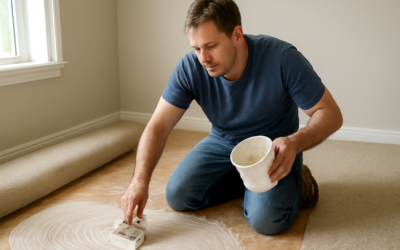
Laminate glue covers a surprising range of products, from the seam sealer that waterproofs joints on a floating floor to the adhesives used to repair lifting planks or bond an older glued laminate system. Modern click-lock laminate is designed to install without any glue at all, yet there are still several situations where the right adhesive saves a floor, and the wrong one ruins it.
Knowing which product fits which job is the whole game. Use a permanent construction adhesive where you needed a flexible seam sealer, and you can lock a floating floor in place where it was meant to move freely.
When Laminate Even Needs Glue
Today’s laminate almost universally uses a tongue-and-groove click system that floats over the subfloor without fasteners or adhesive. So why does glue still come up? A few reasons recur.
- Sealing the seams of click-lock planks for added water resistance in kitchens and entryways.
- Re-bonding planks on older glued-laminate floors that predate modern click systems.
- Repairing a lifting edge, a chipped corner, or a plank that has popped its lock.
- Gluing transition pieces, stair nosing, and trim that the click system does not secure.
The Main Types of Laminate Adhesive
Each product has a specific purpose, and they are not interchangeable.
- PVA seam glue (Type II/III water-resistant): A white or yellow wood-style glue formulated for laminate joints. Applied in the groove during installation, it seals seams against moisture while still allowing the floor to behave as a floating system.
- Laminate repair adhesive: Specialized glues sold for re-securing lifting laminate and bonding the wear layer back down on damaged planks.
- Construction adhesive: Strong, permanent bonding for stair treads, transitions, and trim, but never for the field of a floating floor.
- Super glue (cyanoacrylate): Useful for tiny chip repairs and tightening small loose spots, applied sparingly.
Using Seam Glue During Installation
If you want extra moisture protection in a wet-prone room, seam-gluing a click floor is a proven approach, though you must use a glue made for laminate so the floor still floats. Run a continuous thin bead along the top edge of the lower groove, not the locking mechanism itself, then click the next plank into place. Wipe the squeeze-out immediately with a damp cloth before it dries, because cured glue is far harder to remove from the finished surface.
Work in manageable sections so glue does not skin over before you join the planks, and keep the room within the manufacturer’s recommended temperature range for proper bonding.
Repairing a Lifting or Loose Plank
A plank that has lifted at a seam or corner is often salvageable.
- Clean the area and gently lift the affected edge without snapping the locking tab.
- Apply a small amount of laminate repair adhesive or a quality PVA into the joint with a fine applicator.
- Press the plank flat and wipe away any glue that squeezes out.
- Weight the spot with books or a heavy object, protecting the surface with wax paper.
- Leave it undisturbed for the full cure time, usually 24 hours, before walking on it.
For widespread lifting, suspect a moisture problem or a failed expansion gap rather than treating each seam, since glue alone will not fix a floor that has nowhere to expand.
The Cardinal Rule: Do Not Glue a Floating Floor Down
Laminate expands and contracts with temperature and humidity, which is why it needs a perimeter expansion gap and the freedom to move. Bonding a floating floor to the subfloor with construction adhesive removes that freedom and almost guarantees buckling, gaps, or cracked joints down the line. Reserve permanent adhesives for trim, stair parts, and transitions, never the open field of the floor.
Gluing Stairs, Transitions, and Trim
The one place permanent adhesive belongs with laminate is the parts that are not supposed to float. Stair treads, for instance, must be firmly bonded because a floating step would be dangerous, so laminate stair installations rely on construction adhesive plus mechanical fasteners where appropriate. The same logic applies to stair nosing, which takes heavy wear and impact.
Transition strips between rooms, reducers where laminate meets a lower floor, and quarter-round or shoe molding along baseboards are also fixed in place rather than left to float, though the molding is typically fastened to the wall or baseboard and never to the floor itself. Using a strong adhesive here is correct; the key is keeping that permanence away from the open field of the floating planks, which need room to move.
Removing Old Laminate Glue
If you are repairing or replacing planks on an older glued-down laminate floor, you will eventually face the task of removing cured adhesive. Old PVA can often be softened with warm water and patience, then scraped away with a plastic putty knife that will not gouge the subfloor. Tougher construction adhesives may require a citrus-based adhesive remover or a heat gun used carefully to soften the bond.
Work slowly and protect the subfloor, since aggressive scraping or excessive heat can damage the surface you intend to install over. Always ventilate when using chemical removers and test any solvent in a small area first. A clean, smooth, residue-free subfloor is essential for the next floor to sit flat and bond or float properly.
Safety and Cleanup
PVA glues are low-odor and water-cleanup while wet, which makes them homeowner-friendly. Construction adhesives and cyanoacrylates carry stronger fumes, so ventilate the room, wear gloves, and follow the manufacturer’s instructions on the container. Keep solvents on hand only if the product label calls for them, and always test cleanup methods on a hidden plank first to avoid dulling the finish.
Choosing the Right Product
Match the adhesive to the task: PVA seam glue for moisture-sealing joints, repair adhesive for lifting planks, construction adhesive for trim and stairs, and super glue for tiny chips. Confirm the glue is rated for laminate and for a floating installation when applicable. Used thoughtfully, laminate glue is a small detail that adds water resistance, rescues damaged planks, and keeps your floor tight and quiet for years.
Prefer to explore on your own?
See how new flooring looks in your actual room in seconds — free, no signup.
Try the free Floor Studio →