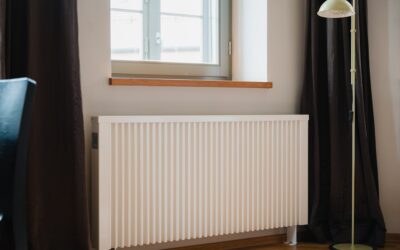
Rusty, dented baseboard heaters age a room the way nothing else can, yet the heating elements behind those ugly covers are usually in perfect working order. That is exactly why baseboard heater covers replacement has become such a popular weekend project: you keep the functioning heater and swap only the cosmetic metal shell around it, typically for $20 to $60 per linear section instead of the $400 to $900 an electrician charges to replace the whole unit. Modern slip-on covers install in minutes without disconnecting any wiring. This guide covers the cover types, sizing, costs, and the one safety step you must not skip.
Covers vs Heaters: What You Are Actually Replacing
A baseboard heater has two separable parts. The working guts, an electric resistance element or, in hydronic systems, a copper pipe with aluminum fins, mount to the wall and rarely fail. The enclosure around them, the backplate, front panel, damper, and end caps, is just formed sheet metal that rusts, dents, and collects decades of paint drips. Replacing covers means leaving the element and all wiring untouched and renewing only that shell.
This matters for scope: if your heater does not heat, trips the breaker, buzzes, or smells, that is a heater repair or replacement job, not a cover job. But if the complaint is purely visual, chipped paint, rust freckles along the bottom edge, a crushed front panel, missing end caps, a cover swap restores the room for a tenth of the price. It applies equally to electric baseboards and hot-water (hydronic) fin-tube baseboards, and the slip-on products serve both.
Safety First: Kill the Breaker
Removing old covers puts your hands inches from 240-volt wiring at the ends of electric baseboard units, where the supply cable enters the junction compartment. Before you unscrew anything:
- Turn the thermostat to off.
- Switch off the heater’s circuit at the breaker panel. Electric baseboards are usually on their own double-pole 240V breaker.
- Verify with a non-contact voltage tester at the wiring compartment before touching metal.
- Let the unit cool completely; fins hold heat for a while after shutoff.
Hydronic baseboards carry no line voltage in the fin-tube run itself, but many still have zone-valve or thermostat wiring at one end, and the pipes can be scalding, so cool-down and a careful look still apply. This is a two-minute precaution against a genuinely dangerous mistake, and it is not optional.
Option 1: Slip-On Replacement Covers
The category leader here is the slip-on steel or aluminum cover system, sold by brands like Baseboarders, NeatHeat (polymer), and Veil. These are designed to install over the existing backplate after you remove the old front panel and end caps.
- How they install: pop off the old front panel and ends, leave the wall-mounted backplate and element in place, and snap or set the new one-piece cover over the assembly. No wiring is touched; most sections go on in under 15 minutes.
- Steel slip-ons: powder-coated, dent-resistant, paintable, roughly $25 to $60 per 2- to 6-foot section, plus $8 to $20 for end caps, inside corners, and splice plates.
- Polymer (NeatHeat-style): around $20 to $45 per section, never rusts, snaps on by hand, and can be repainted; best for hydronic units, and check temperature ratings before using them on electric elements, which run hotter.
- Fit range: most systems fit standard residential baseboards up to about 7 to 8 inches tall and 3 inches deep. Measure height, depth, and length of each run before ordering.
Option 2: OEM-Style Replacement Parts
If your heaters are a common brand, Cadet, Fahrenheat/Marley, Dimplex, Slant/Fin for hydronic, you can often buy exact replacement front panels and end caps from the manufacturer or an HVAC supply house. This is the cheapest route when only one section is damaged, often $15 to $40 per part, and the result matches the untouched units in the rest of the house. The catch is identifying the model, usually stamped inside the wiring compartment door, and living with the same builder-grade look you started with. For whole-house refreshes, the slip-on systems look better and standardize mismatched vintages.
Measuring and Ordering
Measure each baseboard run wall-to-wall along the floor, then note the old cover’s height from the floor and its depth from the wall. Slip-on covers are sold in fixed lengths, commonly 2, 3, 4, 5, and 6 feet, and joined with splice plates for long runs; a 9-foot run, for example, uses a 6-foot and a 3-foot section plus a splice. Order end caps for every exposed end, and 45- or 90-degree corner pieces where runs wrap a wall. Buy all sections from one production batch when possible, since powder-coat whites vary slightly between lots. If the existing backplate is rusted through or missing, choose a cover system that includes its own backplate rather than a front-only design.
Step-by-Step Replacement
- Breaker off, thermostat off, voltage verified, unit cool.
- Remove the old front cover. Most lift up and out, or release after removing a screw at each end cap.
- Unscrew and remove old end caps and dampers. Keep the screws; some slip-on ends reuse the holes.
- Vacuum the fins with a brush attachment. Dusty fins are the main cause of scorched-dust smell at first heat every fall, and this is your once-a-decade access.
- Straighten bent fins gently with a fin comb or butter knife for better heat output.
- Set the new cover per its instructions, typically hook the top lip on the backplate and rotate down, then snap on end caps and splice plates.
- Restore power and run the heater for ten minutes, checking that the cover sits clear of the element and nothing rattles.
Painting Instead of Replacing
If the covers are dingy but structurally sound, paint is the zero-dollar-adjacent alternative. Remove the front panels, sand lightly, wipe with a degreaser, spot-prime any rust with a rust-converting primer, and finish with a high-heat-tolerant enamel; standard appliance epoxy spray or a quality alkyd trim paint both hold up fine at baseboard temperatures, which stay well below what stove paint is designed for. Two light coats beat one heavy coat, and painting the panels off the wall, laid flat on sawhorses, avoids drips and lets you coat the top edge people actually see. The limits are honest ones: paint will not fix dents, crushed fins are still crushed, and a panel rusted through at the floor line will perforate again within a season or two. Paint buys time; slip-on covers buy a new look.
Costs and When to Call a Pro
A typical room with 12 feet of baseboard runs $90 to $250 in slip-on materials; a whole 1,800 sq ft house with 60 to 80 feet of baseboard lands around $500 to $1,200 DIY. Handyman installation adds roughly $50 to $100 per hour, with a whole-house cover swap usually finishing in half a day. Call an electrician instead of a cover supplier if you find scorched wiring insulation, rust that has consumed the backplate and mounting points, or a heater that has failed functionally; at that point a full unit replacement ($400 to $900 installed per heater) is the honest fix. For everything cosmetic, baseboard heater covers replacement gives you the biggest visual return per dollar available on a heating system, no plumber or electrician required.