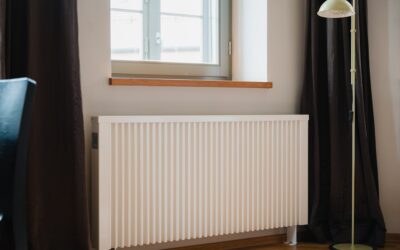
Old baseboard heater covers dent, rust, and yellow over the years, leaving an otherwise nice room looking tired. Many homeowners searching for a quick fix consider plastic baseboard heater covers as an inexpensive, easy-to-install way to freshen up the look. While plastic covers exist and can work in specific situations, there are important safety considerations that determine whether they are a smart choice or a fire hazard. This guide explains when plastic is appropriate, how to install covers, and which alternatives may serve you better.
- Understanding Baseboard Heater Types First
- The Safety Reality of Plastic Covers
- Where Plastic Components Are Acceptable
- Why Homeowners Want to Replace Covers
- The Better Alternative: Slip-On Metal Covers
- Sizing and Measuring Correctly
- Painting as an Even Cheaper Fix
- Cleaning and Maintaining Covers
- Measuring Your Existing Heater
- Signs It’s Time to Replace vs Repair
- Improving Heater Efficiency While You’re At It
- The Bottom Line
Understanding Baseboard Heater Types First
The most critical factor is what kind of heater you have, because it determines whether plastic is even safe:
- Hydronic hot-water baseboard: circulates warm water from a boiler through the fins. Surface temperatures are moderate, making some rigid plastic covers potentially viable.
- Electric baseboard heaters: use an electric resistance element that gets very hot, often exceeding the temperature rating of most plastics.
This distinction matters enormously. Placing a plastic cover on a hot electric baseboard heater can melt, warp, or ignite, which is why manufacturers of electric units specify metal covers only. Always identify your heater type before considering any cover material.
The Safety Reality of Plastic Covers
Plastic has a much lower melting and ignition point than the steel covers that come standard on baseboard heaters. Electric baseboard elements can reach surface temperatures that soften or melt common plastics, creating both a fire risk and toxic fumes. For this reason, true full plastic covers over the heating element are generally not recommended and may violate manufacturer guidelines and code. If you see “plastic baseboard heater covers,” they are most often:
- Plastic end caps or corner pieces, not the full heat-exposed channel.
- Decorative covers intended only for low-temperature hydronic systems.
- Covers for the cool sections of the unit away from the element.
Where Plastic Components Are Acceptable
Plastic parts have legitimate uses on baseboard heaters, primarily on the cooler areas:
- End caps: the plastic or metal caps that close off the ends of the channel, away from the hottest zone.
- Corner and joiner pieces: connecting sections around a room.
- Damper knobs and trim: small accessory parts.
For the main front panel that faces the heating element, however, metal is the safe and standard material, and most replacement cover kits are steel or aluminum for exactly this reason.
Why Homeowners Want to Replace Covers
The desire to swap covers is understandable. Original covers commonly suffer from:
- Dents and bent fins from vacuum cleaners and furniture.
- Rust, especially near exterior walls and in humid rooms.
- Peeling, yellowed, or chipped paint.
- Missing or broken end caps.
- An outdated look that clashes with a renovated room.
A fresh cover instantly modernizes the space and improves airflow if the old fins were crushed.
The Better Alternative: Slip-On Metal Covers
For most homeowners, the safest and most effective solution is a slip-on metal replacement cover rather than plastic. These steel covers are designed to fit over the existing heater base without removing it from the wall or disconnecting any wiring or plumbing. They install in minutes:
- Measure your heater: note the length and profile of your existing unit.
- Order the matching cover: slip-on kits come in standard lengths that you cut to fit.
- Remove the old front panel: unclip or unscrew the damaged cover.
- Snap on the new cover: the replacement clips over the existing back plate and element.
- Add end caps: finish the ends with matching caps.
These metal covers handle the heat safely, look clean, and often cost only slightly more than a plastic option.
Sizing and Measuring Correctly
Whether you choose a covered kit or trim pieces, accurate measurement is essential. Measure the total length of the heater along the wall, noting whether it runs into corners or has splices between sections. Baseboard covers come in standard lengths, commonly 2 to 8 feet, that you can cut down with tin snips or a hacksaw. Also confirm the height and depth profile matches your unit, as older heaters may have different dimensions than current products.
Painting as an Even Cheaper Fix
If your covers are structurally sound but simply look dated, painting is the most economical solution of all. Use a high-temperature spray paint rated for radiators and baseboard heaters, which withstands the heat without peeling or off-gassing. Clean the cover thoroughly, sand any rust, apply a rust-inhibiting primer, and finish with the high-temp paint. This refreshes the look for the cost of a few spray cans and avoids any material safety concerns.
Cleaning and Maintaining Covers
Whatever cover you use, keep it clean for both appearance and performance:
- Vacuum the fins and interior regularly to remove dust that reduces heat output.
- Straighten any bent fins gently with a fin comb or pliers to restore airflow.
- Wipe the front panel with a damp cloth when the heater is cool.
- Address rust early with a wire brush and rust-inhibiting primer.
Measuring Your Existing Heater
Whether you choose a metal slip-on cover, replacement end caps, or decide to repaint, accurate measurements are the foundation of a good result. Take these key dimensions before you shop:
- Overall length: measure along the wall from end to end, noting any corners or splices between sections.
- Height: measure from the floor to the top of the existing cover.
- Depth (projection): how far the unit sticks out from the wall.
- Profile shape: note whether the front panel is flat, curved, or sloped, since replacement covers come in specific profiles.
Older heaters, especially those installed decades ago, may use dimensions that differ from today’s standard products, so compare your measurements carefully against the specifications of any cover you consider. Slip-on covers are typically sold in standard lengths you cut to fit, so buy slightly long and trim to your exact measurement.
Signs It’s Time to Replace vs Repair
Knowing whether to refresh a cover or replace the whole heater saves money and frustration. A cover refresh, by paint or slip-on metal, makes sense when the heating element still works well and only the cover looks bad. Consider replacing the entire baseboard heater, however, when you notice:
- Crushed or corroded fins that no longer transfer heat efficiently even after straightening.
- Weak or uneven heat output compared to when the unit was new.
- Rust that has eaten through the metal rather than just staining the surface.
- Electrical issues like scorching, tripping breakers, or a burning smell, which are safety concerns requiring professional attention.
If the underlying heater is sound and simply looks dated, a cover or fresh coat of high-temp paint is the economical fix. But a heater with damaged fins or electrical problems is often worth replacing outright, since a new baseboard unit is relatively inexpensive and restores full heating performance along with a clean appearance.
Improving Heater Efficiency While You’re At It
Replacing or refreshing a cover is a good moment to improve how well the heater actually performs. A cover that looks great but sits over crushed fins wastes energy, so address the function along with the form:
- Straighten bent fins: use a fin comb to reopen crushed aluminum fins, restoring the airflow that carries heat into the room.
- Vacuum out dust: a season’s buildup of dust between the fins insulates them and cuts output, so clean thoroughly before installing the new cover.
- Check the damper: many covers have an adjustable damper flap that controls airflow; make sure it opens fully.
- Keep furniture clear: nothing should block the front of the heater, or convection cannot circulate warm air.
Combining a clean, undamaged fin element with a properly fitted metal cover ensures the heater delivers its full rated output while looking sharp. There is little point in installing a handsome new cover over a neglected element, so treat the refresh as a chance to restore both the appearance and the heating performance at the same time.
The Bottom Line
Plastic baseboard heater covers sound like an easy, cheap upgrade, but the safety picture is nuanced: plastic should never cover the hot element of an electric baseboard heater, where it can melt or ignite, and full plastic covers are generally limited to cooler hydronic systems or accessory pieces like end caps. For the vast majority of homeowners wanting to refresh a dented or rusty cover, a slip-on metal replacement cover is the safer, better-looking, and equally affordable choice, and simple high-temperature paint can revive a sound cover for even less. Identify your heater type first, prioritize safety over the lowest price, and you will end up with a cover that looks great and poses no risk.