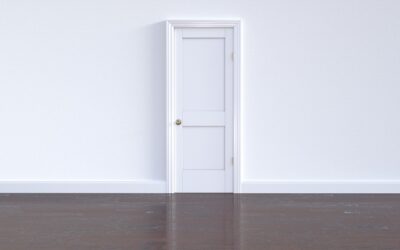
Few upgrades return more visual value per dollar than swapping out builder-grade baseboards for properly sized, well-painted trim. Baseboards and more includes the full family of millwork that defines a room’s character: base, shoe molding, casing around doors and windows, crown molding at the ceiling, and chair rail or wainscoting on the wall. Most homes built since 1990 ship with minimal 2-1/4-inch base that looks dwarfed against 9-foot ceilings, and replacing it changes how a house feels in a single weekend.
- How to Choose Baseboard Height
- Common Baseboard Profiles
- Material Choices: MDF, Primed Pine, and Hardwood
- Shoe Molding and Quarter Round
- Crown Molding Considerations
- Door and Window Casing That Matches the Base
- Chair Rail and Wainscoting Heights
- Painting Baseboards and Trim
- Installation Basics
- Common Trim Mistakes
- Budget vs Custom Trim Packages
How to Choose Baseboard Height
The single biggest mistake is undersizing. A useful rule: baseboard height should be roughly 1/16th of the ceiling height. For 8-foot ceilings, aim for 5-1/2 to 6 inches. For 9-foot ceilings, jump to 7 inches. For 10-foot ceilings and taller, go to 8 inches minimum.
Pro tip: in formal rooms and entry foyers, you can size up another inch beyond the rule. Tall base gives a room a custom feel and helps balance heavy crown molding above.
Common Baseboard Profiles
Profile (the cross-section shape) matters as much as height. The basic styles you’ll find at any home center:
- Modern flat or square stock: clean lines for contemporary homes
- Colonial profile: slight bevel, fits most traditional houses
- Craftsman stepped: flat with a small cap, works in bungalows
- Victorian ogee: curved decorative shape for older formal homes
- Farmhouse stacked: combines a flat base with a separate cap rail
Pick a profile that matches the rest of the trim in your house. Mixing a craftsman base with colonial door casing looks unintentional.
Material Choices: MDF, Primed Pine, and Hardwood
Medium-density fiberboard (MDF) is the most affordable, paint-ready, and dimensionally stable option. It runs $1.50 to $3 per linear foot in standard profiles. The downside: it doesn’t tolerate moisture, so use only in dry rooms.
Primed pine costs $2 to $4 per linear foot, handles moisture better than MDF, and accepts stain or paint. Look for finger-jointed pine for the best price-to-quality ratio.
Solid hardwood (oak, maple, poplar) runs $3 to $7 per linear foot and is necessary if you want a clear-stained, natural wood look. Avoid in bathrooms and basements where humidity swings can move it.
Shoe Molding and Quarter Round
Shoe molding (the small rounded strip at the bottom of the baseboard) hides the gap between the base and the flooring. It also gives the floor room to expand and contract without showing a crack.
Quarter round is the cheaper, fatter alternative and reads less refined. Modern installs almost always specify shoe molding rather than quarter round. Both nail into the baseboard, not the floor, so the floor can move freely.
Crown Molding Considerations
Crown molding at the ceiling is the upper half of trim’s one-two punch. Aim for crown molding sized to roughly match (or slightly exceed) the baseboard height. Mismatched sizes (a 6-inch base with a 2-inch crown) make the ceiling feel low.
For 8-foot ceilings, a 4 to 5-inch crown is enough. For 9-foot ceilings, jump to 6 inches. Multi-piece built-up crown for 10-foot ceilings and taller adds drama. Always cope inside corners rather than mitering; coped joints stay tight even as wood moves seasonally.
Door and Window Casing That Matches the Base
Casing around doors and windows should follow the same design language as the baseboards. A common formula: door and window casing should be roughly 3/4 the height of the baseboard. So a 6-inch baseboard pairs with a 4-inch casing.
For craftsman style, use flat 1×4 or 1×5 stock with a 1×6 head casing above. For traditional, choose a colonial or fluted casing. Modern homes go with flat square stock 2-1/2 to 3-1/2 inches wide.
Chair Rail and Wainscoting Heights
Chair rail typically lands at 32 to 36 inches from the finished floor. Wainscoting (the paneled or beadboard treatment below chair rail) usually rises to the same height. In rooms with very tall ceilings, you can push wainscoting up to two-thirds of the wall height for a more formal effect.
Beadboard wainscoting in 1/4-inch thickness installs over existing drywall at around $1 per square foot in MDF and $3 per square foot in primed pine.
Painting Baseboards and Trim
Trim paint should be a high-quality acrylic enamel in semi-gloss or satin sheen. Top picks include Benjamin Moore Advance ($65 per gallon), Sherwin-Williams Emerald Urethane Trim Enamel ($90), and Behr Premium Plus Ultra in satin ($45).
Two coats of trim paint is standard, with light sanding between. White is still the most common trim color, but soft black, sage green, and warm off-white are gaining popularity. Match all trim in a room: baseboard, casing, crown, doors, and any wainscoting should all be the same color and sheen.
Installation Basics
Nail baseboards into wall studs with 2 to 2-1/2 inch finish nails or 16-gauge brad nails from a pneumatic gun. Find studs first with a stud finder. The bottom of the baseboard sits about 1/4 inch above the finished floor to allow for shoe molding.
- Cope inside corners, miter outside corners
- Always pre-paint trim before installing for cleaner edges
- Fill nail holes with painter’s caulk or wood filler
- Caulk the top edge where trim meets wall (paintable acrylic latex)
- Touch up paint after caulking dries
Common Trim Mistakes
Skipping the cope on inside corners. Mitered inside corners always open up as the wood dries, leaving visible gaps. Coping takes 5 minutes longer per corner and stays tight forever.
Using too small a nail gun. 18-gauge brads can split baseboard. Use 16-gauge nails for baseboards 5 inches and taller.
Filling gaps with wood filler instead of caulk. Wood filler shrinks, cracks, and doesn’t move with the wall. Paintable caulk stays flexible and invisible.
Forgetting to undercut door jambs before installing flooring near them. Baseboard then has to die into mismatched height door trim.
Budget vs Custom Trim Packages
A complete trim upgrade for an average 2,000 square-foot home (baseboard, casing, crown, shoe molding) runs:
- Budget MDF DIY install: $1,800 to $3,000 in materials
- Mid-range primed pine, pro install: $5,000 to $8,000 total
- Custom hardwood, multi-piece built-up trim, pro install: $15,000 to $30,000
Even the budget tier transforms a home’s perceived value far beyond the $2,000 investment. Done well, a trim upgrade is one of the highest-return remodels a homeowner can make.