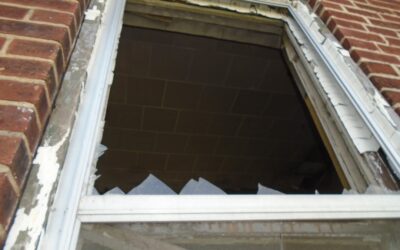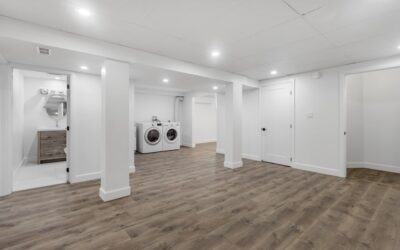
The small, tilt-in window near the top of a basement wall is called a hopper, and when it fails it becomes a source of drafts, leaks, and lost heat. A basement hopper window replacement restores security, seals out water, and brings fresh air and daylight back into an underused space. Whether your old unit is rotted wood, rusted steel, or foggy failed glass, planning a basement hopper window replacement the right way saves money and prevents the water problems that plague poorly installed basement windows.
Part of our Windows & Doors guide — explore the full guide →
What Makes a Hopper Window Different
A hopper window is hinged at the bottom and tilts inward from the top when opened, the opposite of an awning window. This design suits basements because it directs incoming air upward, keeps rain out when cracked open, and lets the sash swing in without hitting a window well outside. Hoppers are almost always small, wide, and short, fitting the limited space between the top of the foundation and the ground.
Because they sit low and often near grade level, hopper windows take a beating from moisture, soil contact, and pests. That is why replacement is so common, and why proper sealing and flashing during installation matters more here than on an upper-story window.
Common Sizes and How to Measure
Basement hopper windows come in standard sizes, but old homes often have odd openings that need custom units. Typical widths run 30 to 36 inches and heights 12 to 24 inches, though many older cinder-block basements were built around specific block-course openings.
- Measure the width at the top, middle, and bottom of the existing frame opening, and use the smallest number.
- Measure the height at the left, center, and right, again using the smallest.
- Measure the depth of the wall opening to confirm the new frame fits.
- Check whether the opening is masonry, a block cavity, or a wood buck frame, since mounting differs.
- Note whether a window well is present outside, which affects egress and drainage.
If your measurements do not match a stock size, order a custom window rather than forcing an ill-fitting unit. A gap-filled installation invites water and air infiltration that no amount of caulk will permanently fix.
Material Choices
Replacement hopper windows come in several frame materials, each with tradeoffs:
- Vinyl: The most popular for basements at $50 to $200 per window. Rot-proof, moisture-resistant, low maintenance, and well insulated.
- Aluminum: Durable and slim but conducts cold, so look for thermally broken frames. Common in older builds.
- Wood: Attractive but a poor choice for damp basements unless clad, since it rots.
- Composite and fiberglass: Premium, stable, and long-lasting at a higher price.
For nearly every basement, insulated vinyl with double-pane glass is the smart pick. It resists the moisture that destroys wood and steel, costs little, and improves energy efficiency dramatically over a single-pane original.
What Replacement Costs
A basement hopper window replacement is one of the more affordable window projects. The window itself runs $50 to $300 depending on material and glass. Professional installation adds $150 to $500 per window, putting a typical replaced-in-place hopper at $250 to $700 total.
Costs climb if the opening needs enlarging, if the surrounding masonry is damaged, or if you are converting to an egress window. A true egress conversion, which involves cutting the foundation and adding a code-compliant window well, runs $2,500 to $6,000 but adds a legal bedroom exit and boosts home value.
Step-by-Step Installation
Replacing a hopper window in an existing opening is a manageable DIY project for someone comfortable with basic tools and caulking. Here is the general process for a common vinyl unit:
- Remove the old window by unscrewing or prying it from the frame, cutting caulk and fasteners as needed.
- Clean the opening, scrape away old sealant, and repair any cracked mortar or rotted buck.
- Dry-fit the new window to confirm it sits square and level with even reveal all around.
- Run a bead of exterior sealant around the opening, then set the window in place.
- Shim it level and plumb, then fasten through the frame into the masonry or buck.
- Seal the exterior perimeter with a quality polyurethane caulk and insulate the interior gaps with low-expansion foam.
- Finish with interior trim and confirm the sash tilts and latches smoothly.
Use low-expansion window foam only, because standard foam expands with enough force to bow the frame and jam the sash. Take your time getting the unit level; a racked frame will never seal or operate properly.
Managing Water and Window Wells
Because hopper windows sit near grade, water management is critical. If your window is below ground level, it needs a window well outside to hold back soil and let light in. That well must drain, either into a gravel bed connected to the foundation drain or, ideally, with a dedicated drain to prevent water from pooling against the glass.
Add a clear window well cover to keep out rain, leaves, and debris while still admitting light. Grade the soil around the well so surface water flows away from the house. These simple measures prevent the recurring leaks that make homeowners blame the window when the real problem is drainage.
Egress and Code Considerations
Standard hopper windows are usually too small to serve as an emergency exit. If your basement has or will have a bedroom, code requires an egress window with a minimum clear opening, typically at least 5.7 square feet, a minimum height of 24 inches, width of 20 inches, and a sill no more than 44 inches above the floor. A small hopper will not meet this.
If you only need light and ventilation, a like-for-like hopper replacement is fine. If you are finishing the basement into living space, plan for at least one code-compliant egress window per sleeping area, even though it costs considerably more.
Glass and Energy Efficiency Choices
The glass package inside your new hopper window makes a real difference in comfort and energy bills. Single-pane glass, common in old basement windows, offers almost no insulation and sweats with condensation in cold weather. Upgrading to double-pane insulated glass with an argon gas fill and a low-emissivity coating cuts heat loss dramatically and reduces the condensation that feeds basement mold.
For basements that stay cold, a low-E coating tuned for heat retention helps hold warmth inside. In hot climates, a coating tuned to reject solar heat keeps the basement cooler. The upgrade from single to double-pane glass typically adds only $30 to $80 per window but pays back in comfort and lower humidity, making it an easy decision for nearly every replacement.
Security and Pest Prevention
Because basement windows sit low and are partly hidden, they are a common entry point for both burglars and pests. Choose a hopper with a solid locking latch, and consider adding a keyed lock or a security bar for windows in vulnerable spots. Since the sash tilts inward, a good latch that pulls it tight against the frame also improves the weather seal.
Small gaps around a poorly sealed basement window invite mice, insects, and spiders indoors. Seal the perimeter thoroughly with caulk and foam during installation, and inspect it each year. If you keep the window cracked for ventilation, make sure the built-in screen is intact so you get fresh air without the bugs. Well-sealed, well-locked hopper windows keep the basement secure, dry, and pest-free year round.
Enjoying the Upgrade
A fresh basement hopper window replacement pays off immediately with fewer drafts, a drier space, better security, and lower energy bills. Choose moisture-proof vinyl with insulated glass, measure carefully, seal and flash the opening thoroughly, and manage the water outside.
If you are unsure about your measurements or the condition of the surrounding masonry, have a window professional take a look before you order, since a custom basement unit is difficult to return. Keep the manufacturer’s paperwork and note the exact size and model in case you ever need a matching second window or a replacement sash. Done right, with the correct size, quality glass, and thorough sealing, your new hopper will keep the basement bright and dry for decades with almost no maintenance.