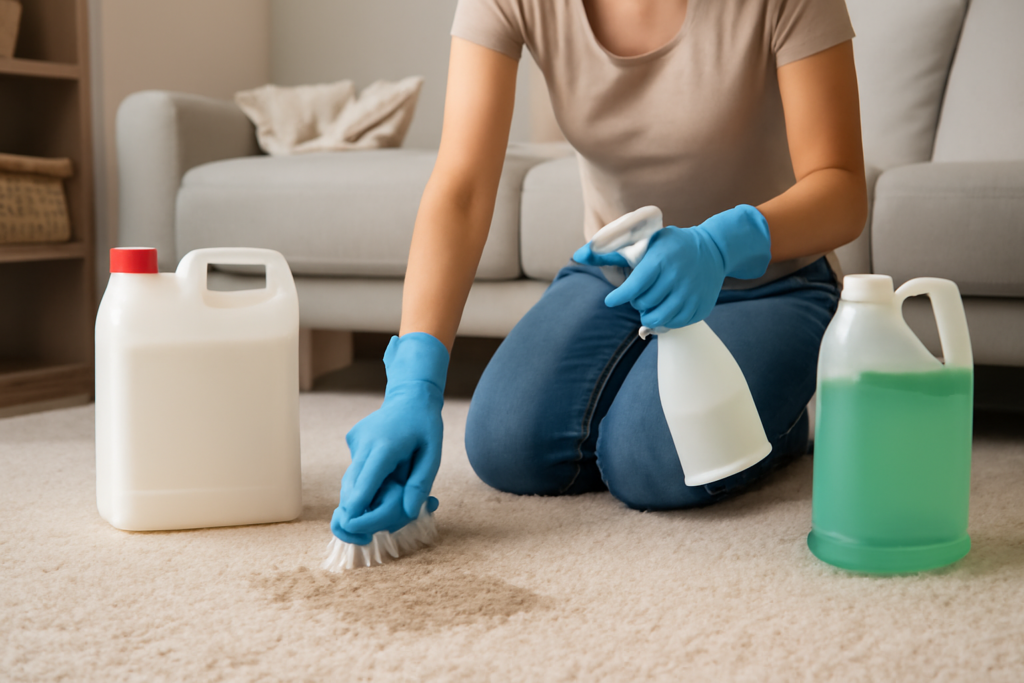
The secret behind professional-looking carpet cleaning isn’t the machine, it’s the pretreatment you spray on first. The best carpet pretreatment breaks down oils, soils, and stains in the fibers before extraction, so the cleaner pulls up dramatically more dirt than water alone ever could. Whether you’re prepping for a rental cleaner or tackling a stubborn traffic lane by hand, choosing the right pre-spray makes the difference between carpet that looks refreshed and carpet that still feels grimy. Here’s how to pick the right one for the job.
Why Pretreatment Matters
Carpet fibers cling to soil through a mix of dry particulate, oily residue, and protein-based stains. Hot water extraction on its own struggles to release that oily film, which is why heavily walked areas stay dingy even after cleaning. A pretreatment uses surfactants and, in some cases, enzymes or solvents to loosen that bond and suspend the dirt.
Apply it, let it dwell for the recommended time, and the soil lifts away during extraction instead of staying locked in. Skipping this step is the number-one reason DIY carpet cleaning underwhelms. Think of it as the same logic as soaking a greasy pan before scrubbing.
Types of Carpet Pretreatment
Pretreatments aren’t one-size-fits-all. Matching the product type to the soil is what separates a good result from a wasted afternoon. Here are the main categories you’ll encounter:
- General-purpose traffic-lane pre-sprays: Surfactant-based formulas built for overall soil and the darkened lanes in hallways and in front of couches.
- Enzyme cleaners: Use biological enzymes to digest protein- and organic-based messes, making them ideal for pet urine, vomit, food, and blood.
- Oxygen (oxidizing) treatments: Release oxygen to lift and brighten organic stains; useful on coffee, wine, and general discoloration.
- Solvent-based spot removers: Target oil, grease, ink, and tar that water-based products can’t touch.
- Enzyme-plus-odor combos: Pair enzymes with odor neutralizers specifically for pet accidents where smell is the real problem.
Most homeowners benefit from keeping two on hand: a general traffic-lane pre-spray for routine cleaning and an enzyme formula for pet and organic emergencies.
What to Look For in a Pretreatment
Beyond the type, a few features separate a reliable product from a frustrating one. Read the label for these signals before you buy.
- Carpet-safe pH: Look for a pH that won’t damage fibers; high-alkaline products clean aggressively but can harm wool and some stain-resistant treatments.
- Concentrate vs. ready-to-use: Concentrates cost less per use and let you mix strength to the job; ready-to-use sprays are convenient for spot work.
- Residue profile: Low-residue or rinse-free formulas matter because leftover detergent attracts new dirt, causing carpet to re-soil fast.
- Stain-protection compatibility: Confirm it won’t strip factory stain-resistant finishes on nylon or polyester carpet.
- Color safety: A “color-safe” or “non-bleaching” label protects against lightening, especially with oxidizing products.
Matching Product to Stain
The fastest path to a clean carpet is choosing the right chemistry. For everyday foot-traffic grime and a general refresh, a traffic-lane pre-spray covers the whole floor well. When the problem is a pet, an enzyme cleaner is non-negotiable, because only enzymes break down the uric-acid crystals that cause urine odor to return.
Greasy spots from food or shoe residue call for a solvent spotter, while coffee, juice, and wine respond best to an oxygen treatment. Using a water-based traffic spray on a grease stain, or a solvent on a urine spot, simply won’t work and may set the stain permanently. Identify the mess first, then reach for the matching formula.
How to Apply Pretreatment Correctly
Technique matters as much as the product. Vacuum thoroughly first, since pretreating over loose surface dirt just turns it to mud. Spray the product in a light, even mist across the soiled area; you want the fibers damp, not soaked.
Honor the dwell time on the label, usually 5 to 15 minutes. This is when the chemistry does its work, and rushing it is a common mistake. For ground-in lanes, gently agitate with a carpet brush or grooming rake to drive the product to the base of the fibers. Then extract with your machine or blot and rinse by hand.
Safety and Spot-Testing
Always test in a hidden area first, like inside a closet, before treating a visible stain. Apply a small amount, wait, and check for color change or fiber damage. This is especially important on wool, which is sensitive to high pH and certain solvents.
Ventilate the room, wear gloves with solvent products, and never mix different cleaners together, since some combinations release harmful fumes. Keep pets and kids off treated carpet until it’s dry. Following these basics protects both your carpet and your household.
A Note on Prices and Specs
Pretreatment products span a wide range, from budget ready-to-use sprays to professional concentrates that dilute many times over. Rather than chasing a specific brand or a price that changes constantly, focus on matching the type to your problem and reading the label features above. A concentrate that yields gallons of working solution almost always costs less per cleaning than single-use bottles.
When comparing options, check the dilution ratio, the targeted soil type, and the fiber-safety notes rather than marketing claims. The “best” product is the one suited to your specific carpet and stain, applied with proper dwell time and agitation.
The Bottom Line
A quality pretreatment turns ordinary carpet cleaning into a genuine deep clean. Keep a general traffic-lane pre-spray for routine work and an enzyme cleaner for pet and organic messes, add a solvent spotter for greasy spots, and you’ll be ready for almost anything your floors throw at you.
Vacuum first, apply lightly, respect the dwell time, agitate the tough spots, and always spot-test. Do that, and you’ll pull far more soil out of your carpet, extend its life, and keep those high-traffic lanes from going gray years before they should.
Common Application Mistakes to Avoid
Even with the right product, a few habits sabotage your results. Knowing them in advance saves you from re-cleaning the same spot twice. Watch out for these frequent errors:
- Over-applying: Drenching the carpet leaves excess detergent that attracts dirt and re-soils faster than before.
- Skipping the dwell time: Extracting immediately gives the chemistry no chance to break the soil bond.
- Not vacuuming first: Pretreating over loose grit just turns dry dirt into mud worked deep into the fibers.
- Scrubbing aggressively: Hard scrubbing frays carpet fibers and can spread a stain outward.
- Mixing products: Combining an oxidizer with another cleaner can neutralize both or release fumes.
Light, even application followed by patience and gentle agitation beats brute force every time.
How Pretreatment Fits Your Cleaning Routine
Pretreatment isn’t only for deep cleans. Keeping a spotter on hand turns sudden spills into quick, contained jobs rather than permanent marks. Blot a fresh spill immediately, apply the matching pretreatment, let it dwell, and blot again before the stain has a chance to set.
For whole-room cleaning, plan to pretreat the entire floor a few minutes before you run the extractor, working in sections so no area dries before you reach it. High-traffic homes with kids and pets benefit from a full pretreatment-and-extraction cycle every six to twelve months, with spot treatment in between. This rhythm keeps carpet looking fresh and prevents the gradual graying that makes flooring look worn out long before it actually is.