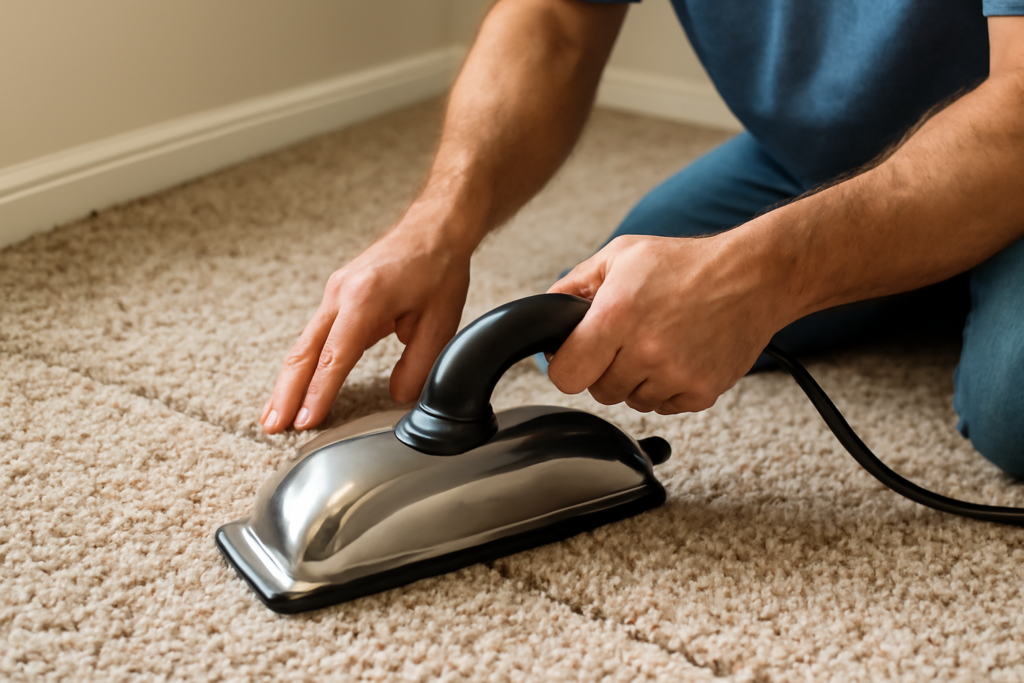
The seam is the moment of truth in any carpet installation, and the wrong tool turns a clean join into a visible, fraying ridge. A carpet seam iron is the specialized tool that melts the adhesive on heat-activated seaming tape, bonding two carpet edges into a single flat surface that, done right, is nearly invisible underfoot. It looks like a regular clothes iron with a long, grooved soleplate, but it is engineered for one job: heating seaming tape evenly so the glue flows and grabs. Here is how the tool works, how to use it, and the technique that separates pro-looking seams from amateur ones.
What a Seam Iron Does
Carpet rolls come in standard widths, usually 12 feet, so any room wider than that needs two pieces joined. The join is made with hot-melt seaming tape, a strip of tape coated with adhesive that melts when heated. The seam iron slides along under the carpet edges on top of that tape, melting the glue so the carpet backing presses down into it and bonds.
Unlike a household iron, a carpet seam iron has a flat, wide soleplate sized to the tape, a temperature dial, and a heat shield, and it is built to run hot for extended periods. The grooved or smooth plate distributes heat so the adhesive activates evenly along the entire seam, not in random patches.
Tools and Materials You Need
A seam is a small system, and skipping any part of it shows. Gather everything before you start, because once the iron is moving you cannot stop.
- Carpet seam iron with a working temperature dial.
- Hot-melt seaming tape matched to your carpet’s traffic level.
- Sharp carpet knife and row cutter for trimming clean, straight edges.
- Seam roller or tractor to press the carpet into the melted adhesive.
- Straightedge and chalk line for marking accurate cuts.
- Seam weight or board to hold the bond while it cools.
Trimming the two edges so they meet perfectly is half the battle. A row cutter that follows the rows of the carpet backing gives a straighter edge than freehand cutting.
Setting the Right Temperature
Heat is everything with a seam iron. Too cool and the adhesive never fully melts, so the bond is weak and the seam lifts. Too hot and you scorch the carpet backing or even the face fibers, and the glue can break down.
Most seaming tapes activate in a specific range, and the right setting depends on the tape and carpet. Manufacturers print a recommended setting, so always follow the tape and iron instructions rather than guessing. Let the iron reach full temperature before you begin; a cold start at the first inch of seam is a common cause of a weak spot right at the edge of the room.
Step-by-Step: Making a Carpet Seam
- Trim both edges straight. Use a row cutter and straightedge so the two carpet edges butt together cleanly with no gaps or overlaps.
- Position the seaming tape adhesive-side up, centered under where the seam will fall, running the full length of the join.
- Preheat the iron to the recommended temperature and let it stabilize.
- Slide the iron under the carpet onto the tape, letting it sit just long enough to melt the adhesive, then pull it slowly along the seam, a few inches at a time.
- Drop the carpet edges into the melted glue immediately behind the iron and press them together so the two pieces meet.
- Roll the seam with a seam roller to push the backing into the adhesive and lock it down.
- Weight it down with a board or seam weight and let the adhesive cool and set before walking on it.
Technique Tips for an Invisible Seam
Speed control is the skill. Move the iron too fast and the glue does not melt; too slow and you risk scorching. A steady, even pace that keeps the adhesive flowing just ahead of the carpet drop is what you are after, and it comes with practice.
Keep the carpet pile running the same direction on both pieces, or the seam will catch the light differently on each side and stand out. Mesh the rows of the two edges together so tufts interlock and hide the join. And work behind the iron continuously, pressing and seating the carpet while the glue is still molten; once it cools you cannot reposition it.
Common Mistakes to Avoid
A few errors account for most failed seams. Pulling the iron too quickly leaves under-melted, weak spots. Letting the iron linger too long scorches the backing and can show a brown line. Sloppy edge trimming leaves gaps that fray or overlaps that bulge. And forgetting to roll and weight the seam means the bond never fully seats.
Another frequent miss is not stretching the carpet properly after seaming. A seam in slack carpet will buckle when the floor is later stretched. Plan the seam placement away from high-traffic paths and doorways when possible, since even a perfect seam wears faster under constant footfall.
Renting vs. Buying
For a one-room job, renting a seam iron and roller from a flooring or equipment rental outlet, often $15 to $30 a day, makes more sense than buying. The technique takes some practice, so if you are nervous, ask the rental shop for tips or watch the process beforehand.
If you install carpet regularly, a quality seam iron with reliable temperature control is a worthwhile purchase. Look for an even-heating soleplate and a dependable thermostat, since consistent heat is what produces consistent seams.
Final Thoughts
A carpet seam iron is not complicated, but it is unforgiving of rushing and sloppy prep. Trim the edges dead straight, set the correct temperature, let the iron come fully up to heat, move at a steady pace while seating and rolling the carpet behind it, then weight the seam until it cools. Respect the heat and take your time, and you will produce flat, durable seams that vanish into the carpet, exactly what a professional installer aims for.