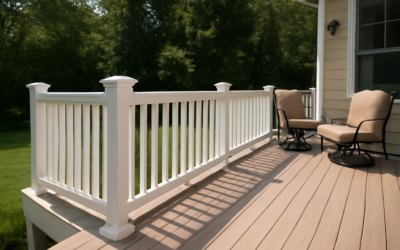
There is a warmth to natural wood that no aluminum or composite can quite match, and few woods deliver it as beautifully as cedar. A cedar deck railing frames your deck with rich, reddish tones and a natural aroma while resisting the rot and insects that plague ordinary lumber. It is a favorite for homeowners who want an authentic wood look and are willing to do a little upkeep to keep it beautiful. Here is what to know about designing, building, and maintaining one.
Part of our Decks & Outdoor guide — explore the full guide →
Why Cedar for a Railing
Cedar earns its place through a rare combination of good looks and natural performance. The wood contains natural oils and tannins that resist rot, decay, and insects without chemical treatment, which is why it lasts far longer outdoors than untreated pine. It is also dimensionally stable, meaning it resists the warping, cupping, and twisting that ruin cheaper lumber. Add its straight grain and beautiful color that ranges from honey to deep amber, and you have a material that looks premium and holds up to the weather.
Cedar is lightweight and easy to cut and fasten too, which makes it forgiving to work with for a DIY railing build.
Design Options
Cedar’s workability opens up a wide range of railing designs, so you can match the look to your home:
- Traditional balusters — evenly spaced square cedar pickets between top and bottom rails, the classic choice
- Horizontal rails — cedar boards run sideways for a clean, modern ranch look
- Cable or metal infill in cedar posts — pairing warm cedar frames with stainless cable for open views
- Lattice or decorative panels — for a cottage or privacy-oriented feel
A popular hybrid is cedar posts and rails with a different infill, which keeps the wood warmth at the structural points while opening up the view or reducing maintenance in the middle.
What It Costs
Cedar sits in the moderate range for railing materials. Expect roughly $20 to $40 per linear foot for materials on a standard cedar baluster railing, with installed costs running $30 to $60 per linear foot depending on design complexity and local labor. It is generally cheaper than aluminum or high-end composite railing at installation, though remember that cedar needs periodic sealing that maintenance-free materials do not. Over the life of the deck, factoring in the refinishing labor narrows that gap.
Sealing and Finishing
This is the commitment cedar asks of you, and doing it well is what keeps the railing looking its best. Left untreated, cedar weathers to a silvery gray, which some homeowners actually love for a rustic look. If you want to preserve the warm color, you need to seal it. The routine:
- Apply a penetrating, UV-resistant clear sealer or a semi-transparent stain within a few weeks of installation
- Reapply every 2 to 3 years, or when water stops beading on the surface
- Clean the railing with a deck cleaner and let it dry fully before recoating
Semi-transparent stains offer the best of both worlds, adding UV protection that clear sealers lack while still showing the grain.
Building for Strength and Code
A railing is a safety barrier first, so it must meet building code. Residential deck railings generally need to stand 36 inches high, though some jurisdictions require 42 inches for elevated decks, and baluster spacing must be tight enough that a 4-inch sphere cannot pass through. The most important structural detail is post attachment: cedar posts must be through-bolted to the deck framing with carriage bolts or heavy structural screws, not just toe-nailed or lag-screwed into the decking. A railing that fails a push test is a serious hazard, so anchor the posts to solid framing.
Preventing Rot Where It Matters
Even rot-resistant cedar can decay where water sits, so build to shed water. Cap the tops of posts and rails so end grain does not soak up rain, slope the top rail slightly if you can, and keep the bottom rail from trapping standing water. Use stainless steel or hot-dipped galvanized fasteners, because standard steel reacts with cedar’s tannins and leaves black streaks around every screw. These small choices add years to the railing’s life.
Cedar Versus the Alternatives
Compared to pressure-treated pine, cedar looks far better and resists warping, though it costs more. Compared to aluminum or composite, cedar wins on natural warmth and lower upfront cost but loses on maintenance, since those materials never need sealing. The honest way to choose is to ask how much you value real wood and whether you will keep up with staining. If you love the look and do not mind a weekend every few years, cedar rewards you.
Choosing the Right Cedar Grade
Not all cedar boards are equal, and the grade you buy affects both looks and longevity. Clear or select-grade cedar has few or no knots and a uniform appearance, ideal for a refined railing but pricier. Knotty or construction-grade cedar shows more character and costs less, which suits a rustic or cabin aesthetic. For the structural posts and rails, pick straight, sound boards without large knots near edges where they could weaken the piece. Western red cedar is the most common and rot-resistant choice, while inland varieties may cost less but weather differently, so check what your supplier stocks.
The Bottom Line
A cedar deck railing delivers genuine wood beauty, natural rot resistance, and design flexibility at a moderate price. The trade-off is periodic sealing to hold its color, along with careful post anchoring and water-shedding details to maximize its lifespan. Seal it on schedule, bolt the posts to solid framing, and use corrosion-proof fasteners, and your cedar railing will frame the deck with warmth and character for many years to come.