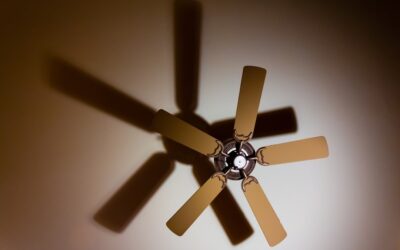
When a ceiling fan starts wobbling, rattling, or dropping in performance, most people blame the motor or the blades themselves. More often the real trouble hides in a part few homeowners can name: the brackets that connect each blade to the motor hub. Ceiling fan blade arms, also called blade irons or blade brackets, are the angled metal or plastic pieces that hold your fan blades and set their pitch. They determine how much air the fan moves and whether it spins smooth and silent or shakes the light fixture below.
This guide explains what blade arms do, why their pitch and condition matter so much, how to spot a bent or damaged arm, and how to replace one. It is a small part with an outsized effect on comfort and noise.
What Blade Arms Actually Do
Each blade arm bolts to the fan’s motor hub on one end and to a blade on the other. Its two jobs are structural and aerodynamic. Structurally, it suspends the blade at a fixed distance from the hub, keeping all blades evenly spaced so the fan stays balanced as it spins. Aerodynamically, the arm holds the blade at a precise angle, the blade pitch, which is what lets a flat blade push air downward.
That pitch typically ranges from 12 to 15 degrees on most residential fans. Too shallow and the fan barely moves air; too steep and the motor strains and the fan grows noisy. Because the arm sets this angle, a bent arm changes one blade’s pitch relative to the others, which throws off both airflow and balance.
Why Blade Arms Cause Wobble
Fan wobble is almost always a balance problem, and blade arms are a leading cause. If even one arm is slightly bent, whether from shipping, a hard bump, or years of heat cycling, that blade now sits at a different height or angle than the rest. As the fan spins, the uneven weight and airflow create a rhythmic shake that grows worse at higher speeds.
Plastic arms on budget fans are especially prone to warping over time, particularly in hot rooms or attics where heat softens the material. Metal arms are sturdier but can still bend if the fan is knocked or if blades are forced during cleaning. Loose mounting screws where the arm meets the hub add a second, subtler source of wobble.
Signs Your Blade Arms Need Attention
Watch and listen for these clues:
- Persistent wobble that a blade-balancing kit does not fully cure.
- One blade riding higher or lower than the others when you sight across them from below.
- Visible bending or cracking in an arm, easiest to see with the fan off and a flashlight.
- A rattle or click that tracks with the fan’s rotation speed.
- Reduced airflow compared with when the fan was new.
A quick diagnostic: turn off and stop the fan, then measure the distance from each blade tip to the ceiling with a yardstick. All blades should measure within about an eighth of an inch of each other. A blade that is noticeably off points straight to a bent arm or loose bracket.
Checking and Aligning Blade Arms
Before replacing anything, confirm the arms are the problem and try a simple correction. With the fan off:
- Tighten every screw where the arms meet the motor hub and where the blades meet the arms. Loose hardware alone causes plenty of wobble.
- Sight across all blade tips from below to spot any that sit out of plane.
- For a slightly bent metal arm, you can sometimes gently flex it back into alignment by hand, supporting the arm near the hub while adjusting the blade end. Go slowly and re-measure.
- Re-check tip-to-ceiling distances and run the fan on low to confirm improvement.
Never try to straighten a cracked or badly warped arm. Once the metal is fatigued or the plastic is split, it will not hold alignment and should be replaced.
Replacing a Blade Arm
Replacement is straightforward and inexpensive. Blade arms usually cost $5 to $20 each, and many manufacturers sell them as sets. The key is matching the exact model, since arm length, mounting hole spacing, and pitch angle vary between fans. Note your fan’s brand and model number, printed on a label inside the motor housing or in the manual, and order the correct part rather than a generic look-alike.
To replace one:
- Turn off power at the wall switch and, for safety on the light kit, at the breaker.
- Unscrew the blade from the damaged arm, then unscrew the arm from the hub.
- Attach the new arm to the hub, snugging but not stripping the screws.
- Reattach the blade, then measure tip-to-ceiling distance to confirm it matches the others.
- Ideally replace all arms as a set if several are old plastic, so pitch stays uniform.
If only one arm is damaged but the others are the same aging plastic, replacing the full set prevents chasing a new bend next season and guarantees identical pitch across every blade.
Metal Versus Plastic Arms
When choosing replacements or a new fan, arm material is worth noting. Metal blade arms, usually stamped steel with a painted or plated finish, hold their shape longer, resist heat, and carry heavier wood or composite blades without sagging. Plastic arms keep costs down and weigh less, but they warp more readily and are best suited to lightweight blades in climate-controlled rooms. If you live somewhere hot or run the fan hard year-round, metal arms are the more durable investment.
Using a Balancing Kit the Right Way
Once you have confirmed the arms are straight, tight, and evenly spaced, a balancing kit fine-tunes any remaining wobble. Most fans include one, and replacements cost only a few dollars. The kit contains a plastic clip and several stick-on weights. Start by clipping the balancing weight to the middle of one blade and running the fan; if the wobble improves, that blade is the problem area, and you slide the clip along it to find the exact spot that quiets the shake.
When you locate the sweet spot, stick a permanent weight on the top of that blade at the same distance from the center. Work one blade at a time, testing after each adjustment. The key point, and the reason arms come first, is that a balancing kit only compensates for weight differences. It cannot correct a blade held at the wrong angle by a bent arm, which is why straightening or replacing damaged arms must happen before you ever reach for the weights.
Matching Replacement Arms Correctly
When ordering new blade arms, precision in matching matters more than homeowners expect. Arm length sets how far the blade sits from the hub, which affects both the fan’s diameter and its balance. The mounting hole pattern must line up with both the hub and the blade, and the built-in pitch angle determines airflow. A generic arm that is close but not exact will change the blade’s position enough to reintroduce wobble or reduce air movement.
Find your fan’s model number on the label inside the motor housing and order the manufacturer’s exact replacement arms whenever possible. If the fan is discontinued, measure the old arm’s length, hole spacing, and angle carefully and match them as closely as you can. Replacing all the arms as a matched set, rather than mixing old and new, guarantees consistent pitch and spacing across every blade, which is the foundation of smooth, quiet operation.
Keeping Your Fan Balanced Long-Term
A little maintenance keeps arms and blades in harmony. Dust the blades regularly, since uneven dust buildup adds weight and mimics a balance problem. Support the arm, not just the blade tip, when cleaning so you do not flex the bracket. Check screw tightness once a year, because vibration slowly loosens hardware. And if you use a balancing kit, address any bent arms first, since no amount of stick-on weight will fix a blade held at the wrong angle.
Though small and easy to overlook, ceiling fan blade arms quietly govern how well your fan performs. Keep them aligned, tight, and undamaged, and you get quiet, efficient airflow. Ignore a bent one, and you will chase a wobble that no other fix will ever fully solve.