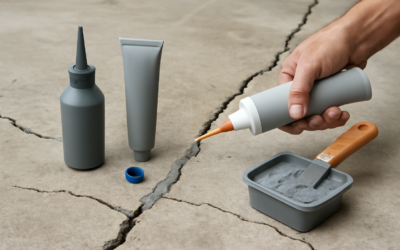
Every concrete slab cracks eventually. Temperature swings, soil movement, curing shrinkage, and heavy loads all contribute, and no amount of reinforcement eliminates cracking entirely. This concrete crack filler guide helps you match the right repair product to the type and size of crack you are dealing with. A $10 tube of the correct filler applied properly can prevent hundreds of dollars in future damage by keeping water, ice, and debris out of the joint.
- Understanding Why Concrete Cracks
- Crack Filler Types
- Repairing Hairline Cracks (Under 1/8 Inch)
- Filling Medium Cracks (1/8 to 1/2 Inch)
- Repairing Large Cracks and Spalling (Over 1/2 Inch)
- Structural Cracks: Epoxy Injection
- When to Call a Professional
- Choosing a Foundation Crack Filler by Crack Type and Movement
Understanding Why Concrete Cracks
Knowing the cause helps you pick the right fix and decide whether the crack is cosmetic or structural. Shrinkage cracks appear within the first year as the concrete cures and loses moisture. They are typically hairline width, less than 1/16 inch, and do not indicate a structural problem.
Settlement cracks develop when the soil underneath shifts or compacts unevenly, causing one section of slab to drop lower than the adjacent section. These are wider, often 1/4 inch or more, and frequently have vertical displacement where one side sits higher than the other. Heaving cracks come from frost action or expansive clay soils pushing the concrete upward. Both settlement and heaving cracks tend to worsen over time and may require more than filler alone.
Crack Filler Types
Four main product categories handle the range of concrete crack sizes and conditions:
- Latex or vinyl concrete patching compound: Pre-mixed paste that fills and feathers out for surface-level repairs. Best for hairline to 1/4-inch cracks on horizontal surfaces. Costs $5 to $12 per quart.
- Polyurethane caulk: Flexible, self-leveling or non-sag formulas that accommodate seasonal movement. Ideal for 1/4-inch to 1/2-inch cracks on driveways, sidewalks, and patios. Runs $5 to $10 per 10-ounce tube.
- Epoxy injection: Two-part structural adhesive that bonds crack faces together and restores load-bearing capacity. Used for foundation walls and structural slabs. Kits cost $30 to $80.
- Hydraulic cement: Fast-setting cement that expands slightly as it cures, sealing against water pressure. Designed for basement walls and below-grade cracks with active water seepage. Costs $10 to $20 per 10-pound pail.
Repairing Hairline Cracks (Under 1/8 Inch)
Clean the crack by blowing out loose debris with compressed air or a leaf blower. For best adhesion, dampen the crack with water but leave no standing puddles. Apply a latex patching compound with a putty knife, pressing it firmly into the crack and feathering the edges flush with the surrounding surface.
Alternatively, use a concrete crack sealant in a squeeze bottle for very fine cracks. Products like Quikrete Advanced Polymer Concrete Crack Seal flow into hairline openings by capillary action. Apply along the length of the crack and allow 24 hours to cure before foot traffic.
Filling Medium Cracks (1/8 to 1/2 Inch)
Widen the crack slightly with a cold chisel and hammer to create an inverted V-shape, wider at the bottom than the top. This “keyed” profile locks the filler in place and prevents it from popping out during temperature cycles. Remove all loose material and dust.
For cracks with seasonal movement, use a flexible polyurethane sealant. Insert a foam backer rod into cracks deeper than 1/2 inch to control the filler depth. The ideal sealant depth is half the crack width, which allows the polyurethane to stretch and compress without tearing. Apply with a caulk gun, tool smooth with a wet finger or spoon, and allow 24 to 48 hours to cure.
Repairing Large Cracks and Spalling (Over 1/2 Inch)
Wide cracks and areas where the surface has chipped or flaked need a different approach. Use a concrete resurfacer or polymer-modified repair mortar rather than caulk. Quikrete Concrete Resurfacer, Sakrete Top ‘N Bond, and Ardex CD Fine are all contractor-grade products that bond to existing concrete and build up damaged areas.
Chisel out loose and crumbling concrete until you reach solid material. Undercut the edges so the patch is wider at the bottom. Dampen the repair area, mix the product to a peanut butter consistency, and trowel it into the void. Build up in layers no thicker than 1/4 inch per pass if the damage is deep, allowing each layer to set before applying the next. Mist and cover with plastic for 24 hours to prevent premature drying.
Structural Cracks: Epoxy Injection
Cracks in foundation walls, load-bearing slabs, or structural beams that need to regain full strength require epoxy injection. The process bonds the crack faces together with a structural adhesive stronger than the concrete itself.
Surface-mount injection ports are glued over the crack at 6 to 8 inch intervals. The crack between ports is sealed on the surface with epoxy paste. After the surface seal cures, low-pressure injection fills the crack from bottom to top, port by port, until epoxy flows from the next port up, confirming full penetration. DIY kits work for simple vertical wall cracks. Structural slab repairs should be handled by a professional engineer or experienced contractor.
When to Call a Professional
Some cracks signal problems that filler alone cannot solve:
- Cracks wider than 1/2 inch or actively widening over time
- Vertical displacement where one side of the crack is higher than the other
- Cracks accompanied by bowing or leaning in walls
- Multiple parallel cracks in a foundation wall (possible lateral soil pressure)
- Active water infiltration through foundation cracks
- Any crack in a structural element like a beam, column, or load-bearing wall
A structural engineer’s assessment costs $300 to $600 and provides a clear diagnosis plus a repair specification. That investment prevents you from spending time and money on surface repairs that mask a worsening structural issue. For cosmetic cracks in driveways, patios, and sidewalks, the products and methods in this concrete crack filler guide handle the job reliably and affordably.
Choosing a Foundation Crack Filler by Crack Type and Movement
Foundation walls need a different decision process than driveways and patios. The best foundation crack filler depends on three questions: Is the crack still moving? Is water coming through it? Does the wall need its strength restored, or just a watertight seal? Answer those first and the product choice becomes straightforward.
Dormant or active?
Before filling anything, find out whether the crack is changing. Mark both ends with a pencil line and date, and measure the width at a few points. Check again over several weeks or through a change of season. A crack that stays the same length and width is usually dormant shrinkage cracking. One that grows, widens, or opens and closes with the seasons is active and needs a flexible filler, or a professional assessment before any filler goes in.
| Crack situation | Filler type that usually fits |
|---|---|
| Dry, dormant hairline or narrow crack in a poured wall | Epoxy injection or a flexible sealant for a cosmetic seal |
| Crack in a poured wall that leaks or may still move slightly | Polyurethane foam injection, which expands and stays flexible |
| Crack with active water flow during repair | Hydraulic cement as a plug, often followed by injection |
| Dormant crack where wall strength must be restored | Epoxy injection, specified by an engineer |
| Stair-step cracks in a block wall mortar joints | Assessment first; repointing mortar only if movement has stopped |
Polyurethane versus epoxy
These two injection products are often confused. Polyurethane is primarily a waterproofing filler. It expands to fill voids through the full wall thickness and flexes with minor movement, which makes it a common choice for leaking poured-concrete cracks. Epoxy is a structural adhesive. It bonds the two faces of the crack back together rigidly, which is ideal when strength matters but a poor choice if the crack is still moving, because a new crack will simply form beside it.
When filler is the wrong answer
Some signs mean the wall needs a structural engineer, not a product off the shelf: horizontal cracks in a basement wall, walls bowing or leaning inward, stair-step cracks in block that are widening, one side of the crack offset from the other, or doors and windows above the area starting to stick. Filling those cracks can hide a problem that is still getting worse. Get the cause diagnosed and repaired first, then seal the crack as the final step.