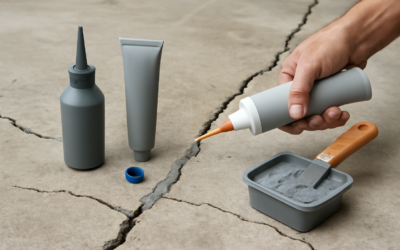
Within the first 30 days of pouring, almost every concrete patio develops hairline cracks in concrete patio surfaces, and most are completely harmless. The trick is knowing which cracks are cosmetic shrinkage you can ignore or fill in 20 minutes, and which signal settlement, frost heave, or rebar failure that need real attention. This guide walks through identifying the type of crack you have, the three repair methods worth using, and the prevention steps that keep new cracks from opening every spring.
Part of our Decks & Outdoor guide — explore the full guide →
- Why Concrete Cracks at All
- Diagnose the Crack Type
- Cleaning the Crack Before Repair
- Repair Method 1: Polyurethane Sealant for Active Cracks
- Repair Method 2: Concrete Crack Filler for Stable Hairlines
- Repair Method 3: Epoxy Injection for Structural Cracks
- Preventing New Cracks
- When to Call for Replacement Instead
Why Concrete Cracks at All
Concrete shrinks as it cures. Water in the mix evaporates, the slab contracts, and any restraint (rebar, foundation walls, adjacent slabs) forces the concrete to relieve stress by cracking somewhere. A well-poured 4 inch thick patio with proper control joints will crack at the joints. A poorly placed slab without joints, or one poured too wet, will crack wherever the stress finds the path of least resistance.
The most common pattern is hairline cracks of 1/64 to 1/32 inch wide running in random directions. These are pure shrinkage cracks and do not indicate structural failure. Cracks wider than 1/8 inch, cracks that step from one side of the crack to the other (offset), or cracks that grow visibly month to month are different and should be investigated.
Diagnose the Crack Type
Look at the crack on a dry day with low sun, which casts shadow into any vertical offset. The five types you will see on a residential patio:
- Shrinkage cracks: 1/64 to 1/32 inch wide, random direction, surface only — cosmetic
- Map cracks (crazing): network of tight surface cracks under 1/16 inch — cosmetic, often from finishing too wet
- Settlement cracks: wider on one end, often near edges where soil has dropped — needs repair
- Structural cracks: wider than 1/8 inch, often with vertical offset, run full thickness — needs evaluation
- D-cracking and spalling: parallel cracks near joints, surface flaking — freeze-thaw damage
For cracks under 1/8 inch with no offset, the repair is cosmetic and DIY-friendly. For wider or offset cracks, you may need professional evaluation before any cosmetic fix.
Cleaning the Crack Before Repair
Any filler or sealant will only adhere to clean concrete. Use a wire brush or a flathead screwdriver to remove loose debris from the crack. Vacuum the crack with a shop vac (a brick-and-mortar shop vac with a 1.5 inch hose pulls debris better than a household vacuum).
Rinse the crack and surrounding 6 inches with a garden hose, then let everything dry for at least 24 hours before repair. Trapped moisture under sealant causes adhesion failure within a year. In humid climates, wait 48 hours or use a heat gun on low to drive surface moisture out.
Repair Method 1: Polyurethane Sealant for Active Cracks
For cracks under 1/4 inch wide that may continue to flex with seasonal movement, polyurethane sealant (Sikaflex 1a or Quikrete Self-Leveling Sealant) gives the best long-term performance. The sealant stays flexible through temperature swings and resists UV breakdown for 10 to 15 years.
Squeeze the sealant directly into the crack with a caulk gun. Self-leveling formulas flow to fill horizontal cracks without tooling. For vertical or slope cracks, use a non-sag formula and tool smooth with a wet finger. A 10 ounce tube covers about 25 feet of hairline crack and costs 8 to 12 dollars.
Repair Method 2: Concrete Crack Filler for Stable Hairlines
For dormant cosmetic cracks where movement is minimal, a cementitious crack filler gives a tighter visual match to the existing concrete. Quikrete Concrete Crack Seal or Rapid Set Concrete Patch are common picks at 6 to 10 dollars per tube.
These products dry to a similar gray as base concrete and accept stain or sealer. The tradeoff is rigidity. If the crack opens further from frost heave, the rigid filler will pop out within a season. Use this method only when you are confident the crack is stable.
Repair Method 3: Epoxy Injection for Structural Cracks
For wider cracks that go through the full slab thickness but are not actively moving, two-part epoxy injection bonds the slab back together. Sikadur 35 Hi-Mod LV (low viscosity) or Polygem Liquid Welder kits at 30 to 60 dollars give you the cartridge and mixing nozzles.
Drill 3/8 inch ports every 8 to 12 inches along the crack, seal the surface of the crack between ports with epoxy gel, and inject low-viscosity epoxy through each port until it flows from the next. Allow 24 hours of cure time. The repaired crack is stronger than the surrounding concrete.
Preventing New Cracks
Sealing the patio every 2 to 3 years with a quality concrete sealer (Foundation Armor SX5000 or H&C Concrete Sealer) reduces water intrusion that drives freeze-thaw damage. Apply with a pump sprayer on a clean, dry surface at 50°F to 90°F.
If the patio drains poorly and water pools, fix the drainage first. Even the best sealer cannot protect concrete sitting in standing water through winter. Adding a 1 to 2 percent slope away from the house with a self-leveling overlay (Ardex K15, about 50 dollars per 50 lb bag) solves the problem at the surface level without breaking up the slab.
When to Call for Replacement Instead
If hairline cracks in concrete patio surfaces are accompanied by sinking sections (more than 1/2 inch differential), large spider-web crazing that covers most of the slab, or extensive spalling where the surface is flaking off in 1/4 inch chunks, the slab has reached the end of its useful life.
A typical 12 by 16 foot replacement runs 1500 to 3000 dollars depending on demo cost and access. Mudjacking or polyurethane foam leveling (300 to 800 dollars) is an option for slabs that have settled but are otherwise sound. Patching a slab that has lost more than 50 percent of its surface to spalling rarely pays off — every patch becomes a future failure point.