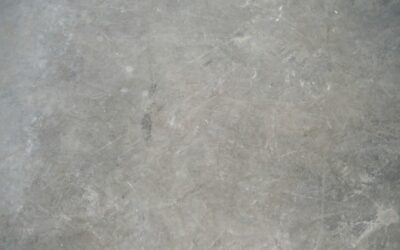
In my 20+ years of flooring experience, I’ve watched design trends come and go — but the industrial concrete look has been steadily gaining ground for over a decade now, and it shows no signs of slowing down. The problem? Actual polished concrete floors are expensive, cold, and unforgiving on your joints. That’s where concrete vinyl flooring comes in, and honestly, the quality of today’s concrete-look vinyl products blows my mind compared to what was available even five years ago.
I’ve installed concrete vinyl flooring in modern lofts, contemporary kitchens, commercial showrooms, and suburban family homes. When done right, guests genuinely cannot tell it’s vinyl until they kneel down and touch it. In this guide, I’ll share everything I know about choosing, buying, and installing concrete-effect vinyl flooring — including which brands deliver the most realistic look and which ones to avoid.
- What Is Concrete Vinyl Flooring?
- Types of Concrete Look Vinyl Flooring
- What Makes Concrete Vinyl Look Realistic
- Pros and Cons of Concrete Vinyl Flooring
- Best Brands for Concrete Look Vinyl
- Color Variations and Design Options
- Installation Guide
- Cost Breakdown
- Concrete Vinyl vs. Real Polished Concrete
- Maintenance and Care
- Frequently Asked Questions
What Is Concrete Vinyl Flooring?
Concrete vinyl flooring is any vinyl flooring product — whether sheet, tile, or plank format — that’s designed to replicate the appearance of poured or polished concrete. The surface features the subtle color variations, texture, and matte finish characteristic of real concrete without the drawbacks of the actual material.
These products use high-resolution photographic printing combined with textured embossing to create surprisingly realistic concrete effects. The best products on the market today feature what’s called “embossed in register” (EIR) technology, where the surface texture aligns precisely with the printed pattern. When you run your hand across the surface, you feel subtle variations that mimic real concrete — it’s genuinely impressive technology.
Concrete vinyl flooring is available in several formats:
- Luxury vinyl tile (LVT): Square tiles, typically 12″x12″ or 18″x18″, with click-lock or glue-down installation
- Luxury vinyl plank (LVP): Rectangular planks that mimic large-format concrete tiles
- Sheet vinyl: Continuous rolls with a seamless concrete look — no grout lines or seams
- Rigid core tiles: SPC or WPC tiles with a concrete-look surface and rigid backing
Types of Concrete Look Vinyl Flooring
Not all concrete vinyl is created equal, and understanding the differences between product types will help you choose the right one for your space.
SPC (Stone Polymer Composite) Concrete Tiles
SPC tiles with a concrete look are my top recommendation for most applications. The rigid stone-based core provides excellent stability, dent resistance, and a solid feel underfoot that’s more reminiscent of actual concrete than flexible vinyl products. These typically come in click-lock format with tile dimensions of 12″x24″ or larger.
The rigid core also means these tiles don’t telegraph subfloor imperfections — a huge advantage over thinner vinyl options. I’ve installed SPC concrete tiles over less-than-perfect subfloors with great results.
WPC (Wood Polymer Composite) Concrete Tiles
WPC products are slightly softer and warmer underfoot than SPC, thanks to the foam layer in their core. They offer better sound insulation and more comfort when standing, but they’re slightly less dent-resistant. For residential kitchens and living areas where comfort matters, WPC concrete tiles are an excellent choice.
Glue-Down LVT in Concrete Finishes
Glue-down luxury vinyl tiles provide the thinnest profile and are ideal for spaces with low ceiling clearance or where you want to minimize floor height transitions. The trade-off is that installation is more labor-intensive, and the thinner material can show subfloor imperfections more readily. These are what I use most in commercial applications.
Sheet Vinyl with Concrete Pattern
Sheet vinyl offers one unique advantage: it can create a completely seamless concrete look across an entire room. Without visible tile edges or grout lines, the floor genuinely looks like poured concrete. The downside is that sheet vinyl is thinner, less durable, and doesn’t feel as solid underfoot as rigid core options.
What Makes Concrete Vinyl Look Realistic
After installing hundreds of concrete-look vinyl floors, I’ve identified the features that separate convincing products from obviously fake ones:
Print Quality and Variation
The best concrete vinyl products use multiple unique print designs — typically 8 to 20 different patterns — that are randomly mixed during manufacturing. This prevents the repetitive pattern issue that plagued older vinyl products. When you look at a properly installed floor with 15+ unique prints, your eye doesn’t detect repetition, and the floor reads as natural.
Surface Texture
Texture is arguably more important than the visual pattern. Real concrete has a subtle, slightly rough surface with fine variations. The best vinyl products replicate this with micro-textured surfaces that feel authentic to the touch. Avoid products with a smooth, glossy surface — they immediately look like vinyl rather than concrete.
Color Depth
Real concrete has depth and subtle color shifts beneath the surface. Premium concrete vinyl uses multi-layer printing to create this dimensional appearance. Budget products tend to look flat and uniform, which is a dead giveaway.
Matte Finish
Most real concrete floors have a matte to semi-matte finish. Any concrete vinyl with a high-gloss sheen will immediately look artificial. I always recommend matte or “natural” finish options for the most realistic result.
Pros and Cons of Concrete Vinyl Flooring
Advantages
- Fraction of the cost: $2-$7 per square foot vs. $8-$15+ for polished concrete
- Warmer and more comfortable: Doesn’t have the bone-chilling cold of real concrete
- 100% waterproof: Unlike actual concrete, which is porous and can stain
- Easy DIY installation: Click-lock tiles require no special tools or skills
- Low maintenance: Simple sweep and mop routine keeps it looking perfect
- Softer underfoot: Especially WPC products — much easier on joints than real concrete
- No cracking: Real concrete develops cracks over time; vinyl does not
- Compatible with radiant heat: Most products approved for heated subfloor systems
Disadvantages
- Not as authentic close up: Under close inspection, it’s still identifiable as vinyl
- Can dent: Heavy furniture and dropped objects can damage the surface
- UV sensitivity: Some products can discolor with prolonged direct sunlight
- Not eco-friendly: PVC-based products have environmental concerns
- Lower resale perception: Some buyers still view vinyl as inferior to “real” materials
- Temperature expansion: Requires expansion gaps and may shift in extreme temperature changes
Best Brands for Concrete Look Vinyl
Based on my firsthand experience installing and observing these products over time, here are the brands that consistently deliver the most realistic concrete look:
Top Tier (Most Realistic)
- Floorte by Shaw: Their concrete-look options in the Paragon and Classico collections feature exceptional texture and color variation. Consistent quality across batches.
- COREtec: The Stone collection offers outstanding concrete finishes with their patented core technology. Premium price but premium result.
- Karndean Designflooring: Known for hyper-realistic concrete and stone designs. Their Opus and Korlok ranges are standouts. Often used in commercial spaces.
Mid-Range (Great Value)
- LifeProof (Home Depot): Surprisingly good concrete finishes for the price point. Their rigid core tiles handle well and look convincing from standing height.
- MSI Everlife: Solid selection of concrete-look tiles at competitive pricing. Good availability and consistent quality.
- Mohawk RevWood Plus: While primarily a laminate brand, their vinyl concrete options are worth considering for budget-conscious projects.
Color Variations and Design Options
Concrete vinyl isn’t limited to basic gray. Modern products come in a wide range of finishes that reflect the diversity of real concrete treatments:
- Light gray (classic): The most popular option, replicating standard polished concrete. Works in almost any design scheme.
- Dark charcoal: Dramatic and sophisticated, ideal for modern and industrial interiors. Pairs beautifully with white or light wood cabinetry.
- Warm concrete (greige): A gray-beige blend that softens the industrial edge. Great for transitional and farmhouse-modern designs.
- White/cream concrete: Light, airy, and contemporary. Popular in Scandinavian-inspired interiors.
- Oxidized/weathered: Darker patches and rust-toned variations that replicate aged concrete. Adds character and visual interest.
- Terrazzo-effect: Concrete base with visible aggregate chips. A trending option that bridges concrete and decorative flooring.
Installation Guide
Installing concrete vinyl flooring is a straightforward DIY project for click-lock products. Here’s my recommended approach based on hundreds of installations:
Subfloor Preparation
This step is critical and where most DIY mistakes happen. The subfloor must be clean, dry, flat (within 3/16″ per 10 feet), and structurally sound. For concrete subfloors, test moisture levels — anything above 5 lbs per 1,000 square feet requires a moisture barrier. For wooden subfloors, ensure there’s no squeaking or movement, and fill any gaps or low spots with floor-leveling compound.
Acclimation
Bring the flooring into the room at least 48 hours before installation. Maintain the room temperature between 65-85°F. This allows the material to reach thermal equilibrium and prevents post-installation expansion or contraction issues.
Layout Planning
With concrete-look tiles, layout is especially important because you want to avoid repeating the same printed tile pattern next to itself. I always dry-lay the first few rows and shuffle tiles from different boxes to ensure good pattern distribution. This extra step takes 15-20 minutes but makes a dramatic difference in the final result.
Installation Process
Start from the longest, most visible wall and work across the room. Maintain a 1/4″ expansion gap at all walls and fixed objects. Use spacers to keep this gap consistent. Click tiles together using the angle-and-drop method — insert the long edge at a slight angle and push down until the joint clicks. Use a rubber mallet and tapping block for stubborn joints, never force tiles into position.
Stagger joints by at least 6 inches between rows for tiles, or randomize the pattern to replicate the look of poured concrete sections. For the most realistic appearance with large-format tiles (12″x24″), I recommend a 50% offset or a random stagger pattern.
Finishing Touches
Install matching transition strips at doorways and where the floor meets different flooring materials. Remove spacers and install baseboards or quarter-round to cover expansion gaps. For a seamless concrete look, consider using color-matched grout-look caulk in the expansion gap at walls.
Cost Breakdown
Here’s what you can expect to spend on concrete vinyl flooring in 2026:
Material Costs
- Budget sheet vinyl: $1 – $2.50 per square foot
- Mid-range click-lock LVT: $2.50 – $4.50 per square foot
- Premium SPC/WPC tiles: $4 – $7 per square foot
- High-end designer vinyl: $6 – $10 per square foot
Installation Costs
- DIY click-lock: $0 (your time only — tools typically under $50)
- Professional click-lock installation: $1.50 – $3 per square foot
- Professional glue-down installation: $2 – $4 per square foot
- Subfloor preparation (if needed): $1 – $3 per square foot additional
Total Project Cost Example
For a 300-square-foot kitchen using mid-range SPC concrete tiles with professional installation:
- Materials (300 sq ft x $4): $1,200
- Underlayment: $150
- Installation: $750
- Transitions and trim: $75
- Total: approximately $2,175
Compare this to polished concrete at $8-$15 per square foot installed, and the savings become significant — often 50-60% less for a comparable visual result.
Concrete Vinyl vs. Real Polished Concrete
I get asked about this comparison constantly, so let me give you an honest, side-by-side assessment:
Appearance
Real concrete wins on authenticity, of course, but top-tier vinyl products are remarkably close. From a normal standing height of 5-6 feet, the best concrete vinyl is nearly indistinguishable from the real thing. Up close, the differences become apparent — real concrete has depth and imperfections that even the best prints can’t fully capture.
Comfort
Vinyl wins decisively. Real concrete is brutally hard and cold underfoot. Even with area rugs, concrete floors cause fatigue and discomfort during extended standing. Vinyl — especially WPC products — offers meaningful cushion that makes a genuine difference in daily comfort.
Maintenance
Vinyl is far easier to maintain. Real concrete is porous (even when sealed) and requires periodic resealing to resist stains. Spilled red wine on polished concrete is a panic moment; on vinyl, it wipes up without concern. Vinyl is also waterproof, while concrete can absorb moisture and develop issues.
Durability
Real concrete wins on raw durability — it’s literally stone. However, it cracks, and those cracks are expensive to repair. Vinyl can dent and scratch but is easily replaced in sections. For most residential applications, vinyl’s practical durability matches or exceeds concrete.
Maintenance and Care
Concrete vinyl flooring is wonderfully low-maintenance. Here’s my recommended care routine:
- Daily: Sweep or use a dust mop to remove grit and debris that could scratch the surface
- Weekly: Damp mop with warm water and a pH-neutral vinyl floor cleaner
- Monthly: Check expansion gaps and transitions for any movement or debris buildup
- As needed: Clean spills immediately — while vinyl is waterproof, standing water at seams can work its way underneath
Avoid steam mops (the heat can damage the adhesive and core), abrasive cleaners, and wax-based polishes. Use felt pads under all furniture legs and avoid dragging heavy items across the surface. With basic care, a quality concrete vinyl floor should maintain its appearance for 15-20 years.
Frequently Asked Questions
Does concrete vinyl flooring look fake?
The best concrete vinyl flooring products look remarkably realistic from a normal viewing distance. Products with embossed-in-register (EIR) texture, matte finishes, and multiple unique print designs are nearly indistinguishable from real concrete when standing at normal height. Budget products with glossy finishes or repetitive patterns can look artificial. I always recommend requesting samples before purchasing and viewing them on the floor in your actual lighting conditions rather than just looking at them on a showroom wall.
Can concrete vinyl flooring be installed in bathrooms?
Yes, concrete vinyl flooring is an excellent choice for bathrooms. It’s 100% waterproof (the vinyl and core layers don’t absorb water), comfortable underfoot in bare feet, and the concrete aesthetic works beautifully in bathroom designs. For bathrooms, I recommend rigid core (SPC) products with sealed edges and applying a bead of silicone sealant around the perimeter for extra water protection. Avoid using standard grout between tiles — if you want a grouted look, use flexible vinyl-compatible grout.
How long does concrete look vinyl flooring last?
With proper installation and maintenance, quality concrete vinyl flooring lasts 15-25 years in residential settings. The main factor affecting lifespan is the wear layer thickness — I recommend a minimum of 20 mil for residential use and 28 mil or higher for commercial or heavy-traffic residential areas. SPC and WPC products with thicker wear layers tend to last longer than thin sheet vinyl. Environmental factors like direct sunlight exposure and extreme temperature fluctuations can also affect longevity.
Is concrete vinyl flooring suitable for large open-plan spaces?
Concrete vinyl is excellent for open-plan spaces, but you need to plan for expansion. Most manufacturers specify maximum continuous run lengths — typically 30-40 feet in any direction for floating installations. For larger spaces, you’ll need transition strips or expansion joints. I also recommend using SPC products for large areas because their rigid core is more dimensionally stable than WPC, reducing the risk of expansion-related issues. The seamless concrete look works particularly well in open-plan designs where visual continuity across living, dining, and kitchen areas is desired.
Can I install concrete vinyl flooring over existing tile?
Yes, you can install concrete vinyl flooring directly over existing tile as long as the tile is in good condition, firmly bonded, and reasonably level. Deep grout lines (more than 1/8 inch) should be filled with floor-leveling compound first, as they can telegraph through thinner vinyl products. Rigid core (SPC) products handle uneven tile better than flexible vinyl because the rigid core bridges minor imperfections. This is actually one of the most popular use cases I encounter — homeowners wanting to cover dated ceramic tile with a modern concrete look without the hassle of tile removal.