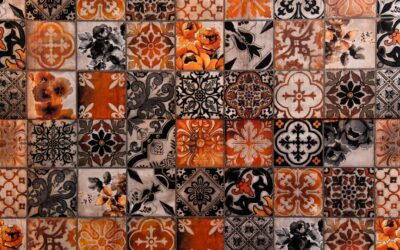
The strip of surface where your counter meets the wall does more work than its size suggests, catching splashes, water, and grease that would otherwise soak into drywall and stain the paint. A countertop backsplash is that protective surface, and choosing between a simple integrated lip and a full-height tiled wall changes both the function and the entire look of a kitchen. Some homeowners want the seamless practicality of a stone backsplash that matches the counter, while others want the design statement of floor-to-cabinet tile. Understanding the options helps you protect the wall, simplify cleaning, and get the look you want.
Part of our Countertops guide — explore the full guide →
The Integrated 4-Inch Backsplash
The most common and budget-friendly option is the integrated backsplash, a short strip of the same material as the countertop, usually about 4 inches tall, running up the wall behind the counter. Fabricators cut it from the same slab of granite, quartz, or laminate, so it matches the counter exactly and creates a continuous look. Where it meets the counter, the joint is caulked to seal out water.
This style is practical and inexpensive because it uses material the fabricator is already cutting. It protects the most splash-prone zone right behind the counter, wipes clean in one swipe, and skips the labor and cost of a full tile job. The trade-off is a more basic appearance and less protection on the upper wall.
Full-Height and Tile Backsplashes
For a bigger design impact, many homeowners run the backsplash all the way from the countertop to the bottom of the upper cabinets, typically about 18 inches. This area is prime real estate for decorative tile: subway tile, mosaic, marble, glass, or a continuous slab of stone that extends the counter material up the wall for a dramatic, seamless look.
- Subway tile: classic, affordable, and easy to clean, the default for a reason.
- Mosaic sheets: small tiles on mesh backing that add pattern and texture.
- Full-slab stone: a continuous extension of granite or quartz, luxurious and grout-free.
- Glass tile: reflective and modern, brightening the workspace.
A full-height backsplash protects far more wall and becomes a focal point, but it costs more in material and labor than the integrated strip.
Matching or Contrasting
One of the first decisions is whether the backsplash should match or contrast the counter. A matching slab backsplash, where stone runs up from the counter, reads sleek, hides the counter-to-wall seam, and makes a small kitchen feel cohesive. It is also the easiest to clean since there are no grout lines.
A contrasting tile backsplash lets the wall become its own design element, adding color, pattern, or texture that the counter lacks. Pair a busy granite with a calm subway tile, or ground a quiet quartz with a bold mosaic. The right move depends on whether you want the counter or the wall to be the star.
Height, Outlets, and Seams
Plan the layout before installation. Standard full-height backsplashes stop at the bottom of the upper cabinets, but the dimension varies, so measure your actual gap. Electrical outlets in the backsplash zone need to be accounted for, and on a tile job the spacers and cuts around outlets are where amateur work shows. On a slab backsplash, the seams should be placed and color-matched carefully.
Behind the range and sink, the backsplash works hardest, so prioritize a durable, easy-clean material in those zones even if you economize elsewhere. The area behind a cooktop sees grease and heat that demand a wipeable surface.
Installation and Sealing
An integrated slab backsplash installs with the countertop, set in place and caulked at the joint. Tile backsplashes go on after the counter, with the installer applying thinset or mastic, setting and spacing the tile, then grouting and sealing. The caulk line where the backsplash meets the counter is critical: it flexes with the slight movement between counter and wall, so it should be a flexible silicone, not rigid grout, to avoid cracking.
If you choose natural stone, both the counter and a stone backsplash need periodic sealing to resist stains. Grout in a tiled backsplash should be sealed too, since unsealed grout absorbs grease and discolors over time.
Material Options Compared
The material you choose shapes durability, cleaning, and cost. Each common option has clear strengths and trade-offs.
- Stone slab (granite or quartz): seamless, grout-free, and luxurious, but the most expensive and best for matching the counter.
- Ceramic and porcelain tile: affordable, durable, and endlessly varied, though the grout lines need sealing and cleaning.
- Glass tile: bright and reflective, easy to wipe, but pricier and prone to showing adhesive through clear pieces if not installed carefully.
- Laminate: the budget integrated option, matching laminate counters at low cost but less heat and scratch resistant.
- Metal or pressed tin: a distinctive look that wipes clean and resists heat behind a range.
Behind the cooktop, where grease and heat concentrate, lean toward a hard, wipeable surface like stone, porcelain, or glass rather than a porous or heat-sensitive material.
Cleaning and Long-Term Care
How much upkeep a backsplash demands depends on what it is made of. A solid stone or glass surface wipes clean with a damp cloth and mild cleaner, with no grout to worry about. Tiled backsplashes need a bit more attention, because grout lines collect grease and grime, especially behind a stove. Sealing the grout when new and resealing periodically keeps it from staining, and a soft brush clears buildup that a cloth misses. For natural stone backsplashes, use pH-neutral cleaners and reseal the stone on the same schedule as the counter to keep it stain-free. Regular wiping after cooking prevents the baked-on splatter that becomes a chore to remove later.
Cost and Choosing Your Approach
An integrated 4-inch backsplash adds relatively little, often $10 to $20 per linear foot, since it uses the counter material. A tiled backsplash runs $10 to $40 per square foot installed depending on the tile, and a full-slab stone backsplash costs the most because of the extra material and fabrication. For tight budgets and a clean look, the integrated backsplash delivers. For impact and maximum wall protection, full-height tile or slab is the upgrade. Match the choice to your budget and your kitchen’s style, and the backsplash will protect the wall and pull the room together for years.