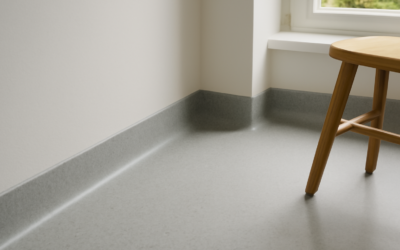
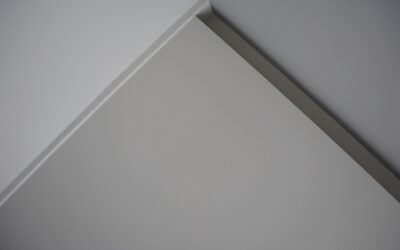
A true coved ceiling, where the wall rolls into the ceiling in a smooth curve, used to take a plasterer days of work with lath and a running mold. Today you can get most of that soft look with coved ceiling molding: a large concave trim profile that bridges the wall and ceiling corner. Choose a big enough profile, install it cleanly and paint it the ceiling color, and from the floor most people cannot tell it from plaster.
The quick answer: for a convincing curve, use a cove profile at least 4 to 6 inches on each leg in rooms with 8 to 9 foot ceilings, and 6 to 9 inches or more in taller rooms. Paint the molding and ceiling the same color so the curve reads as part of the ceiling rather than as trim. For curved walls or round rooms, use flexible polyurethane cove instead of wood.
- What Coved Ceiling Molding Is (and How It Differs From Crown)
- Choosing the Right Size and Profile
- Before You Start: Old Plaster, Lead and Asbestos
- Tools and Materials
- How to Install Coved Ceiling Molding
- Ladder and Overhead Work Safety
- Troubleshooting
- Cost Ranges
- When to Call a Pro
- Frequently Asked Questions
If you live in an older home that already has plaster coves, the decision is different. Repairing original coves is usually better than tearing them out, and any demolition of old plaster needs testing first.
What Coved Ceiling Molding Is (and How It Differs From Crown)
Crown molding is a decorative profile with ogees, beads and fillets that sits at an angle across the corner. Cove molding is a simple concave quarter-circle or elliptical curve. Small cove trim, under 2 inches, is mostly used to hide gaps. Large coved ceiling moulding is used to imitate the plaster coves found in 1920s to 1940s homes, Spanish revival houses and Art Deco rooms.
The difference is in scale and finish. A coved ceiling trim job uses a profile big enough that the curve dominates the corner, and it is painted to blend into the ceiling. Crown is usually painted to match other trim and meant to be noticed.
Three ways to get the look
- Large wood or MDF cove. Paint-grade pine, poplar or MDF in profiles up to about 5 or 6 inches. Inexpensive and easy to cut, but best on straight, fairly flat walls.
- Polyurethane or foam cove. Lightweight, available in bigger sizes and in flexible versions that bend around curved walls. Installs with adhesive and a few nails.
- True plaster or drywall cove. Built with bendable drywall or plaster over a curved framing form. It gives a continuous, jointless curve but is a skilled, messy job.
Choosing the Right Size and Profile
Scale is the most common mistake. A 3 inch cove in a large living room looks like trim, not a curve. Rough guidelines that work for most rooms:
- 8 foot ceilings: 3.5 to 5 inch legs
- 9 foot ceilings: 5 to 6 inch legs
- 10 foot and taller: 6 to 9 inch legs, or a built-up cove
Profiles with an elliptical curve, slightly flatter where they meet the ceiling, look more like real plaster than a perfect quarter-circle. If your walls have heavy texture or the ceiling dips, a larger profile also hides more of the irregularity. Buy one sample length, hold it up in the room and look at it from the doorway before ordering the whole room.
Before You Start: Old Plaster, Lead and Asbestos
Many homes with coved ceilings are old enough to contain hazardous materials. If your house was built before 1978, assume painted surfaces may contain lead until a test says otherwise. Use a lead test kit or a certified inspector before you sand, scrape or cut painted plaster, and follow lead-safe practices: plastic sheeting, misting to keep dust down, a HEPA vacuum and no dry sweeping.
Plaster, joint compound, ceiling texture and some patching materials from before the 1980s can contain asbestos. Have a sample tested by an accredited lab before demolishing an existing cove or cutting into the ceiling. If either test comes back positive, hire a licensed abatement contractor for removal. Simply installing new molding over sound plaster, without sanding or demolition, avoids most of this risk.
Tools and Materials
- Cove molding in your chosen size, plus about 10 to 15 percent extra for waste
- Miter saw and a coping saw for inside corners
- Brad or finish nailer, construction adhesive, and a stud finder
- Painter’s caulk, wood filler or lightweight spackle, sandpaper
- Primer and paint matched to the ceiling
- Stable step ladder or scaffold, safety glasses and a dust mask
How to Install Coved Ceiling Molding
- Mark framing. Find the wall studs and the ceiling joists or top plate with a stud finder and mark them lightly with pencil just beyond where the molding will sit.
- Snap reference lines. Hold a scrap of cove in place and mark its bottom edge on the wall at several points. Connect the marks with a level or laser so the reference mark is straight even if the ceiling is not.
- Plan the order. Run the first piece square into the corner on the wall opposite the door. Cope the next pieces against it, working around the room so the last joint is in the least visible corner.
- Cut inside corners by coping. Cut a 45 degree inside miter to reveal the profile, then follow the curved edge with a coping saw, back-cutting slightly. Because a cove is a simple curve, coping is easier than on crown.
- Cut outside corners as miters. Cut matching 45 degree miters, glue the joint and pin it with brads.
- Join long runs with scarf joints. Overlap two 45 degree cuts over a stud and glue them, instead of butting square ends.
- Fasten. Apply a bead of adhesive to both back edges, press the piece to your line and nail into studs and joists or the top plate. Two people make long lengths far easier.
- Finish. Fill nail holes, caulk the top and bottom edges and every joint, sand smooth and paint the cove the same color as the ceiling.
DIY coved ceiling in a curved room
For a diy coved ceiling around a bay, turret or curved wall, use flexible polyurethane cove. Let it sit at room temperature, dry-fit it, then fasten with adhesive and finish nails. Keep the radius within what the manufacturer lists for that profile.
Ladder and Overhead Work Safety
Molding work keeps your arms above your head for long stretches. Use a step ladder rated for your weight plus tools, keep it fully open with the spreaders locked, and never stand on the top step or top cap. A small rolling scaffold with locked wheels is safer and faster for whole rooms. Move the ladder instead of leaning out to reach. For stairwells or two-story rooms, hire a pro with proper scaffolding.
Long lengths of molding are floppy and awkward. Work with a second person who holds one end while you fasten, and fasten into studs, joists or the top plate rather than relying only on adhesive. If the trim has to go around a ceiling light, have a licensed electrician remove or relocate it. Turn off the breaker and confirm power is off with a non-contact voltage tester before anyone handles a fixture, and never work on live wiring.
Troubleshooting
- Gaps along the ceiling. Ceilings are rarely flat. Keep the bottom edge on your straight line and caulk the top gap; for gaps over 1/4 inch, add a nail into a joist to pull the trim up.
- Open coped joints. Back-cut more aggressively and test-fit. A little glue and caulk hides hairline gaps once painted.
- Visible seams after painting. Wood joints move with humidity. Glue every scarf joint and allow paint to cure fully before judging.
- Molding looks like trim, not a curve. The profile is too small or painted the wrong color. Paint it the ceiling color, or step up a size.
- Cracks in existing plaster coves. Hairline cracks can be taped and skim-coated after testing confirms there is no lead or asbestos concern.
Cost Ranges
Paint-grade cove molding in the 3.5 to 6 inch range generally costs a few dollars per linear foot, while large polyurethane profiles and flexible molding cost more, often several times as much. A 12 by 14 foot room needs about 52 linear feet plus waste. Professional installation typically runs several dollars to over $10 per linear foot depending on profile size, corners and ceiling height. Building a true plaster or drywall cove costs substantially more because of the framing and finishing labor.
When to Call a Pro
Call a finish carpenter for very large profiles, rooms with many angles or ceilings above about 10 feet. Hire a plaster contractor if you want a true curved cove or need to repair original plaster coves. Bring in a licensed abatement contractor if testing finds asbestos, and a lead-safe certified contractor for work on painted surfaces with lead. Any lighting or wiring changes belong with a licensed electrician.
Frequently Asked Questions
What is the difference between cove and crown molding?
Cove is a simple concave curve. Crown has a more complex decorative profile. Large cove molding is used to imitate a curved plaster ceiling.
What size cove molding looks like a real coved ceiling?
Plan on legs of about 5 to 6 inches for a 9 foot ceiling and larger for taller rooms. Smaller profiles tend to read as ordinary trim.
Can I install cove molding on a textured ceiling?
Yes. Keep the bottom edge straight, caulk the top edge to the ceiling, and consider a larger profile to bridge the texture.
Should cove molding be painted the wall or ceiling color?
For a coved ceiling effect, paint it the ceiling color so the curve looks like part of the ceiling.
Is it safe to remove an old plaster cove?
Only after testing. Older plaster and paint can contain asbestos or lead, so test first and use a licensed abatement contractor if results are positive.