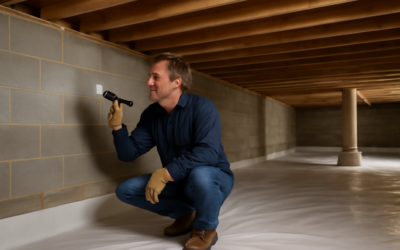
Water in a crawl space is more than a nuisance; it quietly rots framing, feeds mold, and drives up your energy bills. Effective crawl space drainage is the difference between a dry, stable foundation and a slow, expensive collapse in structural integrity. If you have noticed standing water, a musty smell, or condensation on your ductwork, upgrading your crawl space drainage should move to the top of your home maintenance list before the damage compounds.
- Why Crawl Spaces Flood in the First Place
- The Full Range of Drainage Solutions
- Installing an Interior Drainage System
- The Role of a Sump Pump
- Encapsulation and Vapor Barriers
- DIY Steps to Improve Drainage
- Signs Your Drainage Is Failing
- Dehumidifiers and Air Management
- Hiring a Contractor vs. DIY
- Protecting Your Investment
Why Crawl Spaces Flood in the First Place
Understanding the source of the water tells you which fix to use. Most crawl space moisture comes from one of three places: surface water running toward the foundation, a high groundwater table pushing up through the soil, or humid air condensing on cool surfaces during warm months. Many homes suffer from a combination of all three.
Grading is the most common culprit. When the ground around your house slopes toward the foundation instead of away, every rainstorm channels water straight to your crawl space. Clogged or missing gutters make it worse by dumping roof runoff right at the base of the walls. Before spending money on interior systems, walk your property during a downpour and see where the water actually goes.
The Full Range of Drainage Solutions
Crawl space drainage works best in layers, addressing water from the outside in. Here are the primary methods contractors combine:
- Exterior grading and gutters: Regrade soil to fall 6 inches over the first 10 feet, and extend downspouts at least 5 feet from the foundation.
- Perimeter French drain: A perforated pipe in gravel around the footing that intercepts groundwater before it enters.
- Interior perimeter drain: A trench dug inside the crawl space along the footing, feeding a sump pit.
- Sump pump: Collects water in a basin and pumps it out and away from the house.
- Vapor barrier and encapsulation: A sealed plastic liner that blocks ground moisture and humidity.
For a mild moisture problem, better grading, gutter extensions, and a vapor barrier may be enough. For chronic flooding, you will likely need an interior drainage channel tied to a sump pump.
Installing an Interior Drainage System
When water regularly pools on the crawl space floor, an interior perimeter drain is the workhorse solution. A crew digs a trench 8 to 12 inches deep around the inside edge of the crawl space, lays perforated pipe in washed gravel, and grades it toward a sump basin at the low point. The pump then discharges water through a pipe that daylights well away from the foundation.
Expect professional installation to run $2,000 to $6,000 depending on the perimeter length and how much digging is required in tight, low-clearance conditions. The sump pump itself adds $300 to $800 installed. It is not glamorous work, and the cramped quarters make it hard DIY, but a well-built interior drain solves flooding that surface fixes alone cannot.
The Role of a Sump Pump
A sump pump is the engine of most crawl space drainage systems. Submersible pumps sit inside the basin and run quietly, handling 2,000 to 4,000 gallons per hour. Pedestal pumps keep the motor above the water and cost less but run louder. For crawl spaces prone to power outages during storms, a battery backup pump is essential because the heaviest rain often coincides with lost electricity.
Set the pump on a solid base so it does not tip, and route the discharge line downhill to daylight or a dry well. Add a check valve on the discharge pipe to keep pumped water from flowing back into the pit. Test the pump every few months by pouring in a few gallons of water and confirming it cycles on and shuts off cleanly.
Encapsulation and Vapor Barriers
Drainage handles liquid water, but humidity is a separate battle. A vapor barrier is a heavy polyethylene sheet, typically 6 to 20 mil thick, laid across the crawl space floor to stop moisture from wicking up out of the soil. Full encapsulation seals the walls and floor together into a continuous liner and often includes a dehumidifier.
A basic vapor barrier costs $0.50 to $1.00 per square foot in materials. Full professional encapsulation runs $5,000 to $15,000 depending on size, but it transforms a damp, moldy crawl space into clean, conditioned storage and can lower heating and cooling costs by 15 to 20 percent. Encapsulation works best after drainage is handled, since a liner over standing water only traps the problem.
DIY Steps to Improve Drainage
Several meaningful improvements cost little and require no special skills. Start outside, because keeping water away from the house is always cheaper than removing it later.
- Clean gutters and add downspout extensions to carry roof water 5 to 10 feet out.
- Build up soil against the foundation so it slopes away at 6 inches per 10 feet.
- Fill low spots in the yard that collect and channel water toward the house.
- Lay a 6-mil vapor barrier across the crawl space floor, overlapping seams by 12 inches and taping them.
- Seal any foundation vents if you are moving toward a conditioned, encapsulated crawl space.
These steps alone resolve a surprising number of moderate moisture problems and buy you time to plan a larger interior system if you still need one.
Signs Your Drainage Is Failing
Catching problems early keeps repair bills manageable. Watch for standing water after rain, a musty or earthy smell drifting up into the living space, condensation dripping from ducts and pipes, and white efflorescence staining on the foundation walls. Warped hardwood floors, sticking doors, and rising humidity readings upstairs all point back to crawl space moisture.
Mold is the clearest warning sign, and it can appear on joists within 48 hours of a soaking. If you spot fuzzy growth or the wood feels soft and spongy, address the drainage immediately and consider a professional mold inspection.
Dehumidifiers and Air Management
Even after you handle liquid water, humid air remains a problem in many crawl spaces, particularly in warm, muggy climates. A dedicated crawl space dehumidifier, sized for the square footage, holds relative humidity below the 55 to 60 percent range where mold and dust mites thrive. These units drain automatically to your sump pit or a condensate pump, so they run unattended.
The old approach of venting crawl spaces to the outside has fallen out of favor in humid regions, because outdoor summer air brings moisture in and condenses on cool surfaces. Sealing the vents and conditioning the space, an approach called a closed or encapsulated crawl space, keeps humidity controlled. If you go this route, pair the sealed vents with a dehumidifier or a small supply of conditioned air from your HVAC system to keep the air dry.
Hiring a Contractor vs. DIY
Deciding whether to call a professional comes down to the scope and the conditions. Surface fixes like gutter extensions, regrading, and laying a vapor barrier are well within reach for most homeowners and cost only materials. Full interior drainage systems, sump pump installation in tight quarters, and encapsulation are harder, dirtier, and often better left to specialists with the right equipment and low-clearance experience.
When you do hire out, get at least three quotes and ask each contractor to explain how they will handle the water source, not just the symptoms. A good contractor inspects grading and gutters, tests for moisture, and proposes a layered solution rather than pushing a single expensive product. Beware anyone who recommends encapsulation before addressing active water, since sealing over standing water only hides the problem. Ask for a written warranty on both the workmanship and the sump pump, and confirm they will provide a moisture reading after the job to prove the fix worked.
Protecting Your Investment
Good crawl space drainage is preventive medicine for the entire house. Combining exterior grading, a perimeter drain, a reliable sump pump, and a quality vapor barrier keeps water out, protects the framing, and improves air quality throughout your home. Whether you tackle the surface fixes yourself or hire a contractor for a full interior system, keeping that space dry is one of the smartest investments you can make in your home’s long-term health.