Cream subway tile has quietly become one of the most requested finishes in kitchens and bathrooms, and for good reason. It softens the crisp, clinical edge of bright white while keeping that classic rectangular silhouette homeowners love. The result is a backdrop that feels warm, lived-in, and timeless rather than stark.
Part of our Tile & Grout guide — explore the full guide →
If you are weighing this finish for a backsplash, shower surround, or accent wall, this guide walks through everything that matters: sizing, layout patterns, grout choices, realistic costs, and the installation details that separate a polished job from an amateur one.
Why Choose Cream Over Bright White
White subway tile is a default, but it can read cold under certain lighting. Cream introduces a subtle warmth that flatters wood cabinetry, brass hardware, and natural stone countertops. The undertone bridges the gap between traditional and modern, so it works in a farmhouse kitchen just as comfortably as a transitional bath.
Cream also hides minor imperfections better than pure white. Hard-water spots, light splatter, and everyday grime are less obvious against a soft ivory field, which means your walls look cleaner between deep cleans. For busy households, that practical advantage is hard to beat.
Common Sizes and Finishes
The traditional subway proportion is a 3-by-6-inch rectangle, but the category has expanded dramatically. You will find cream options in several formats, each lending a slightly different feel to the room.
- 3 by 6 inches: the classic, ideal for vintage and traditional spaces.
- 2 by 4 inches: a smaller mosaic-style option that adds texture and detail.
- 4 by 12 or 4 by 16 inches: elongated tiles for a cleaner, more contemporary look with fewer grout lines.
Finish changes the entire mood. A glossy glaze reflects light and brightens small spaces, while a matte or honed surface feels understated and modern. Some cream tiles feature a handmade, slightly uneven glaze that catches light beautifully and adds artisan character. Ceramic is the most budget-friendly base, though porcelain offers greater durability in high-moisture zones.
Layout Patterns That Make a Difference
The pattern you choose dramatically shifts the personality of cream subway tile. The same tile can look traditional or trendy depending on how it is set.
- Classic running bond: each row offset by 50 percent, the most familiar and forgiving layout.
- Offset by one-third: a subtler stagger that reduces the “lippage” effect on longer tiles.
- Herringbone: tiles set at 45 degrees for a dynamic, upscale feel.
- Vertical stack: tiles aligned in clean columns for a modern, minimalist statement.
- Horizontal stack: a grid layout that reads contemporary and gallery-like.
If this is your first tiling project, the running bond pattern is the most forgiving and the fastest to install. Herringbone looks stunning but generates more cuts and waste, so order roughly 15 percent extra material to cover mistakes and trim pieces.
Choosing the Right Grout
Grout is not an afterthought; it is half the design. The contrast between tile and grout determines how bold or seamless the finished wall appears.
For a soft, cohesive look, choose a grout that closely matches the cream tone. This downplays the grid and lets the tile texture shine, which suits larger spaces and modern aesthetics. For definition and a more traditional feel, a slightly darker greige or taupe grout outlines each tile and adds depth. Avoid stark white grout against cream, since the mismatch tends to make the tile look dingy by comparison. Steer clear of very dark grout in cooking zones unless you want the lines to read heavy and demand frequent cleaning.
Where Cream Subway Tile Works Best
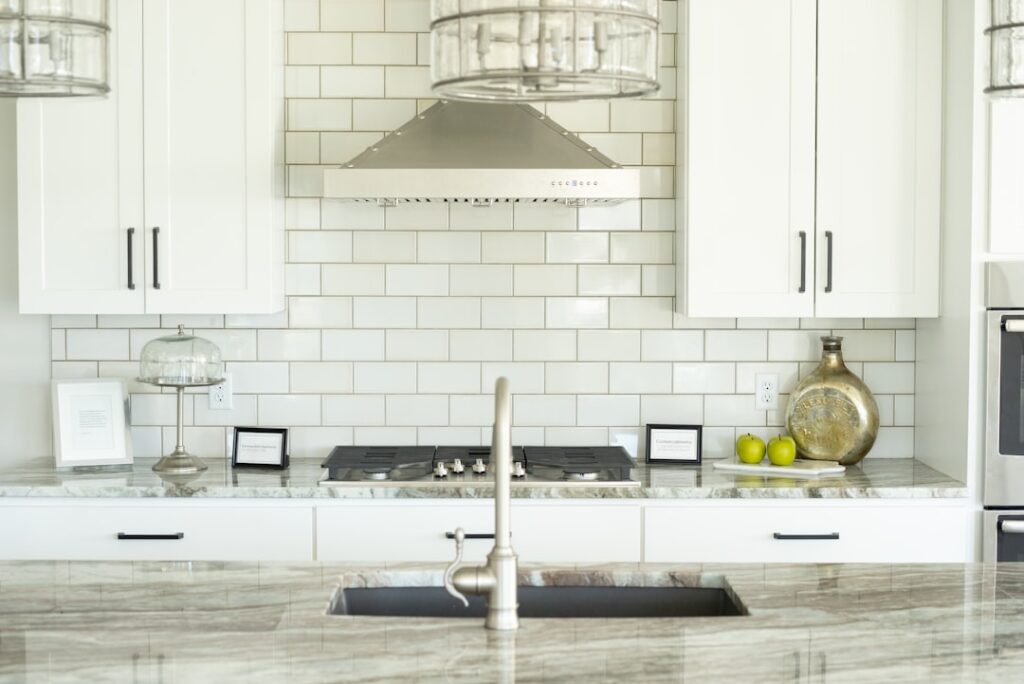
Versatility is this tile’s strongest selling point. In the kitchen, it makes a warm, classic backsplash that pairs with everything from white shaker cabinets to deep navy or sage green. The cream tone keeps the space from feeling sterile while still bouncing light around.
In bathrooms, it shines as a full shower surround, a wainscot-height accent, or a vanity backsplash. The warm neutral plays well with marble-look countertops, wood vanities, and matte black fixtures. Beyond wet zones, cream subway tile also works as a fireplace surround or a laundry-room accent wall, anywhere you want subtle texture without bold color.
Cost and Budgeting
Pricing varies with material quality and finish, so treat these as planning estimates rather than firm quotes. Basic ceramic cream subway tile often runs roughly $2 to $7 per square foot for materials, while handmade or porcelain versions can climb to $10 to $20 per square foot or more.
Installation labor typically adds another $7 to $14 per square foot depending on the pattern complexity and your region. Herringbone and other intricate layouts cost more because they take longer and waste more tile. Do not forget the supporting materials: thinset mortar, grout, spacers, sealer, and edge trim or bullnose pieces all add to the total. Budgeting an extra 10 to 15 percent for overage and incidentals keeps the project on track.
Pairing Cream Tile With Your Palette
Because cream is a warm neutral, it plays nicely with a remarkably wide range of colors. The trick is deciding whether you want the tile to recede into the background or contribute warmth to the overall scheme.
For a soft, monochromatic kitchen, pair cream tile with off-white cabinetry and a light quartz counter; the subtle tonal shifts keep the space from feeling flat. To create contrast, set cream against deep cabinet colors like forest green, charcoal, or navy, where the tile reads as a bright, warm counterpoint. Brass and unlacquered gold fixtures glow against cream, while matte black hardware delivers a crisp, modern edge. Natural wood open shelving reinforces the organic warmth, and a marble-look counter ties the whole story together. Because cream leans warm, avoid pairing it with very cool blue-grays, which can make the ivory look slightly yellow by comparison.
Installation Tips for a Clean Result
A flawless tile job comes down to preparation and patience. Start with a flat, clean, and properly waterproofed substrate, especially in showers where cement board and a waterproof membrane are essential.
- Dry-lay a section first to confirm your pattern and plan cuts at the edges.
- Use consistent spacers so grout lines stay uniform; 1/16 to 1/8 inch is common for subway tile.
- Spread thinset with a notched trowel and back-butter tiles in wet areas for full coverage.
- Check frequently for lippage, where one tile edge sits higher than its neighbor.
- Let the thinset cure before grouting, then seal cementitious grout once it has fully set.
If you are comfortable with tools and tackling a modest backsplash, this is a realistic DIY project. For a full shower surround or a complex herringbone wall, hiring an experienced tile setter is money well spent. Either way, cream subway tile rewards careful work with a finish that stays handsome for decades.
Prefer to explore on your own?
See how new flooring looks in your actual room in seconds — free, no signup.
Try the free Floor Studio →