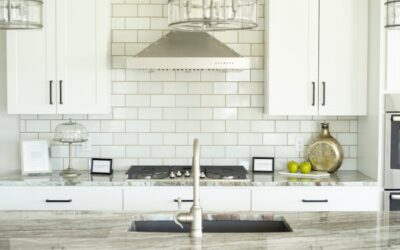
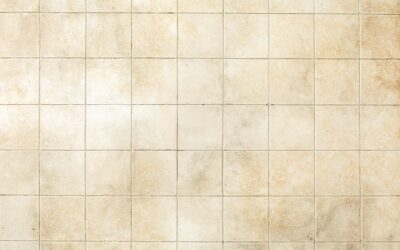
White subway tile has ruled kitchens for over a decade, but a growing number of homeowners are reaching for something softer. A cream subway tile backsplash delivers the same timeless rectangular geometry while trading crisp, clinical white for a warm, inviting off-white that flatters wood cabinets, brass hardware, and natural stone. It is the difference between a kitchen that feels sterile and one that feels like home. This guide covers the design choices, grout pairings, cost, and installation know-how to help you get the look right.
Part of our Kitchen Remodeling guide — explore the full guide →
- Why Cream Instead of White
- Choosing the Right Cream Shade
- Grout Color Makes or Breaks the Look
- Layout Patterns to Consider
- What a Cream Subway Backsplash Costs
- Installing a Cream Subway Backsplash
- Pairing Cream Tile With Your Kitchen
- Ceramic vs. Porcelain vs. Glass Cream Tile
- Caring for a Cream Backsplash
- Frequently Asked Questions
Why Cream Instead of White
Pure white tile is bright and clean, but it can read cold under LED lighting and clash with warm-toned countertops or flooring. Cream tile carries a hint of yellow, beige, or ivory that harmonizes with the warm palette most kitchens already lean toward.
Cream also hides everyday life better. Light splatter, faint water spots, and the occasional smudge disappear against an off-white surface where they would jump out against stark white. For a hardworking backsplash behind a stove or sink, that forgiveness is a real practical benefit alongside the softer aesthetic.
Choosing the Right Cream Shade
Not all cream tiles are equal. The undertone determines what the tile pairs with, so hold samples against your cabinets and counters before buying.
- Warm ivory: A yellow-leaning cream that glows against espresso and cherry cabinets.
- Greige cream: A cream with a gray undertone that bridges warm and cool palettes and suits transitional kitchens.
- Antique or almond: A deeper, slightly tan cream that adds a vintage, farmhouse feel.
- Glossy vs. matte: Glossy cream reflects light and feels traditional; matte or handmade-look cream feels artisanal and current.
Handmade and hand-glazed ceramic tiles show subtle color variation and slight surface irregularity, which many homeowners love for the depth and character it brings. If you want perfect uniformity, choose a machine-made ceramic or porcelain.
Grout Color Makes or Breaks the Look
Grout choice has as much impact as the tile itself. The contrast level sets the entire mood of the backsplash.
- Matching cream or beige grout: Creates a seamless, monolithic surface that feels calm and expansive — ideal for small kitchens.
- Warm gray grout: Adds gentle definition to each tile without harsh contrast, a popular balanced choice.
- White grout: Slightly brightens the joints; use carefully so it does not fight the cream tone.
- Dark taupe or greige grout: Emphasizes the brick pattern for a bold, structured look.
Whatever you choose, use a quality sanded or unsanded grout appropriate for your joint width, and seal it after curing. In a kitchen, an epoxy grout resists staining from grease and tomato splatter far better than standard cement grout, though it costs more and is harder to install.
Layout Patterns to Consider
The classic subway layout is a running bond with each row offset by half a tile, mimicking a brick wall. But cream tile opens the door to several other patterns:
- Running bond (50% offset): The traditional, universally flattering standard.
- One-third offset: A subtler stagger that looks more current and reduces the “lippage” problem long tiles can have.
- Stacked (grid): Tiles aligned in straight columns for a clean, modern look.
- Herringbone: A diagonal zigzag that adds movement and a designer touch, though it uses more tile and labor.
- Vertical stack: Turning tiles on end to draw the eye up and make ceilings feel taller.
What a Cream Subway Backsplash Costs
Backsplash tile is one of the more affordable kitchen upgrades. Here is a realistic budget breakdown for an average 30-square-foot backsplash:
- Ceramic cream tile: $2 to $8 per square foot
- Handmade or specialty ceramic: $10 to $25 per square foot
- Thinset, grout, and supplies: $50 to $100 total
- Professional installation: $10 to $20 per square foot in labor
A DIY installation of standard ceramic tile might run $150 to $300 in materials for a small kitchen, while hiring a pro for the same space typically lands between $600 and $1,200 all in. Herringbone and specialty tiles push the higher end.
Installing a Cream Subway Backsplash
Tiling a backsplash is one of the most achievable DIY tile projects because the vertical surface is small and forgiving. The basic sequence:
- Prep the wall. Clean it, patch holes, and lightly sand glossy paint so thinset bonds.
- Find your center. Mark a level starting line; work outward so cut tiles fall at the edges, not the focal point.
- Apply thinset with a notched trowel, working in small sections so it does not skin over.
- Set tiles using spacers for consistent joints; check level frequently.
- Cut around outlets and edges with a wet saw or a snap cutter and nippers.
- Let it cure 24 hours, then grout, wipe with a damp sponge, and haze off after it hazes.
- Seal the grout once it fully cures, usually after 48 to 72 hours.
Pairing Cream Tile With Your Kitchen
Cream tile is remarkably versatile. Against white or cream cabinets, it creates a soft, monochromatic layered look. Against navy, sage, or forest-green cabinets, it provides a warm neutral backdrop that lets the color shine. With natural wood cabinetry, cream echoes the organic warmth for a cohesive farmhouse or Scandinavian feel. Brass, gold, and unlacquered bronze fixtures look especially rich against cream, while matte black hardware adds crisp contrast.
Ceramic vs. Porcelain vs. Glass Cream Tile
Cream subway tile comes in several materials, and the choice affects both durability and price. Standard glazed ceramic is the most common and affordable, easy to cut and install, and perfectly suited to a low-impact backsplash. Porcelain is denser and more water-resistant than ceramic, a good upgrade if you want extra durability, though it is slightly harder to cut. Glass subway tile in cream tones adds a luminous, reflective quality that brightens a kitchen and resists staining completely, but it costs more and requires careful installation to avoid visible thinset behind the translucent tile.
For most kitchen backsplashes, glazed ceramic offers the best balance of cost, appearance, and ease of installation. Reserve porcelain for spaces that see heavy use and glass for when you specifically want that light-catching sheen. Whatever material you choose, confirm it is rated for wall use rather than floor use, since backsplash tiles do not need the abrasion resistance of flooring.
Caring for a Cream Backsplash
Keeping a cream backsplash looking fresh is simple with the right habits. Wipe the tile down regularly with a soft cloth and a mild dish-soap solution to remove grease and cooking splatter before it sets. Avoid abrasive scrubbers and harsh acidic cleaners, which can dull the glaze over time. The grout lines need the most attention — reseal cement grout once a year to keep it stain-resistant, and clean any discoloration promptly with a gentle grout cleaner or a baking-soda paste. If you chose epoxy grout, maintenance is even easier since it resists staining without sealing. With minimal care, a cream backsplash keeps its warm, inviting glow for the life of your kitchen.
Frequently Asked Questions
Does cream subway tile look dated?
No. Because subway tile is a century-old classic and cream is a warm neutral, the combination reads as timeless rather than trendy. It sidesteps the slightly clinical feel that some find in stark white.
Will cream tile yellow over time?
Quality glazed ceramic and porcelain tiles are color-stable and will not yellow. The glaze is fired glass, impervious to sunlight and cleaning products. Only the grout may discolor if left unsealed, which sealing prevents.
What countertop goes with cream backsplash?
Cream pairs beautifully with warm-veined quartz, butcher block, honed marble, and beige or brown granite. It also softens the look of a bold black or dark quartz counter, keeping the space from feeling heavy.
A cream subway tile backsplash gives you all the enduring appeal of the subway format with an added layer of warmth and forgiveness. Nail the shade, grout, and layout, and you will have a backsplash that feels both classic and quietly current for years to come.
Prefer to explore on your own?
See how new flooring looks in your actual room in seconds — free, no signup.
Try the free Floor Studio →