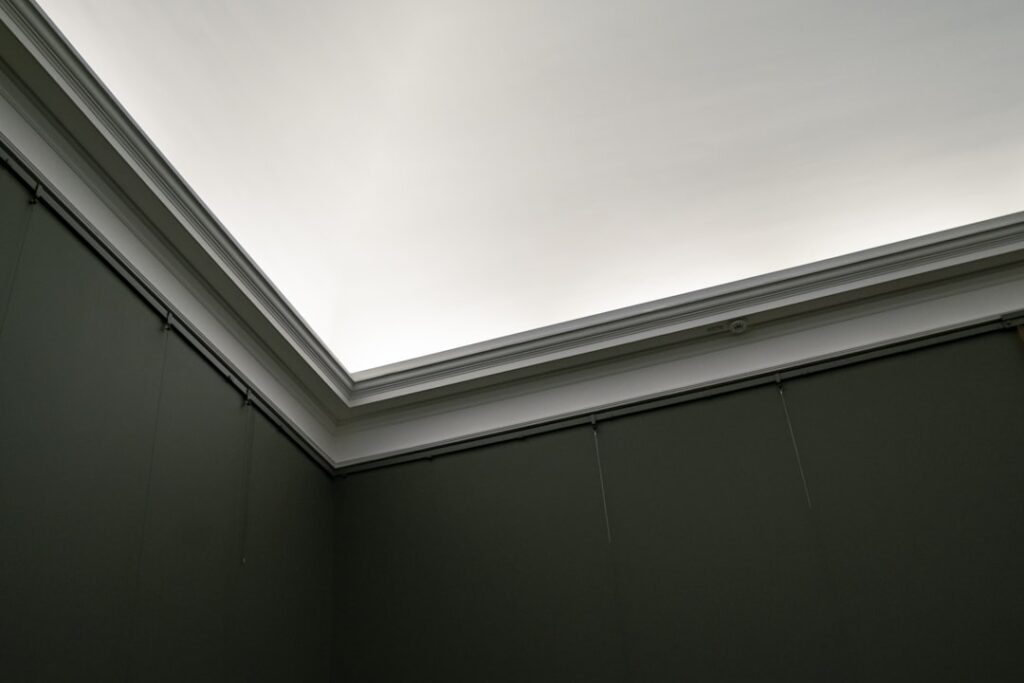
There’s a reason upscale hotels and custom homes bathe their ceilings in a soft, sourceless glow—it makes a room feel warm, layered, and expensive. You can achieve the same effect with crown molding lighting, tucking LED strips behind or above your crown molding so light washes gently across the ceiling with no visible fixture. It’s one of the highest-impact, lowest-cost upgrades a homeowner can make, and much of it is DIY-friendly. This guide covers the design options, the products you need, step-by-step installation, costs, and the mistakes that ruin the effect.
What Crown Molding Lighting Actually Does
Crown molding lighting is a form of indirect or cove lighting. Instead of a bright bulb shining down, an LED strip hidden behind the top edge of the molding throws light upward and outward onto the ceiling and wall. The molding conceals the strip so you see only the glow, not the source. This soft, ambient layer softens shadows, adds depth, and creates a relaxing mood you simply can’t get from overhead cans alone.
It works beautifully as accent and mood lighting in living rooms, bedrooms, dining rooms, home theaters, and tray ceilings, layered on top of your primary lighting.
Two Main Approaches
- Light on top of existing crown: If your crown molding is installed a few inches below the ceiling with a flat top ledge, you can lay an LED strip along that ledge so it uplights the ceiling. This is the simplest retrofit.
- Dedicated cove or lighting-ledge molding: Special crown profiles have a built-in channel or are mounted with a gap specifically to hold LED strips and hide them, sometimes called a “light tray” or cove. This gives the cleanest, most intentional glow but requires installing new molding.
Choosing the Right LED Strips
The LED strip is the heart of the system, and quality matters. Cheap strips produce uneven, dim, or oddly colored light that undermines the whole effect.
- Color temperature: Warm white (2700K–3000K) for cozy living spaces; neutral (3500K–4000K) for a cleaner look. RGB or RGBW strips let you change colors for entertaining.
- Brightness: Look for strips rated by lumens per foot; higher density LED strips (more LEDs per meter) give smoother, brighter light without visible dots.
- CRI: A color rendering index of 90 or above makes your room’s colors look natural.
- Dimmable: Choose dimmable strips and a compatible dimmer or smart controller so you can set the mood.
- Length and power supply: Measure your total run and buy a transformer (driver) rated for the wattage, with some headroom.
What You’ll Need
- LED strip lights (enough for the room perimeter plus extra)
- A low-voltage LED power supply/driver sized to the load
- A dimmer or smart controller and remote or app
- Aluminum mounting channel (optional, but improves heat dissipation and looks)
- Connectors, wire, and a way to reach a power source or outlet
Step-by-Step Installation
For a retrofit on top of existing crown, the process is straightforward and doesn’t usually require an electrician if you plug into an existing outlet.
- Clean the top ledge of the molding so the adhesive backing sticks well.
- Measure the run and cut the LED strip only at the marked cut points.
- Optionally mount an aluminum channel first, then seat the strip in it for a cleaner line and better heat management.
- Peel and stick the strip along the ledge, aiming the light up and out toward the ceiling and wall.
- Connect segments with solderless connectors around corners, avoiding sharp bends.
- Run the low-voltage wire to the power supply, hidden behind the molding or routed to a nearby outlet.
- Connect the driver and dimmer, plug in, and test the glow, adjusting the strip angle so no hotspots or dotting show.
For a brand-new cove installation, you’ll install the crown molding a few inches down from the ceiling on mounting blocks, leaving a channel for the strip—more carpentry, but a more polished result.
What It Costs
Crown molding lighting is remarkably affordable as a lighting upgrade. Quality LED strip kits with a driver and controller run about $30 to $100 for a typical room. Aluminum channels add $10 to $30. If you’re adding new crown molding to create a cove, factor in the molding and installation—$4 to $12 per linear foot for materials and labor. A full DIY retrofit of an average room often lands under $150, while a professionally installed cove-lit room with new molding might run several hundred to over a thousand dollars.
Design Tips for the Best Effect
- Keep at least a couple inches of gap between the strip and the ceiling so the light spreads into a smooth wash rather than a harsh line.
- Use warm white in bedrooms and living rooms for a relaxing feel.
- Put the lighting on a dimmer—full brightness is rarely the goal; a gentle glow is.
- Run the strip continuously around the room’s perimeter for even, wraparound light.
- In a tray ceiling, hide the strip in the tray’s recess for a floating-ceiling effect.
Best Rooms for Crown Molding Lighting
While you can add cove lighting almost anywhere with crown molding, certain rooms benefit most from the soft, indirect glow. Knowing where it pays off helps you prioritize.
- Living rooms: Layered ambient light for relaxing evenings, dimmed low behind the primary lighting.
- Bedrooms: A gentle, warm glow that’s easier on the eyes than overhead fixtures before sleep.
- Home theaters and media rooms: Just enough light to navigate without washing out the screen—perfect for movie nights.
- Dining rooms: A warm wash that complements a chandelier and sets a dinner-party mood.
- Tray ceilings and stairwells: The recess of a tray or the height of a stairwell showcases the floating-glow effect beautifully.
- Home offices: Reduces harsh contrast and screen glare during video calls.
In each of these spaces, the key is that the LED strip supplements rather than replaces your main lighting, adding a layer of atmosphere you can dial up or down to suit the moment.
Smart Controls and Color-Changing Options
Modern LED systems offer far more than a simple on-off switch, and the control layer is where crown molding lighting becomes genuinely fun to live with. Smart controllers let you operate the lights from your phone, pair them with voice assistants like Alexa or Google Home, and set schedules so the glow fades on at dusk automatically. This transforms the lighting from an occasional accent into an effortless part of your home’s daily rhythm.
Color-changing RGB and RGBW strips add another dimension. RGBW strips include a dedicated white channel alongside the red, green, and blue diodes, so you get both a clean, warm white for everyday relaxing and vivid colors for holidays, parties, or setting a mood. You can wash the ceiling in warm amber for a cozy evening, shift to cool blue for a movie, or program festive reds and greens for the holidays—all from an app. Tunable white strips, meanwhile, let you slide between warm and cool white to match the time of day, cooler and brighter in the daytime, warmer and softer at night. When choosing a controller, confirm it matches your strip type—a single-color dimmer won’t run RGBW strips—and check that it supports the smart-home platform you already use. With the right controller, a simple hidden LED strip becomes a flexible, programmable lighting feature that adapts to any occasion at the touch of a button.
Common Mistakes to Avoid
The number-one mistake is buying low-density, low-CRI strips that show individual dots and cast an unpleasant color—invest in quality LEDs. The second is placing the strip too close to the ceiling, which creates a harsh bright stripe instead of a soft wash. Third, undersizing the power supply causes voltage drop, making the far end of the run dimmer than the start; size the driver with headroom and feed power from both ends on long runs. Fourth, forgetting a dimmer leaves you stuck at full brightness. Fifth, sticking strips to a dusty or greasy surface causes the adhesive to peel; clean first or use channels. And sixth, running exposed low-voltage wire where it’s visible spoils the clean, hidden look.
With quality LED strips, a properly sized driver, a dimmer, and a little care in placement, crown molding lighting turns an ordinary ceiling into a warm, glowing focal point—an affordable, DIY-friendly upgrade that instantly makes a room feel custom, layered, and inviting.