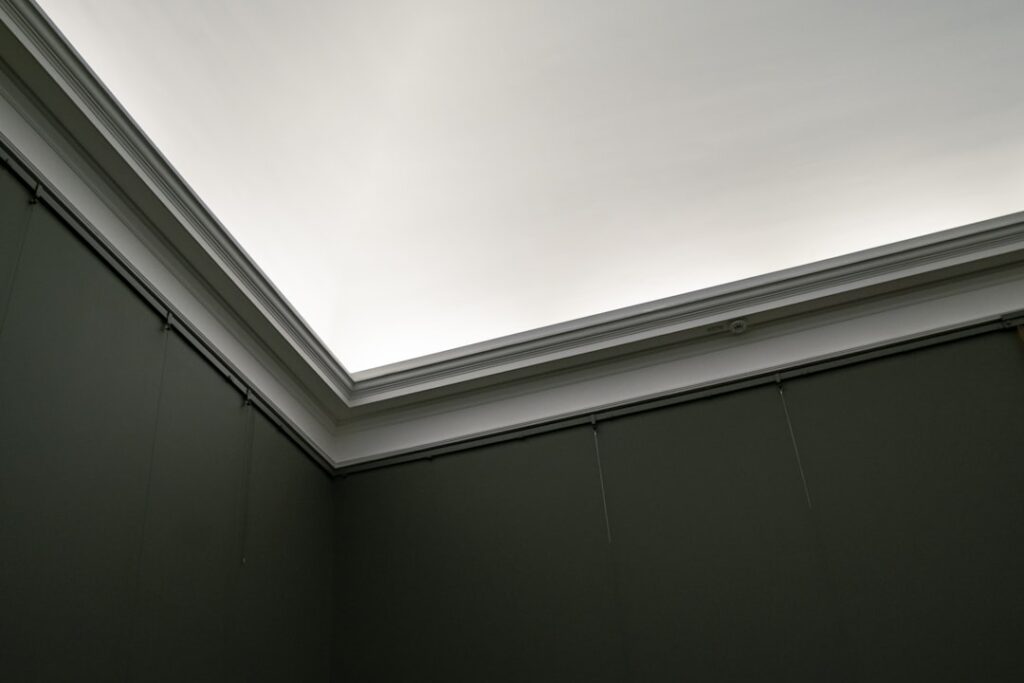
Crown molding with LED lights combines classic architectural detail with modern indirect lighting to create a warm, upscale glow that seems to float along the top of your walls. Instead of, or in addition to, harsh overhead fixtures, a hidden LED strip tucked behind or above the crown washes the ceiling with soft, even light, adding drama and a sense of luxury that makes a room feel custom and expensive. It is a favorite in home theaters, living rooms, tray ceilings, and primary bedrooms, and it is surprisingly achievable as a DIY project thanks to peel-and-stick LED strips and plug-in power supplies. This guide covers the design approaches, LED strip selection, real costs, a step-by-step installation overview, wiring basics, and the mistakes that make the effect look uneven or cheap.
How the Effect Works
The magic of lit crown molding is indirect (cove) lighting. The LED strip itself is hidden from view, mounted so its light bounces off the ceiling or wall rather than shining directly at you. Your eye sees the glowing ceiling and the softly outlined molding, not the bright diodes. This creates a gentle, ambient wash with no glare, which is why it reads as sophisticated rather than harsh. There are two common configurations:
- Crown mounted with a gap at the top: The molding is installed a few inches below the ceiling with the LED strip hidden on top of the molding, throwing light up onto the ceiling. This is the classic “floating ceiling” glow.
- Crown with a built-in channel: Special crown profiles or a small ledge hold the strip, directing light up and out.
Design Options and Where It Works
Lit crown works beautifully in specific settings:
- Tray and coffered ceilings: Uplighting the perimeter of a tray ceiling is a showstopper and one of the most popular applications.
- Home theaters and media rooms: Dimmable, color-changing LEDs set the mood and reduce screen glare.
- Living rooms and primary bedrooms: A warm perimeter glow adds ambiance for relaxing evenings.
- Kitchens and hallways: Subtle accent lighting that supplements task and overhead lights.
For the effect to work, you need enough gap (usually at least 3 to 4 inches) between the top of the molding and the ceiling so the light can spread; too tight a gap creates a harsh, concentrated line instead of a soft wash.
Choosing the Right LED Strip
The LED strip makes or breaks the result. Key specs to consider:
- Color temperature: Warm white (around 2700K to 3000K) gives a cozy, incandescent glow ideal for living spaces; cooler white (4000K+) feels more clinical. Many choose tunable or RGBW strips to adjust.
- Brightness (lumens per foot): For a smooth ceiling wash you want a reasonably bright, high-density strip. Cheap low-density strips create visible “dots” of light rather than a continuous line.
- LED density: More LEDs per foot (e.g., 60+ per meter) means smoother, dot-free light. This matters a lot for a clean look.
- CRI (Color Rendering Index): A CRI of 90+ renders wall and ceiling colors accurately; low-CRI strips can make colors look off.
- Dimmability and control: Dimmable strips with a remote, wall dimmer, or smart-home integration let you tune the mood.
What It Costs
Costs depend on whether you DIY and the quality of components:
- LED strip and power supply: $20 to $80 for a room’s worth of quality strip, transformer, and connectors.
- Crown molding materials: $1 to $6 per linear foot depending on material (foam, MDF, or wood).
- DIY total for a room: often $100 to $400.
- Professional installation: adds $500 to $2,000+ depending on molding type, ceiling complexity, and whether hardwired wiring is involved.
Using peel-and-stick LED strips and a plug-in transformer keeps it firmly in DIY territory; hardwiring to a switched circuit is where you may want an electrician.
Installation Step by Step
- Plan the layout. Decide where the molding sits relative to the ceiling and where the LED strip will hide. Measure the perimeter to size your strip and molding, and locate a nearby outlet or switch for power.
- Install the crown molding first, mounted with a consistent gap below the ceiling so the strip can uplight. Secure it to studs or top plates for real molding, or adhere lightweight foam molding.
- Test the LED strip before permanent mounting. Lay it out, connect the power supply, and confirm it lights evenly and is the right color and brightness.
- Mount the strip. Clean the top surface of the molding, peel the adhesive backing, and press the strip down along the length, keeping it consistently positioned so light hits the ceiling evenly. Use an aluminum channel with a diffuser for the cleanest, most even glow and better heat dissipation.
- Connect the wiring. Run the low-voltage leads to the transformer (power supply), plug in or hardwire, and route wires discreetly.
- Add controls. Wire in a dimmer, remote receiver, or smart controller so you can adjust brightness and, if applicable, color.
Wiring and Power Basics
Most residential LED strips run on low-voltage DC (commonly 12V or 24V) supplied by a transformer/driver that plugs into a standard outlet. Twenty-four-volt strips are better for long runs because they suffer less voltage drop, which is the dimming you see at the far end of a too-long low-voltage run. Size the power supply to the strip’s total wattage with some headroom, and do not exceed the maximum run length the manufacturer specifies without adding a power injection point. If you want the lights on a wall switch rather than a plug, an electrician can hardwire the driver to a switched circuit.
Common Mistakes to Avoid
- Too small a gap between molding and ceiling, producing a harsh light stripe instead of a soft wash.
- Low-density or cheap strips that show visible dots rather than a continuous glow.
- Wrong color temperature, picking a cool white that feels cold in a living space; warm white usually flatters interiors.
- Exceeding the maximum run length, causing noticeable dimming (voltage drop) at the far end.
- Skipping a diffuser channel, leaving hot spots and uneven light on the ceiling.
- Undersizing the power supply, which shortens its life and can cause flicker.
- Mounting the strip where it is visible, so you see glaring diodes instead of indirect light.
- Not planning for control, ending up with lights you cannot dim.
Smart Controls and Color-Changing Options
Modern LED strips open up control options that transform lit crown molding from a static feature into an adjustable mood tool. At the simplest level, a dimmer lets you dial the brightness from a bold accent to a barely-there nightlight glow. Stepping up, tunable white strips let you shift the color temperature from warm and cozy in the evening to cool and energizing during the day, matching the light to the time and activity. RGB and RGBW strips add full color, which is popular in home theaters, kids’ rooms, and entertaining spaces where you might want a soft blue for movie night or festive colors for a party, while the added white channel (the “W” in RGBW) still delivers a clean, usable white for everyday use.
Smart-home integration makes these features effortless. Wi-Fi or Zigbee LED controllers let you operate the lights from your phone, set schedules so the crown lighting fades on at sunset, or trigger scenes by voice through Amazon Alexa, Google Assistant, or Apple HomeKit. You can tie the lights into whole-home scenes, dimming them alongside other fixtures when you start a movie, for example. Popular ecosystems like Philips Hue offer plug-and-play lightstrips designed for exactly this kind of cove lighting, trading some cost for simplicity and reliability.
When choosing controls, match the controller to the strip type; an RGBW strip needs an RGBW-capable controller, and a tunable-white strip needs a controller with the right number of channels. Confirm the controller and power supply are rated for the total wattage of your run, and place the controller and transformer somewhere accessible for future service, such as inside an adjacent closet or above an access panel, rather than sealed permanently behind the molding.
Crown molding with LED lights is one of those upgrades that punches well above its cost, turning an ordinary room into something that feels designed and luxurious the moment you dim the overheads and let the ceiling glow. The keys to a professional result are simple: leave enough gap for the light to spread, choose a high-density, warm, high-CRI strip, hide it well in a diffuser channel, size the power supply correctly, and add a dimmer. Get those details right, and you will have a soft, floating halo of light that showcases your crown molding and makes the whole room feel warm, calm, and custom, every evening.