Cutting vinyl plank flooring is the single skill that decides whether a DIY install looks clean and professional or rough and amateur, and the good news is that the most common cut, a straight crosscut, can be done with nothing more than a utility knife and a straightedge, no power tools and no dust. That accessibility is a big reason vinyl plank dominates the DIY market. At D and G Flooring we walk readers through the techniques, and this guide covers the cutting methods, the right tool for each cut, the pros and cons of each approach, and practical tips for crisp edges.
The Score-and-Snap Method: Your Workhorse
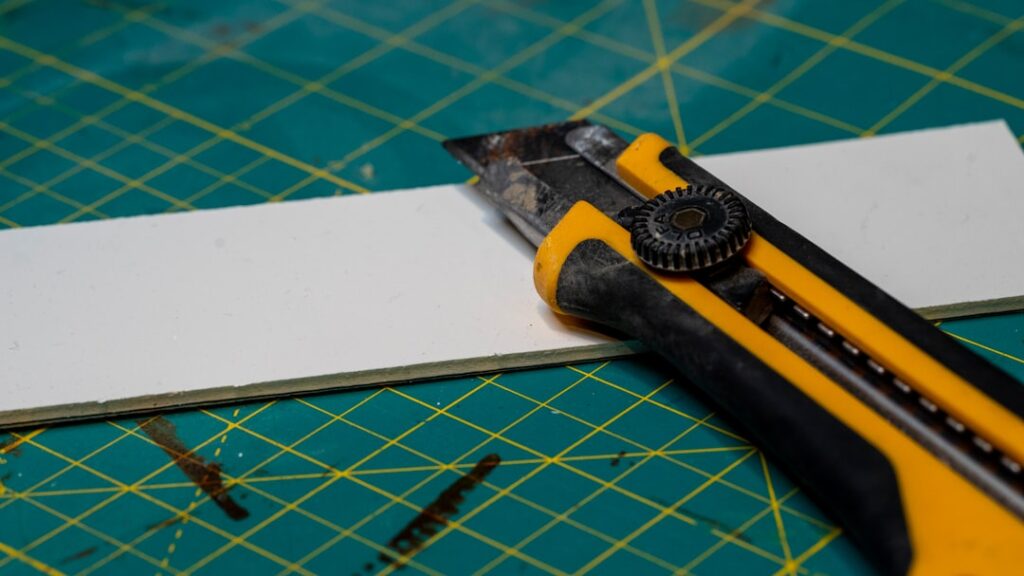
For straight crosscuts across the width of a plank, the score-and-snap method is fast, quiet, and dust-free. You mark the cut line, lay a straightedge or square along it, draw a sharp utility knife firmly across the surface two or three times to score the wear layer, then bend the plank away from the score line until it snaps cleanly. A final pass with the knife separates any backing. This works especially well on flexible and many rigid planks for cross cuts and is the method most homeowners use for the majority of cuts in a room.
- Pros: No power tools, no dust, quiet, inexpensive, fast for straight cuts, can be done in the room.
- Cons: Best for straight crosscuts, not curves or long rip cuts; very dense SPC planks can resist snapping cleanly; a dull blade tears the edge.
Power Tools for Tougher Cuts
Some cuts need a saw. Lengthwise rip cuts, very thick rigid SPC planks, and high-volume jobs are faster and cleaner with the right power tool.
- Jigsaw: The go-to for curves, notches around pipes, irregular shapes, and door casings. Use a fine-tooth blade and let the blade do the work to avoid melting or chipping.
- Miter saw (chop saw): Excellent for fast, accurate straight crosscuts and angle cuts, ideal when you have many planks to cut. Use a fine-tooth blade for clean edges.
- Table saw: Best for long rip cuts down the length of a plank, such as the final row against a wall. Requires care and a fine blade.
- Oscillating multi-tool: Perfect for undercutting door jambs and casings so planks slide underneath for a professional finish.
Power saws create dust and noise and call for eye and hearing protection, plus good ventilation, but they handle the cuts a utility knife cannot.
Specialty Cuts You Will Encounter
- Notch cuts around corners and cabinets: Measure carefully, mark the L-shape, and cut with a jigsaw or by scoring and snapping the two legs.
- Pipe and toilet flange holes: Mark the circle, drill a starter hole if needed, and cut with a jigsaw; some installers split the plank, cut a half-circle in each piece, and rejoin around the pipe.
- Door casing undercuts: Rather than cutting the plank to fit around the molding, undercut the casing itself with an oscillating tool so the plank slides beneath for a seamless look.
- Final-row rip cuts: Measure the gap to the wall minus the expansion gap, scribe if the wall is uneven, and rip the plank to width with a table saw or by scoring and snapping.
- Angle cuts: For diagonal layouts or angled walls, a miter saw set to the angle gives clean, repeatable results.
Choosing the Right Tool for the Cut
Match the tool to the task. Straight crosscuts across a plank go fastest with score-and-snap or a miter saw. Long rip cuts down a plank call for a table saw or careful scoring. Curves, circles, and notches require a jigsaw. Door jambs need an oscillating tool. For a small room with mostly straight cuts, a sharp utility knife, a square, and perhaps a jigsaw for a few notches may be all you need. For a large job or very thick SPC, investing in or renting a miter saw saves significant time and yields cleaner edges.
Pros and Cons by Approach
- Utility knife (score-and-snap): Cheapest and cleanest for straight cuts, no dust; limited to straight lines and struggles with very dense planks.
- Jigsaw: Versatile for curves and notches; creates dust and can chip or melt if the blade is wrong or pushed too fast.
- Miter saw: Fast, accurate straight and angle cuts; costs more, makes dust and noise, less portable around the room.
- Table saw: Best for rips; bulky, requires care, and produces dust.
- Vinyl plank cutter (guillotine-style): A dedicated lever cutter that shears planks cleanly with no dust or noise, great for straight cuts in volume; an extra tool to buy or rent and limited to straight lines.
Tips for Clean, Accurate Cuts
- Keep blades sharp. A dull utility knife or saw blade tears and chips edges; replace blades often.
- Measure twice, cut once. Most cut edges hide under baseboard or transitions, but accuracy still matters for tight seams.
- Cut face-up or face-down per the tool. Score-and-snap and many saws cut face-up; some saws chip less cutting face-down. Test on a scrap.
- Account for the expansion gap. When cutting the final row, subtract the required gap, usually about 1/4 inch, from the wall measurement.
- Scribe uneven walls. Trace the wall’s contour onto the plank for a tight fit where walls are not straight.
- Mind the print direction. Keep the visible side oriented correctly so cut planks blend into the pattern.
- Wear protection when using power tools, and keep the work area ventilated.
Common Mistakes to Avoid
- Forcing a dull blade: Leads to ragged, torn edges and uneven snaps.
- Pushing a jigsaw too fast: Heat builds and the vinyl melts or chips; let the blade cut at its own pace.
- Ignoring the expansion gap: Cutting final planks tight to the wall causes buckling later.
- Not testing on scrap: Different planks behave differently; a test cut prevents wasted boards.
- Sloppy notch measuring: Notches around cabinets and pipes are unforgiving; measure carefully.
Cost and Tool Investment
Cutting vinyl plank can cost almost nothing beyond a utility knife and blades, which is part of the appeal. Adding a jigsaw covers nearly every special cut at modest cost, and a miter saw or dedicated vinyl cutter speeds large jobs but adds expense, though both can often be rented. Compared with the flooring itself, commonly around $2 to $5 per square foot, the cutting tools are a small investment, and the right ones pay for themselves in clean edges and saved time. Buy about 10 percent extra flooring to absorb cutting mistakes and offcuts.
The Bottom Line
Cutting vinyl plank flooring is approachable: a sharp utility knife and a straightedge handle most straight cuts with no dust, while a jigsaw covers curves and notches and an oscillating tool undercuts door jambs for a pro finish. Match the tool to the cut, keep blades sharp, always subtract the expansion gap on final rows, and test on scrap before committing. With these techniques you can achieve tight seams and clean edges throughout the room. The team at D and G Flooring is glad to help you plan your cuts and choose the right tools for your project.
Prefer to explore on your own?
See how new flooring looks in your actual room in seconds — free, no signup.
Try the free Floor Studio →