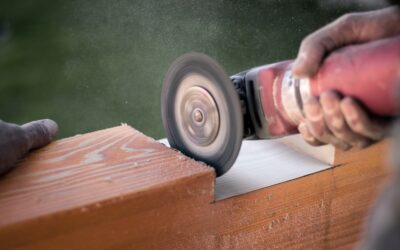
Vinyl siding is one of the most forgiving materials to install, but cutting it cleanly is where beginners struggle, especially in cold weather when the plastic turns brittle. The best way to cut vinyl siding actually depends on the type of cut you are making: long lengthwise rips, crosscuts across a panel, and small notches around windows each call for a different tool and technique. Get the method right and you produce crisp, professional edges; get it wrong and you crack panels, chip corners, or leave ragged lines that show. This guide covers the tools, techniques, weather considerations, and mistakes for every kind of vinyl siding cut.
- Understanding Vinyl's Quirks
- The Three Types of Cuts and the Best Tool for Each
- Method 1: Circular Saw (Fast Crosscuts)
- Method 2: Utility Knife (Score and Snap)
- Method 3: Tin Snips or Aviation Snips (Curves and Notches)
- Cutting Vinyl Siding in Cold Weather
- Safety and Setup
- Common Mistakes to Avoid
- Choosing the Right Method for Your Project
- Cutting Around Windows, Doors, and Fixtures
- Maintaining Your Cutting Tools
Understanding Vinyl’s Quirks
Vinyl siding is a PVC plastic, and its behavior changes with temperature. In warm weather it is flexible and cuts easily, but in cold weather it becomes stiff and brittle, and an aggressive cut can shatter it. Vinyl also expands and contracts significantly with temperature, which affects installation more than cutting, but it is a reminder to handle panels gently in the cold. The goal in every cut is a clean edge without cracking, melting, or chipping, and the right tool for the job makes that easy.
The Three Types of Cuts and the Best Tool for Each
- Crosscuts (across the panel): These are the most common cuts, trimming panels to length. A circular saw with a fine-tooth blade installed backward is the go-to for fast, clean crosscuts, or tin snips and a utility knife for a quieter approach.
- Lengthwise rips (along the panel): To trim a panel narrower along its length, a utility knife scored and snapped works well, and tin snips or aviation snips handle curves and the nailing hem.
- Notches and detail cuts: Around windows, outlets, and fixtures, tin snips or a utility knife give the control you need for precise notching.
Method 1: Circular Saw (Fast Crosscuts)
For cutting many panels to length quickly, a circular saw is the fastest method, but there is a professional trick: install the fine-tooth plywood or siding blade backward, so the teeth face the opposite of the normal rotation. Running the blade in reverse lets it shave through the vinyl smoothly instead of grabbing and cracking it. Use a blade with many fine teeth, cut slowly, and support the panel on a flat surface. This method is ideal in moderate to warm temperatures and less suited to very cold days when vinyl is brittle. Always wear eye protection because the saw throws small plastic chips.
Method 2: Utility Knife (Score and Snap)
For clean straight cuts without any power tools, the score-and-snap method is excellent, especially for lengthwise rips. Lay the panel on a flat surface, use a straightedge, and run a sharp utility knife firmly along the cut line to score the vinyl. You do not need to cut all the way through; one or two firm passes scoring the surface is enough. Then bend the panel back and forth along the score line and it snaps cleanly. This is quiet, dust-free, and produces a straight edge, though it is slower for high volumes and works best on straight lines rather than curves.
Method 3: Tin Snips or Aviation Snips (Curves and Notches)
For notching around windows, cutting curves, trimming the nailing hem, and any detail work, tin snips (or aviation snips) give the most control. They cut vinyl like heavy scissors, letting you follow a marked line precisely around obstacles. Take short, full strokes rather than closing the snips all the way, which can leave a jagged tab at the end of each stroke. Snips are the best all-around hand tool for the fiddly cuts that define a professional-looking siding job around openings.
Cutting Vinyl Siding in Cold Weather
Cold is vinyl’s enemy for cutting. When temperatures drop below about 40 degrees Fahrenheit, vinyl becomes brittle and prone to cracking, particularly with a circular saw. Strategies for cold-weather cutting:
- Favor hand tools like snips and the score-and-snap method, which stress the material less than a spinning blade.
- Bring panels indoors or into a heated space to warm up before cutting when possible.
- Cut slowly and support the panel fully so it cannot flex and crack.
- Leave slightly larger expansion gaps, since installed vinyl will expand as it warms.
Safety and Setup
Whichever method you use, work safely. Wear safety glasses because vinyl chips fly, especially with a saw. Use gloves to protect against sharp cut edges. Set up a stable cutting station, such as a pair of sawhorses with a flat surface, so panels are fully supported. Keep blades and knife edges sharp; a dull blade tears and chips vinyl instead of cutting it cleanly. Clear cut debris regularly so it does not become a slip or trip hazard.
Common Mistakes to Avoid
- Using a standard saw blade forward. A normal blade running the usual direction grabs and cracks vinyl. Reverse a fine-tooth blade for clean saw cuts.
- Forcing the cut. Pushing a saw or snips too fast chips and cracks the edge. Let the tool do the work slowly.
- Cutting cold vinyl with power tools. Brittle cold panels shatter. Warm them or switch to hand methods.
- Dull utility knife. A worn blade requires multiple ragged passes. Snap in a fresh blade often.
- Not supporting the panel. An unsupported panel flexes and breaks. Fully support it on a flat surface.
- Cutting expansion gaps too tight. Remember vinyl expands; leave the recommended gap at ends and around openings so panels can move without buckling.
Choosing the Right Method for Your Project
If you are re-siding a whole house and making dozens of crosscuts, a circular saw with a reversed fine-tooth blade saves enormous time. If you are patching a few panels or working quietly on a weekend, the utility knife score-and-snap approach needs no power and leaves clean edges. For every job, keep a pair of tin snips handy for the notches and curves around windows, doors, and fixtures, because no straight-cutting tool handles those details as well. Most professionals carry all three and switch between them constantly.
Cutting Around Windows, Doors, and Fixtures
The trickiest cuts on any siding job are the ones around openings and fixtures, and they reward patience. To notch a panel around a window, measure the horizontal and vertical dimensions of the cut carefully, marking the panel where it will sit, then use a utility knife to score the horizontal cut and tin snips to make the vertical cuts up to it, removing the waste piece. For outlets, hose bibs, and light fixtures, you will often need to cut a hole or a notch in the middle of a panel; a combination of a drill to start the hole and snips or a knife to finish works well. Always dry-fit the panel before nailing to confirm the notch clears the obstruction with the small expansion gap the manufacturer recommends. Leaving that gap around openings is essential, because vinyl expands and contracts with temperature, and a panel cut too tight will buckle in summer heat or pull apart in winter cold. Take your time on these detail cuts, since they are the ones most visible from the ground.
Maintaining Your Cutting Tools
Clean, sharp tools are the unsung secret to good vinyl cuts. A utility knife should get a fresh blade often, because a dull blade tears and drags rather than scoring cleanly, forcing multiple ragged passes. Keep spare blades in your pocket and swap them the moment cutting feels harder. Tin snips should be kept clean and occasionally oiled at the pivot so they cut smoothly without crushing the vinyl edge; if the snips leave a jagged tab at the end of each stroke, you are closing them too far, so use full but not complete strokes. Circular saw blades for vinyl should be fine-toothed and free of pitch buildup, since a gummed-up blade grabs and cracks panels. Wiping the blade with a resin remover keeps it cutting cleanly. Storing tools dry prevents rust that dulls edges. A few minutes of tool maintenance before and during the job pays off in cleaner cuts, less wasted material, and a more professional-looking finished wall.
The best way to cut vinyl siding is really about matching the tool to the cut: a reversed-blade circular saw for fast crosscuts, a utility knife for straight rips, and tin snips for curves and notches, all adjusted for temperature. Keep your blades sharp, support the panels, respect the cold, and wear eye protection, and you will produce the crisp, professional edges that make a vinyl siding installation look clean from top to bottom.