Concrete floors do not have to be gray and boring. Decorative floor epoxy transforms plain slabs into striking, seamless, high-gloss surfaces that rival the look of polished stone, marble, or custom terrazzo, all while delivering the toughness that makes epoxy a favorite for garages, basements, showrooms, and even modern living spaces. From swirling metallic finishes to colorful flake blends, decorative epoxy has moved well beyond the utilitarian gray coating and become a genuine design choice. This guide covers the popular styles, how they are applied, what they cost, and how to keep them looking sharp for years.
Part of our Epoxy, Concrete & Garage Floors guide — explore the full guide →
Whether you want a showpiece garage floor, a durable basement makeover, or an eye-catching commercial entrance, understanding your options helps you pick the right system and set realistic expectations.
What Is Decorative Floor Epoxy
Epoxy flooring is a two-part system, a resin and a hardener, that chemically cure into a hard, thick, plastic-like surface bonded to concrete. Standard epoxy is a solid color; decorative epoxy adds visual interest through pigments, metallic powders, color flakes, quartz aggregate, or embedded designs, then seals everything under a clear protective topcoat. The result is a floor that is simultaneously beautiful and extremely durable, resistant to stains, chemicals, abrasion, and impact.
Because the finish is seamless and nonporous, it wipes clean easily, resists moisture, and has no grout lines or seams where dirt collects. That combination of looks and performance is why decorative epoxy has spread from commercial settings into homes.
Popular Decorative Epoxy Styles
The style you choose sets the entire character of the floor. These are the most popular options:
Metallic Epoxy
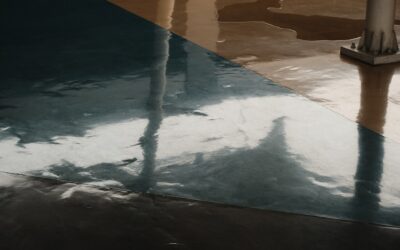
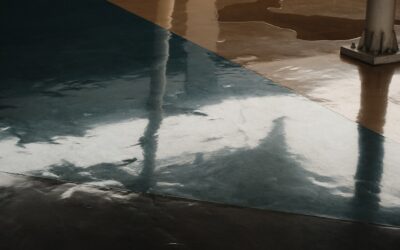
The showstopper of the category, metallic epoxy uses reflective metallic pigments suspended in clear resin that are manipulated during application to create flowing, three-dimensional effects resembling lava, marble, water, or clouds. No two floors are ever identical. Metallic finishes deliver a dramatic, high-end look ideal for showrooms, basements, retail spaces, and statement garages.
Flake (Chip) Epoxy
Also called broadcast flake systems, these scatter colored vinyl chips across a base coat, then seal them under a clear topcoat. The flakes add texture, hide minor imperfections, provide subtle slip resistance, and let you customize the color blend. This is the classic speckled garage floor look, versatile and forgiving, and one of the most popular residential choices.
Quartz Epoxy
Quartz systems broadcast colored quartz sand aggregate into the epoxy for a durable, slip-resistant, textured surface. They are exceptionally tough and hygienic, making them common in commercial kitchens, locker rooms, and other heavy-duty or wet environments, though they work in homes too where extra grip is wanted.
Epoxy Terrazzo
For a high-end, custom look, epoxy terrazzo embeds marble, glass, or stone chips into the resin, which is then ground and polished smooth to reveal a classic terrazzo aesthetic. It is a premium option seen in upscale commercial buildings and design-forward homes.
Where Decorative Epoxy Works Best
Decorative epoxy suits a wide range of spaces thanks to its durability and easy maintenance. Common applications include:
- Garages: The most popular residential use, standing up to hot tires, oil, and heavy traffic while looking sharp.
- Basements: A durable, moisture-resistant, attractive finish for finished or utility basements.
- Showrooms and retail: Metallic and high-gloss floors that impress customers.
- Kitchens and living areas: Increasingly used in modern homes for a seamless, industrial-chic look.
- Commercial and industrial spaces: Warehouses, restaurants, and clinics where hygiene and toughness matter.
The Application Process
Decorative epoxy is only as good as its preparation and application, and both take skill, especially for metallic finishes. The general process runs as follows:
- Surface prep: The concrete is cleaned, repaired, and mechanically ground or shot-blasted to open the pores and create the profile epoxy needs to bond. This step is the single biggest determinant of durability.
- Primer coat: A primer seals the concrete and promotes adhesion.
- Base and decorative coat: The colored base goes down; for metallic, pigments are added and manipulated with tools and torches to create the pattern, while flake or quartz systems broadcast the media into the wet coat.
- Clear topcoat: One or more clear coats of epoxy or polyurethane/polyaspartic seal and protect the design and provide the final gloss or matte finish.
Each coat must cure before the next, and the whole system typically needs several days of cure time before heavy use, up to a week before parking vehicles or placing heavy loads. Metallic finishes in particular are difficult to master, so many homeowners hire professionals for those, while flake kits are more DIY-friendly.
What Decorative Floor Epoxy Costs
Pricing depends heavily on the system and whether you DIY or hire out. As a rough guide:
- DIY flake kits: $100 to $600 for a two-car garage in materials
- Professional flake systems: $3 to $7 per square foot installed
- Metallic epoxy (professional): $7 to $15 per square foot due to the artistry involved
- Quartz systems: $5 to $12 per square foot installed
- Epoxy terrazzo: $15 to $30+ per square foot, a premium finish
While professional metallic and terrazzo floors cost more, they deliver a custom look that is essentially impossible to replicate cheaply, and the durability means you are unlikely to redo the floor for many years.
DIY vs. Hiring a Professional
Whether to tackle decorative epoxy yourself depends heavily on the style you want and your comfort with the process. Flake systems are the most DIY-friendly, and kits sold for garage floors walk homeowners through prep, base coat, broadcasting the chips, and sealing. A patient weekend warrior with good prep discipline can get a genuinely attractive, durable flake floor this way. The critical caveat is that DIY success lives or dies on surface preparation; renting a concrete grinder and taking the time to profile the slab properly is what separates a floor that lasts from one that peels.
Metallic and terrazzo finishes are a different matter. Metallic epoxy in particular is as much art as installation, requiring the installer to work quickly, manipulating pigments with rollers, brushes, and sometimes a torch to create the flowing patterns before the resin sets. There are no do-overs once it cures, and the short working time leaves little margin for a first-timer. Most homeowners who want a metallic or terrazzo floor are better served hiring an experienced installer, whose skill with the material is exactly what you are paying for. If you love the metallic look but want to keep costs down, a professionally installed metallic floor in a single key room, paired with DIY flake floors elsewhere, can be a smart compromise.
Understanding Cure Times and Downtime
One practical factor people underestimate is how long the floor is out of commission during and after installation. Epoxy cures in stages, and rushing back into service is a common way to ruin an otherwise good floor. Each coat, primer, base, decorative, and clear topcoat, must cure before the next goes down, so a multi-coat decorative system typically spans two to four days of work with drying time between steps. Temperature and humidity affect how fast each coat sets, and cold conditions slow curing considerably.
After the final coat, plan on roughly 24 hours before light foot traffic, several days before moving furniture back in, and up to a full week before parking vehicles or subjecting the floor to heavy loads. Putting a car on the floor too early, or dragging heavy equipment across a coating that has not fully hardened, can gouge or lift it. This downtime is worth building into your project timeline, especially for a garage or a room you use daily. The reward for that patience is a fully cured, rock-hard surface that shrugs off the wear that would destroy paint or bare concrete, which is exactly what makes decorative epoxy such a durable long-term choice.
Maintenance and Longevity
One of decorative epoxy’s biggest selling points is how easy it is to live with. Sweep or dust-mop regularly, damp-mop with a mild cleaner, and wipe spills promptly, and the seamless surface stays looking new. Avoid harsh solvents and dragging sharp metal objects that could scratch the topcoat. Place mats under vehicle tires if hot tire pickup is a concern in a garage. A quality professionally installed epoxy floor can last 10 to 20 years, and refreshing the clear topcoat every several years in high-traffic areas restores the gloss. With good prep and proper care, decorative floor epoxy gives you a floor that is as tough as it is beautiful, well worth the investment for anyone who wants concrete that looks like a design feature rather than a foundation.
Prefer to explore on your own?
See how new flooring looks in your actual room in seconds — free, no signup.
Try the free Floor Studio →