Few upgrades give you as much visual payoff for as little money as swapping out builder-grade plastic plates. Decorative light switch covers turn the one thing your hand touches in every room from an afterthought into a finish detail—matched to your hardware, your metals, and your trim. This guide covers the materials, the sizing traps that trip people up, and a safe, five-minute swap that anyone can do.
Why the Cover Plate Matters More Than You Think
A switch plate sits at eye level next to every door, and there’s usually one in your peripheral vision the whole time you’re in a room. Cheap plates yellow, crack, and go slightly crooked over the years. Upgrading them ties a room together the same way cabinet hardware or a light fixture does—it’s the kind of small detail people feel without being able to name it. Because they’re inexpensive and the swap is quick, it’s one of the highest-return updates in the house.
Materials and Finishes
The material sets the whole character of the plate. The common options:
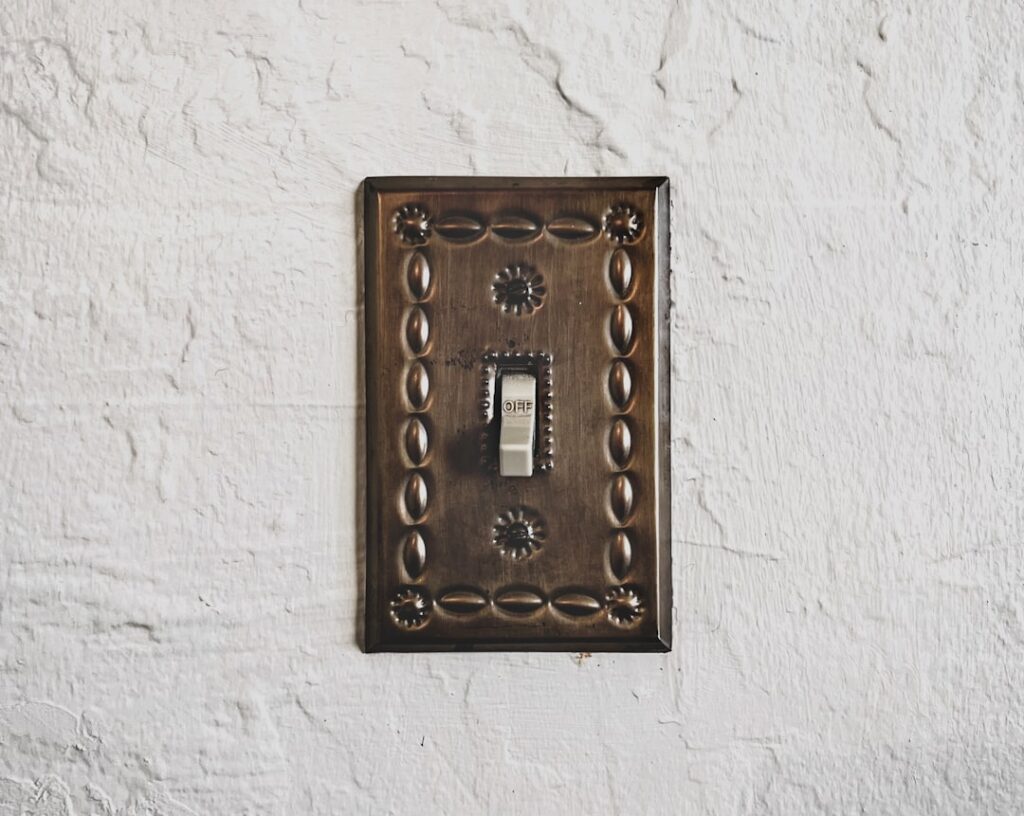
- Stamped metal (steel/aluminum) — affordable and available in brushed nickel, bronze, black, and painted finishes. The workhorse of decorative light switch covers.
- Solid brass and bronze — heavier, warmer, and ages beautifully; unlacquered brass develops a living patina.
- Cast metal with relief patterns — Victorian, Art Deco, and hammered designs for period homes.
- Wood and bamboo — warm and natural, great with wood trim and rustic interiors.
- Ceramic and porcelain — hand-painted or glazed, common in traditional and cottage styles.
- Glass and acrylic — mirrored, frosted, or clear for a light, modern feel.
- Screwless/flush plates — a two-piece plate that snaps over a subplate to hide the screws for a clean, modern face.
Match the finish to the room’s dominant metal—door levers, cabinet pulls, faucet. When your plates, hardware, and fixtures share a finish, the whole space reads intentional.
Getting the Size and Gang Count Right
This is where most orders go wrong. A “gang” is one opening. A single switch is one-gang; two switches side by side share a two-gang plate; three is three-gang, and so on up. Count the devices behind the existing plate before you buy.
- Standard size — a standard single-gang plate is about 2.75″ wide by 4.5″ tall. Most homes use standard.
- Oversized/jumbo — roughly 3.13″ by 4.88″, used to hide gaps, over-cut drywall, or paint lines from an old larger plate. Handy on remodels.
- Mid-size — a hair larger than standard, splitting the difference.
- Device type matters — toggle, rocker (decora), and combination openings are all different. A rocker dimmer needs a decora-style opening, not a toggle slot.
Measure the existing plate and note whether you have toggle switches, flat rocker paddles, or a mix, and whether any opening is actually an outlet. Buying the wrong gang count or opening style is the number one reason plates get returned.
Matching Covers to Your Room
- Modern/minimal — screwless flush plates in matte black or brushed nickel.
- Traditional — beveled solid brass or ceramic with subtle detail.
- Farmhouse/rustic — oil-rubbed bronze, hammered metal, or wood.
- Industrial — raw steel, galvanized, or exposed-screw metal plates.
- Period homes — cast relief patterns matched to the era.
Keep the finish consistent within a room, and ideally down a whole sightline of connected rooms, so nothing jumps out as mismatched.
Safely Swapping a Switch Plate
Replacing just the cover plate is one of the safest jobs in the house because you’re not touching wiring—only two screws hold the plate on. Still, treat it with respect, because the switch behind it is live.
- Turn the breaker off. Even for a plate swap, kill the breaker feeding that switch at the panel and tape it so no one flips it back. If you’ll ever remove the switch itself, this is mandatory.
- Verify it’s de-energized. Hold a non-contact voltage tester near the switch terminals to confirm the circuit is dead, then test it on a known-live outlet to prove the tester works.
- Remove the old plate. Back out the one or two cover screws and lift the plate straight off. Don’t let the screwdriver slip into the box.
- Check the fit. Set the new plate on and confirm the opening lines up with your toggle or rocker and the screw holes align.
- Mount the new cover. Start both screws by hand, then snug them gently—metal and especially ceramic or glass plates crack if you overtighten. For screwless plates, clip the subplate to the device, then snap the face on.
- Restore power and test. Flip the breaker back and confirm the switch works.
Buying Guide: What to Check Before You Order
A little planning saves a return trip. Before you buy, walk the house with a notepad and log a few things for each location:
- Gang count — how many devices share the plate (one, two, three, or more).
- Device type per opening — toggle switch, rocker/decora paddle, dimmer, or outlet. Mixed boxes are common, like a switch next to an outlet, and need a combination plate.
- Size — standard, mid-size, or oversized to cover old paint lines.
- Finish — matched to the room’s dominant metal so plates, hardware, and fixtures agree.
- Screw or screwless — whether you want visible screws or a clean flush face.
Buy a couple of spares in your chosen finish. Plates get discontinued, and a leftover means a cracked ceramic cover or a new outlet down the line still matches the rest of the room. If you’re doing a whole floor at once, count every device first and order in one go so the finish and casting are consistent batch to batch.
Cost and Value
Decorative light switch covers span a wide range, and the price mostly tracks the material. Stamped metal and painted plates run about $3-$8 each; solid brass, bronze, ceramic, and screwless flush plates land around $10-$30; hand-cast period and designer plates can run $30-$60 or more. Even at the high end, doing a whole room costs less than a single light fixture, and the effect touches every wall. For most homeowners, mid-grade metal or screwless plates hit the sweet spot—clearly better than builder plastic without a designer price tag. Because the swap is a five-minute job with no wiring, all of the value is in the part, not the labor.
Common Problems and Fixes
- Plate won’t sit flush — the switch is set too proud or the box is buried; loosen the device screws slightly or add spacers.
- Screw holes don’t line up — you have a non-standard device orientation; buy the matching toggle vs rocker plate.
- Gap around the plate — go oversized/jumbo to cover the old paint line or over-cut drywall.
- Cracked ceramic or glass — you overtightened; replace and snug screws just until they catch.
- Wobbly switch behind the plate — the device or box is loose, which is a separate fix best handled with the power off.
When to Call an Electrician
Swapping decorative light switch covers is firmly in DIY territory—it’s a plate and two screws. But if you pull a plate and find scorched or melted terminals, a warm switch, cloth or ungrounded wiring, aluminum branch wiring, or a device so loose the wires are exposed, stop and call a licensed electrician. Those are signs of a real problem behind the wall, not a cosmetic one. Likewise, if you want to replace the switch itself or add a dimmer, and you’re not fully comfortable working with live-capable wiring, hire a pro. The cover is cheap; a good electrician’s peace of mind is cheaper than a fire. For the plate alone, though, you can upgrade every switch in the house in an afternoon, and it’s the rare project where the result looks far more expensive than it was. Start with the rooms guests see most, dial in a finish you like, and work through the rest as time allows.