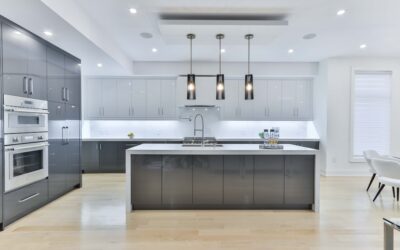
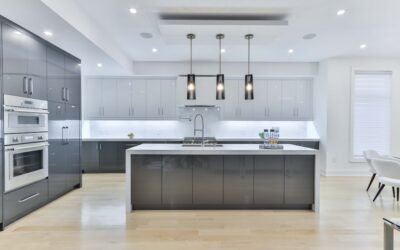
The single most important measurement in a kitchen remodel is also the one most contractors take for granted. The distance between upper and lower cabinets sets the height of every backsplash tile, the clearance for every small appliance, and the way the kitchen feels when you stand at the counter. The standard 18-inch gap is the right answer most of the time, but specific situations call for 19, 20, or even 24 inches of separation. Understanding when to follow the rule and when to break it is what separates a kitchen that flows from one that fights you every morning. This guide covers the standard, the exceptions, and the construction details that trip up DIY remodels.
Part of our Kitchen Remodeling guide — explore the full guide →
The Standard 18-Inch Rule
The kitchen design rule that has held since the 1950s sets 18 inches between the top of the base cabinet counter and the bottom of the wall cabinet. The math works because most countertops sit 36 inches off the finished floor, so an 18-inch gap puts the bottom of the wall cabinet at exactly 54 inches. With a standard 30-inch tall wall cabinet, the top lands at 84 inches, which leaves a clean 12-inch gap to an 8-foot ceiling for soffits or trim.
This standard works because the average reach for an adult is comfortable at 48 to 78 inches off the floor. The first wall cabinet shelf usually lands at 58 to 60 inches, which is easy to access without a step stool. Drop the cabinets too low and they bang into small appliances. Raise them too high and you cannot reach the top shelf without climbing.
When to Use 19 or 20 Inches
Three situations call for a slight increase above the 18-inch standard.
- Tall homeowners (6 feet or above): 20 inches feels more natural and reduces hunching while prepping
- KitchenAid or Vitamix mixer use: Tall stand mixers need 18.5 to 19 inches of vertical clearance
- Visible coffee bars or appliance garages: 19 to 20 inches creates a more elegant proportion when the space is on display
Going past 20 inches starts to look top-heavy and pushes the wall cabinets above comfortable reach. Stick within the 18 to 20-inch range unless you have a specific reason to go further.
When to Use 24 Inches or More
Larger gaps are appropriate over specific work zones. Over a cooktop or range, the bottom of the wall cabinet or microwave hood needs to be 24 to 30 inches above the cooking surface for fire safety. The exact distance varies by appliance brand and combustion type, but 30 inches is the universal minimum for over-the-range microwaves on gas ranges.
Over a kitchen sink, increasing the gap to 24 to 30 inches creates breathing room and opens up the window view if one exists. Many designers skip wall cabinets entirely above the sink for this reason. Other zones that justify a larger gap include a built-in coffee station with a tall espresso machine and an open shelf display area where the proportion benefits from more space.
How Backsplash Choice Affects the Math
The backsplash fills the entire vertical gap between counter and wall cabinet. Tile choice changes the look but rarely the measurement. A full-height tile backsplash at 18 inches works beautifully with 3×6 subway tile (six rows), 4×4 squares (4.5 rows, so half-cut top), or large-format 12×24 vertical slabs.
If you want a tile pattern to land on clean grout lines without cutting, adjust the gap before installation. Plan for tile dimensions plus grout joints in advance. A 4-inch hexagon tile with 1/8-inch grout joints reaches 16.625 inches in four rows or 20.78 inches in five rows. Choosing 20 inches instead of 18 lets the pattern run uncut from counter to cabinet.
The Stand Mixer Test
Any kitchen used for baking should pass the stand mixer test. Place a KitchenAid Pro 600 or similar at its tallest configuration with the bowl locked and the head tilted back fully. Measure from the counter to the highest point. Most stand mixers reach 17 to 18.5 inches in that position. With 18 inches of clearance, you have just barely enough room.
If you bake often or own a Bosch Universal Plus mixer (which reaches 17.5 inches with the bowl in place), planning the gap at 19 inches gives you working clearance to tilt the head fully without bumping the cabinet. The extra inch is invisible visually and saves countless small annoyances over the years.
How the Distance Affects Lighting
Under-cabinet lighting eats some of the available vertical space. A typical LED under-cabinet light strip is 1/2 to 5/8 inch thick. With an 18-inch gap, the effective open height drops to 17.4 inches. That still clears most small appliances but pinches a few tall ones. If you plan recessed under-cabinet lights with a 1-inch profile, account for it during the cabinet layout.
The light also defines how the backsplash reads. A warm 2700K to 3000K LED strip casts light down the backsplash and across the counter. A cool 4000K LED looks more clinical. Match the color temperature to the rest of the kitchen lighting to avoid a patchwork feel.
Common Mistakes to Avoid
Three errors come up over and over in DIY kitchen installs. Watch for them during planning.
- Forgetting to account for an undermount sink, which lowers the working counter height by 1/2 inch
- Setting wall cabinets before the countertop is templated, which locks the gap to a guessed dimension
- Skipping the appliance check on the existing or planned coffee maker, toaster oven, and air fryer
- Ignoring tile grout lines and ending up with awkward half-cut tile against the cabinet
- Leaving no clearance for under-cabinet outlets, which need at least 4 inches of mounting space
The fix for all of these is to mock up the wall with painter’s tape before the cabinets go up. Mark the counter line and the underside of the wall cabinet on the wall. Set every appliance on the counter and stand at the sink, the cooktop, and the prep area. Adjust the cabinet height before the install crew shows up.
ADA and Accessibility Versions
Universal design kitchens use slightly different measurements. ADA-compliant kitchens often set the upper cabinets at 15 inches above a 34-inch counter to bring the first shelf into reach for seated users. Pull-down shelf hardware from Rev-A-Shelf at $250 to $400 per cabinet brings the contents down to counter level with a gentle pull, which transforms a standard kitchen into an accessible one without changing the cabinet height.
For households planning to age in place, designing the kitchen with a 15-inch or 16-inch gap and pull-down hardware adds maybe $1,500 to the project but pays back for decades. It also looks identical to a standard kitchen from across the room.