A backyard fireplace can turn an ordinary patio into the favorite room of the house, but the gap between a Pinterest render and a structurally sound masonry build is wider than most weekend warriors expect. A well-planned diy outdoor fireplace runs $1,500 to $5,000 in materials, requires 60 to 100 hours of labor, and in most US jurisdictions needs a permit. Here is what actually goes into the project before you pour the first footing.
Part of our Windows & Doors guide — explore the full guide →
- Pick Your Build Method First
- Permits and Code Requirements
- Footing and Foundation Basics
- Materials for a Mid-Difficulty Build
- Firebox Construction
- Flue and Chimney Sizing
- Cladding and Finish Work
- Safety Tips That Matter
- Gas vs Wood Burning Tradeoffs
- Maintenance Over the First Five Years
- When to Call a Pro
Pick Your Build Method First
There are three realistic DIY paths. A pre-engineered modular kit from Isokern, Necessories, or RumbleStone lets you assemble mortared sections without any masonry skill, with kits running $2,000 to $4,500. A concrete block core clad in stone veneer is the mid-difficulty option at $1,500 to $2,500 in materials. A full cut-stone or brick build from scratch is a 100-hour project for experienced masons and starts around $3,500.
Permits and Code Requirements
Most municipalities require a building permit for any outdoor fireplace with a chimney over six feet tall. Setbacks from property lines typically run 10 to 25 feet, and clearance to combustibles like eaves, fences, and trees is usually 10 feet minimum. Call your local building department before you design, because retrofitting for code is always more expensive than building to it.
HOA covenants often restrict chimney height and visible materials. Review both layers of rules early.
Footing and Foundation Basics
A masonry fireplace with a chimney can weigh 3,000 to 8,000 pounds. That load needs a reinforced concrete footing, typically 12 inches thick and extending 6 inches beyond the fireplace footprint on all sides. In freeze-prone climates, the footing must extend below the frost line, which ranges from 18 inches in coastal Virginia to 48 inches in Minnesota.
Pour the footing with 3,500 PSI concrete and lay two mats of #4 rebar on 12 inch centers. Skipping rebar guarantees cracks within three winters.
Materials for a Mid-Difficulty Build
- Concrete masonry units (CMU), 8 by 8 by 16 inch, about 80 blocks at $2.50 each
- Refractory firebrick for the firebox lining, 60 pieces at $4 each
- Refractory mortar (not regular Type N), about six 55 lb bags at $45 each
- Stone veneer, 35 sq ft at $9 to $18 per sq ft
- 8 inch double-wall insulated chimney pipe, 8 linear feet at $110 per foot
- Chimney cap, spark arrestor, and flashing kit, about $240
Firebox Construction
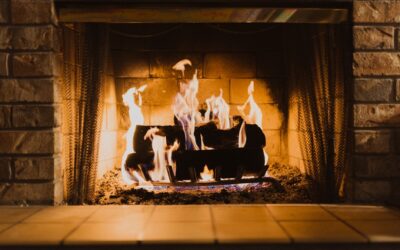
The firebox is the interior chamber that holds the fire, and it must be lined with firebrick set in refractory mortar. Standard clay brick and Type N mortar fail within a year because they cannot tolerate repeated 1,200 degree Fahrenheit cycles. Keep mortar joints at 1/16 to 1/8 inch and butter each brick fully on both bed and head joints.
A typical residential firebox measures 36 inches wide, 28 inches deep, and 30 inches tall at the opening. The back wall slopes forward starting at 14 inches up to create the smoke shelf.
Flue and Chimney Sizing
The flue cross-sectional area should equal roughly 1/10 of the firebox opening area for proper draft. A 36 by 30 inch opening equals 1,080 square inches, which calls for an 11 by 11 inch flue or an 11 inch round insulated pipe. Undersize the flue and smoke rolls into the patio. Oversize it and the fire burns cold.
Cladding and Finish Work
Once the structural core cures for seven days, lay your veneer stone over a metal lath and scratch coat. Work from the bottom up and keep a wet sponge handy to clean mortar off the stone face before it sets. A mantel in natural stone or reclaimed timber over 6 inches thick adds visual weight and a place to set drinks.
Cap the chimney with a bluestone or concrete cap that overhangs the stack by 1.5 inches on all sides to shed water.
Safety Tips That Matter
Install a spark arrestor screen on the cap if you are in a wildfire-prone area. Keep the hearth extension at least 18 inches in front of the firebox and 8 inches on each side, constructed of non-combustible material. Never burn treated lumber, painted wood, or accelerants in a masonry unit because the fumes attack the mortar joints.
Gas vs Wood Burning Tradeoffs
A wood-burning masonry fireplace delivers the classic crackle and smell but requires ongoing chimney sweeping, a wood rack, and cleanup after every burn. A gas insert ($1,200 to $3,000) with a natural gas or propane line eliminates the mess, lights with a switch, and burns cleanly enough to skip the spark arrestor debate. The tradeoff is ambiance, since gas logs never quite match real wood, and running a new gas line to the patio often requires a licensed plumber at $800 to $2,000.
Many homeowners split the difference with a gel-fueled or bio-ethanol insert that retrofits into an existing masonry firebox. Those run $400 to $900 and need no venting or fuel line, though heat output is modest and fuel refills average $15 per burn.
Maintenance Over the First Five Years
- Annual chimney sweep for wood burners, $150 to $300
- Repoint any mortar joints showing hairline cracks within the first two winters
- Reseal the chimney cap with NP1 polyurethane sealant every three years
- Inspect the firebrick lining annually and replace any cracked brick before the next burn season
- Clean stone veneer with a soft brush and pH-neutral cleaner, never pressure wash above 1,200 PSI
When to Call a Pro
If your site has sloped grade over 10 percent, expansive clay soil, or requires a chimney over 12 feet tall, hire a mason. The engineering for those conditions is outside the scope of a weekend DIY build, and insurance claims for fireplace-caused structure fires get rejected fast when unpermitted work is involved.