Most homeowners who price out solar are surprised to learn that labor, permitting, and installer overhead often make up close to half of a professionally installed system’s cost. That gap is exactly why diy solar panel installation keeps growing in popularity. You can legally and safely handle a large share of the work yourself, including planning, buying a kit, building racking, and mounting panels, but the utility interconnection and the connection to your main electrical panel are jobs for a licensed electrician in nearly every jurisdiction.
The honest answer to “can I install my own solar panels?” is yes, partly. A realistic DIY path looks like this: you design the system, pull or help pull the permit, do the mechanical installation, and run conduit to a disconnect. Then a licensed electrician makes the final service connection, the building department inspects, and the utility grants permission to operate. Handled that way, homeowners commonly save 20 to 40 percent compared with a turnkey quote.
- Is DIY Solar Panel Installation Right for Your Home?
- Choosing a Kit: Grid-Tie, Hybrid, or Off-Grid
- Tools and Materials
- Step-by-Step Overview of the DIY Path
- Safety: Ladders, Roofs, and Solar Electricity
- Troubleshooting Common DIY Solar Problems
- Costs and Realistic Savings
- When to Call a Licensed Professional
- Frequently Asked Questions
What follows covers kit types, tools, a step-by-step overview, the safety rules that matter on a roof and around high-voltage DC, troubleshooting, costs, and the exact points where a professional should take over.
Is DIY Solar Panel Installation Right for Your Home?
Before you buy anything, be honest about three things: your roof, your comfort level on it, and your local rules. A diy solar panel installation works best on a single-story home with a roof less than 10 years old, a pitch you can walk safely, and a south-, west-, or east-facing plane that stays unshaded from roughly 9 a.m. to 3 p.m. If your roof needs replacing within the next decade, replace it first. Pulling and remounting panels later costs real money.
Ground mounts are the easiest DIY projects of all. If you have open yard space, a ground-mounted array keeps you off the roof entirely, makes cleaning and maintenance simple, and lets you set the ideal tilt angle. The trade-off is trenching for the conduit run back to the house and building footings that meet local frost-depth and wind requirements.
Finally, call your building department and your utility before you commit. Some jurisdictions allow homeowner permits for solar; others require a licensed contractor’s name on the application. Some utilities also cap system size or require specific equipment approvals. A 20-minute phone call up front can save you from buying the wrong kit.
Choosing a Kit: Grid-Tie, Hybrid, or Off-Grid
Most DIY solar panels for home use come as a packaged kit with panels, inverters, racking, and wiring components sized to work together. Buying a matched kit is far safer than piecing parts together, because the voltage and current ratings are already coordinated. Here are the three main types:
- Grid-tie kits connect to the utility grid with no batteries. They are the least expensive per watt and deliver the fastest payback where net metering is available. They shut down during a power outage by design, to protect utility line workers.
- Hybrid kits connect to the grid and add battery storage, so critical loads keep running during outages. Expect a significantly higher cost and a more involved electrical design, often including a critical-loads subpanel.
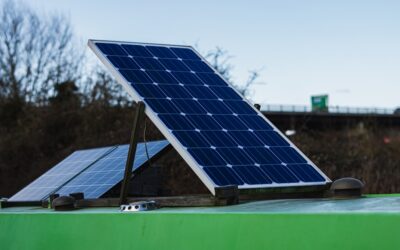
- Off-grid kits power cabins, sheds, workshops, and RVs with no utility connection. A simple solar setup like this, running a few lights and small appliances, is the most forgiving place for a beginner to learn.
Within grid-tie and hybrid systems, you will also choose between microinverters (one small inverter under each panel), string inverters (one central inverter), or string inverters with panel-level optimizers. Microinverters are popular for DIY because the wiring on the roof carries AC at household voltage rather than high-voltage DC, and one shaded panel doesn’t drag down the whole array. They also simplify rapid-shutdown compliance, which most codes now require for rooftop arrays.
Size the system from your utility bills. Add up the last 12 months of kilowatt-hour usage, divide by 365 for a daily figure, then divide by your area’s average peak sun hours (typically 3.5 to 6 hours across the US). Multiply that result by roughly 1.2 to account for system losses. A household using 900 kWh per month in a 4.5-sun-hour region lands around a 7 to 8 kW system.
Tools and Materials
A typical rooftop grid-tie job calls for the following. Your kit instructions and permit plans take priority over any general list.
- Solar panel kit with panels, inverters or microinverters, racking rails, mounts, and flashing
- Roof attachments with integrated flashing rated for your roofing material
- Cordless drill/driver, impact driver, and a torque wrench for racking and grounding hardware
- Stud finder or rafter locator, chalk line, and tape measure
- Roofing sealant compatible with your shingles
- Conduit, fittings, wire rated for the application, and a lockable AC disconnect if your utility requires one
- Crimping tool and the connector tool specified by the panel maker
- Extension ladder rated for your weight plus tools, ladder stabilizer, and a fall-arrest harness with a roof anchor
- Non-contact voltage tester, insulated gloves, and safety glasses
Step-by-Step Overview of the DIY Path
This sequence reflects how a well-run owner-builder project usually goes. Treat it as a road map, not a substitute for your permit drawings or kit manual.
- Get a site assessment and design. Many kit sellers include a plan set with a single-line electrical diagram and roof layout. Confirm setbacks from ridges and edges required by your fire code.
- Apply for permits and interconnection. Submit the building/electrical permit and the utility interconnection application. Do not energize anything until both approvals are in hand.
- Locate rafters and lay out mounts. Snap chalk lines, find rafter centers, and mark attachment points at the spacing your racking manual specifies for your wind and snow loads. Every mount must go into framing, not just roof decking.
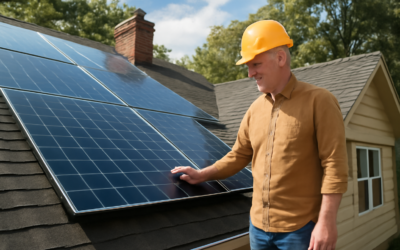
- Install flashed attachments. Slide the flashing under the next course of shingles up the roof, drill a pilot hole into the rafter, seal, and fasten with the specified lag bolts. This is the step that decides whether your roof leaks in five years, so take your time.
- Mount rails and ground the racking. Level and square the rails, then bond them to the grounding system with the listed hardware, torqued to spec.
- Install inverters and panels. Attach microinverters or optimizers to the rails, then set panels with mid- and end-clamps. Keep panels covered with an opaque tarp or leave them face-down until you connect them, because panels produce voltage the moment light hits them.
- Run conduit to the disconnect. Route conduit from a roof junction box down to a lockable disconnect and toward the main panel, following your plan set.
- Hand off to a licensed electrician. The electrician makes the connection at the main panel or service, installs the backfed breaker or supply-side tap, and verifies the rapid-shutdown setup.
- Pass inspection and receive permission to operate. Only after the inspector signs off and the utility approves should you turn the system on.
Safety: Ladders, Roofs, and Solar Electricity
Falls are the leading cause of serious injury on residential solar jobs. Set your extension ladder at a 4-to-1 angle (one foot out for every four feet up), extend it at least 3 feet past the roof edge, and tie it off at the top. Wear a harness clipped to a properly installed roof anchor whenever you climb past the first few rungs. Never work on a wet, icy, or windy roof, and never haul panels up a ladder by hand; use a ladder hoist or a helper on the roof with a rope. If your home is two stories or taller, or the pitch is steeper than about 6-in-12, hire a pro for the rooftop work.
Solar electricity deserves serious respect. Unlike household circuits, panels cannot be switched off while the sun is out. Series strings can carry several hundred volts of DC, which can sustain an arc far more readily than AC. Keep panels covered while making connections, never disconnect a connector under load, and follow the kit manufacturer’s shutdown sequence. For any work at the house panel side, turn off the breaker and confirm power is off with a non-contact voltage tester, but leave the actual service connection to a licensed electrician. Never attempt live testing on powered circuits.
Batteries add another hazard in hybrid systems. Use only listed battery systems and UL-listed components, follow clearance rules from the manual, and keep them out of living spaces where local code prohibits it.
Troubleshooting Common DIY Solar Problems
Monitoring shows one panel underperforming. With microinverters, check for new shade from tree growth, a loose connector, or debris on the glass. If the pattern persists on a clear day, the microinverter may need a warranty replacement.
The system produces nothing after approval. Confirm the AC disconnect and the solar breaker are both on, and check that the inverter or gateway is communicating. Many systems need a commissioning step in the monitoring app before they start producing.
A roof leak appears after install. Nearly always an attachment issue: flashing not tucked under the upper shingle course, a lag bolt that missed the rafter, or sealant applied on top of flashing rather than underneath. Fix it promptly before water damages sheathing or insulation.
Production is lower than the estimate. Compare output to the season, not the annual average. Winter output in northern states can be less than half of summer output. Dust and pollen also cut production modestly in dry climates, and a gentle rinse from the ground often helps.
Costs and Realistic Savings
Budget is where diy solar panel installation shows its biggest advantage. Kit prices change often, but a typical DIY grid-tie system with panels, inverters, and racking commonly runs about $1.00 to $2.00 per watt. Add permit fees, the electrician’s connection work, and incidentals, and many owner-builders land around $1.50 to $2.50 per watt all-in. Professionally installed systems generally fall somewhere between $2.50 and $3.50 per watt before incentives, so savings on a 7 kW system can reach several thousand dollars.
Federal and state incentives, where available, may apply to owner-installed systems as well, but eligibility rules change. Check current guidance or ask a tax professional before counting on a credit. Payback for a grid-tie DIY system is often 5 to 10 years depending on your electricity rates and net-metering terms. Hybrid systems with batteries usually pay back more slowly and are chosen more for backup power than pure savings.
Weigh the trade-offs, too. Some installers won’t service a system they didn’t install, and roofing warranties can be affected by third-party penetrations. Keep your plan set, receipts, and inspection records together for future buyers and warranty claims.
When to Call a Licensed Professional
A diy solar panel installation still depends on licensed help at a few critical points. Even a skilled DIYer should bring in licensed trades for key parts of the job. Plan on a licensed electrician for the connection to your main panel or service, any main panel upgrade, supply-side taps, and battery or critical-loads subpanel wiring. A structural engineer or experienced roofer should evaluate older roofs, tile or slate roofs, and any framing you are unsure about. Permits and inspections are required in almost every US jurisdiction, and your utility will not grant permission to operate without them.
Call a pro for the whole rooftop portion if your home is two or more stories, the roof is steep or fragile, or you aren’t comfortable working at height with fall protection. Many homeowners find a middle path: they buy the equipment, a local installer handles the roof and electrical work for a labor-only fee, and everyone saves on the markup.
Frequently Asked Questions
Can I legally install my own solar panels?
In most US jurisdictions, homeowners can do much of the installation on their own home, but you still need a permit, an inspection, and utility approval. Many areas require a licensed electrician for the final connection to your electrical service.
How much can DIY solar installation save?
Homeowners typically save 20 to 40 percent compared with a full-service installer by doing the design coordination and mechanical work themselves. Savings depend on system size, local labor rates, and how much electrical work you hire out.
Is a ground mount easier than a roof mount for DIY?
Yes, for most people. A ground mount keeps you off the roof and avoids roof penetrations, though it requires footings, trenching for conduit, and attention to local setback and frost-depth rules.
Do I need batteries for a DIY solar system?
Not for a standard grid-tie system, which uses the utility grid as storage through net metering. Add batteries only if you want backup power during outages or your utility’s rates make self-consumption worthwhile.
What is the hardest part of a DIY solar install?
Most owner-builders say permitting and utility paperwork take the most time, while roof attachments demand the most care. A single poorly flashed mount can cause leaks, so follow the racking manual closely.