A garage that bakes to 100 degrees in July and drops below freezing in January is useless as a workshop, home gym, or hangout, which is why a ductless mini split for garage conditioning has become the go-to fix. Unlike a window unit or a space heater, a mini-split heats and cools from one efficient system, runs quietly, and needs no ductwork. The mistakes people make are almost always in sizing and insulation, not in the equipment itself.
This guide walks through how to size the BTUs for a garage specifically, where to mount the indoor and outdoor units, why insulation makes or breaks performance, and the climate limits that decide whether a mini-split alone is enough. Get the load right and you will wonder why you waited.
Why a Mini-Split Beats the Alternatives
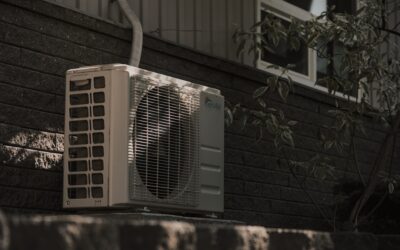
A garage has no return ducts and usually no room in the electrical plan for a full HVAC extension, so a ductless system is a natural fit. The setup is simple: a wall-mounted indoor head connected by a small line set through the wall to an outdoor condenser. That line set carries refrigerant, not air, so you only drill one small penetration.
Compared to a window air conditioner, a mini-split is quieter, more efficient, and heats as well as cools. Compared to electric space heaters, it uses a fraction of the electricity because it moves heat rather than generating it. And a single-zone unit is sized to condition the whole space evenly instead of just the corner you are standing in.
Sizing a Garage Is Different From Sizing a Bedroom
This is where most garage projects go wrong. A common rule of thumb for living space is about 20 BTU per square foot, but a garage is not living space. It typically has poor insulation, an uninsulated overhead door, more air leakage, and often a west-facing wall that soaks up afternoon sun. All of that means a garage usually needs more capacity per square foot than a bedroom of the same size.
Use these rough starting points, then adjust up for a hot climate, poor insulation, or heavy sun:
- A one-car garage, roughly 250 to 350 square feet, often lands around 9,000 to 12,000 BTU.
- A two-car garage, roughly 400 to 600 square feet, commonly needs 12,000 to 18,000 BTU.
- A three-car or oversized garage, 600 to 900 square feet, may need 18,000 to 24,000 BTU or more.
Resist the urge to massively oversize. An oversized unit short-cycles, meaning it cools quickly then shuts off before it removes humidity, leaving the space clammy. Undersizing leaves it running flat out and never catching up on the hottest days. When in doubt, a load calculation from an HVAC pro that accounts for your insulation, door, ceiling height, and climate is worth the small fee, especially before you buy a unit that costs $1,500 to $4,000 installed.
Placement of the Indoor Head
Where you hang the indoor unit affects both comfort and how much of the garage you can actually use. Mount the head high on a wall, typically 7 feet or more off the floor, on a wall that lets conditioned air sweep across the open space rather than blowing straight into a stack of shelving.
A few placement rules keep it working well:
- Choose a wall where the airflow can reach the far corners, usually the wall opposite your main work zone or across the long dimension of the room.
- Keep the head clear of obstructions like open shelving, cabinets, or a lift that would block the throw of air.
- Avoid mounting directly above where you park if drips or the unit’s presence would be in the way, though condensate is routed outside by a drain line.
- Keep it away from the overhead door’s travel path and any door track.
Placement of the Outdoor Condenser
The outdoor unit needs airflow and easy service access. Set it on a level pad or wall bracket close to the indoor head to keep the line set short, ideally within the manufacturer’s maximum run. Give it clearance on all sides for airflow, keep it out of the path of drifting snow in cold climates, and place it where the low hum will not annoy you or a neighbor.
Shorter line sets are more efficient and cheaper to install, so mounting the condenser just outside the wall behind the indoor head is ideal when the layout allows. In snowy regions, raising the condenser on a taller stand or bracket keeps it above snowdrifts so it can breathe in winter.
Insulation Is Half the Battle
The most efficient mini-split in the world will struggle in an uninsulated garage. Before or alongside the install, address the envelope. The overhead door is usually the biggest weak point, so an insulated door or an aftermarket insulation kit pays off immediately. Insulate the walls and ceiling to reasonable levels, and seal the obvious air leaks around the door, service door, and any gaps.
An insulated garage lets you buy a smaller, cheaper unit and run it less, so the money you spend on insulation often reduces both the equipment size and the operating cost. Skipping insulation and buying a bigger unit to compensate is the expensive way to a garage that still feels drafty.
Know the Climate Limits
Mini-splits are heat pumps, and heat pumps lose heating capacity as the outdoor temperature drops. A standard unit may struggle to keep up when it gets well below freezing, which matters if you want a warm garage in a northern winter. The fix is a cold-climate or hyper-heat rated model, engineered to deliver useful heat down to roughly minus 5 to minus 15 degrees Fahrenheit depending on the model.
If you live where winters are mild, a standard model heats and cools the garage year round with no drama. If you face hard freezes and want a reliably warm workshop, spend up for the cold-climate rating rather than fighting a standard unit that can’t keep pace. On the cooling side, mini-splits handle hot summers well as long as they are sized correctly and the garage is reasonably sealed.
Efficiency Ratings and Running Costs
Once you know the capacity you need, efficiency ratings tell you how cheaply the unit will run. Two numbers matter. SEER2 measures cooling efficiency, and higher is better, with common garage-appropriate units landing anywhere from the high teens into the 20s and premium models higher still. HSPF2 measures heating efficiency for the heat-pump side. A higher-rated unit costs more up front but draws less electricity every hour it runs, which adds up in a space you condition daily.
For a garage used a few hours at a time, a mid-range efficiency unit is usually the sweet spot, since the payback on the highest-rated models stretches out when the space is not conditioned around the clock. If you plan to run the garage as a full-time office or gym, the efficiency premium makes more sense. Look for the ENERGY STAR label as a quick shortcut to a genuinely efficient unit, and check whether your utility offers a rebate on qualifying models, which can meaningfully cut the net cost.
Inverter-driven compressors, standard on quality mini-splits, ramp up and down instead of cycling fully on and off. That steady modulation is what keeps the garage at an even temperature and avoids the energy spikes of older on-off systems, and it is a big reason mini-splits cost less to run than window units.
Keep in mind that a garage door opening and closing dumps a big slug of outside air into the space, so a garage used as a busy shop with the door up half the day will run its mini-split harder than the ratings suggest. If you park and pull out often, weatherstripping the door and limiting how long it stays open protects your comfort and your energy bill more than chasing the last point of SEER2 on the equipment.
Installation and Electrical
Most garage mini-splits need a dedicated 208/240-volt circuit, though some smaller units run on 120 volts. That means panel capacity and a licensed electrician are part of the budget. The refrigerant line connections, vacuum, and charge should be done by a qualified HVAC installer, both for warranty and because improper charging kills efficiency and lifespan. Many manufacturers require professional installation to keep the warranty valid.
Add up the pieces and a typical installed ductless mini split for garage project runs $2,000 to $5,000 depending on capacity, whether you need cold-climate performance, and your local labor and electrical costs. Size it for a garage rather than a bedroom, insulate the envelope, place both units thoughtfully, and match the unit to your winter lows. Do that, and a space that was unusable half the year becomes the most comfortable room in the house.