Finished basements, garage workshops, EV chargers, and backyard studios all run into the same wall: the main panel is full. Electrical sub panel installation solves that by feeding a second, smaller panel from the main one, adding breaker spaces and putting circuits close to where the load lives. Let’s be clear up front: this is licensed-electrician work in most jurisdictions, involving service load calculations, permits, and bonding details that cause fires and shock hazards when done wrong. This guide is not a how-to. It exists so you understand what the electrician is doing, why the quote reads the way it does, and how to be an informed customer for a job that typically runs $1,200 to $3,000 or more installed.
What a Sub Panel Is and When You Need One
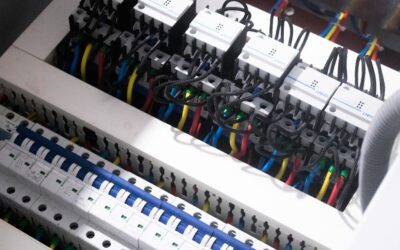
A sub panel is a secondary breaker panel fed by a large double-pole breaker in your main panel through a feeder cable. It does not add capacity to your electrical service, your home still has the same 100, 150, or 200 amp service from the utility, it redistributes that capacity and adds physical breaker slots.
Typical triggers for adding one:
- The main panel is out of spaces and tandem breakers are maxed out or prohibited by the panel’s listing
- A detached garage, shop, or ADU needs multiple circuits, and one feeder beats running five separate branch circuits across the yard
- A basement or kitchen remodel adds many new circuits far from the main panel
- An EV charger, hot tub, or workshop equipment concentrates heavy load in one location
Common residential sub panels are rated 60, 100, or 125 amps. Note the distinction the electrician will make immediately: if your service itself is undersized, say a 100 amp service in a house adding an EV charger and a heat pump, the right answer may be a service upgrade ($1,800 to $4,500), not a sub panel. A sub panel cannot create amps that the service does not have.
The Load Calculation Comes First
Before anything gets mounted, a proper installation starts with a load calculation under NEC Article 220. This is the arithmetic that determines whether your existing service can carry the new loads: square footage lighting loads, small appliance circuits, fixed appliances, HVAC, ranges and dryers at their demand factors, plus the new sub panel’s anticipated load. The output tells the electrician what feeder breaker size the main panel can safely support and whether the whole plan is viable.
Homeowners sometimes hear this step as padding on the invoice. It is the opposite, it is the difference between an installation designed for your house and a guess. An electrician who quotes a 100 amp sub panel without asking what is on your service now, or what you plan to plug in later, is skipping the part of the job that protects you. If you want homework you can genuinely do yourself, this is it: inventory your major loads and your plans (EV? hot tub? shop tools?) so the load calc reflects reality.
Feeder Sizing and What Those Cable Numbers Mean
The feeder, the heavy cable from main panel to sub panel, is sized to the breaker protecting it under NEC ampacity tables. Ballpark figures you will see on quotes: #6 copper for 60 amps, #3 or #4 copper (or #1 aluminum) for 100 amps, adjusted for cable type, length, and installation method. Four conductors are run to a sub panel in the same building or a detached structure under modern code: two hots, a neutral, and a separate equipment grounding conductor.
Long runs to detached buildings add voltage-drop math, distances past roughly 100 feet often push the wire a size up, and trenching: underground feeders in PVC conduit typically need 18 inches of burial depth, with the trench itself, $10 to $30 per linear foot dug and restored, often rivaling the electrical labor on garage projects. Copper versus aluminum is a legitimate cost conversation; properly terminated aluminum feeder (with antioxidant compound and correctly torqued lugs) is code-compliant and common, saving hundreds on long runs.
The Bonding Difference That Trips Up Amateurs
Here is the technical heart of why sub panels burn DIYers. In your main service panel, the neutral bar and the ground system are bonded, connected together, exactly once. In a sub panel, they must be kept separate: the neutral bar floats isolated from the enclosure, the bonding screw or strap is removed, and grounds land on a separate ground bar bonded to the can.
Why it matters: if neutral and ground are tied together downstream, normal return current flows on the ground wires, energizing conduit, enclosures, and appliance chassis under everyday operation, and creating a shock and fire pathway that works fine right up until it does not. Inspectors check this first because incorrectly bonded sub panels are among the most common DIY defects found in real houses. Detached buildings add their own wrinkle: they typically require their own grounding electrode (ground rods) connected to the sub panel’s ground bar. These are exactly the kinds of rules that are invisible to someone copying a YouTube video and second nature to a licensed electrician.
Permits and Inspections Are Not Optional
Virtually every US jurisdiction requires an electrical permit for sub panel work, with rough and final inspections. Permit costs run $50 to $350 depending on locality. Some areas allow homeowners to pull their own permits for work on their own home; many others restrict panel work to licensed electricians outright, and either way the inspection happens.
Skipping the permit has a long tail: unpermitted panel work surfaces during home sales and insurance claims, and a fire traced to unpermitted electrical work gives your insurer an argument you do not want to fund. The permit-and-inspection loop is cheap relative to the job and is the one quality check that exists specifically to protect you from a bad installer, including yourself.
What It Costs and What Drives the Price
Typical installed pricing for electrical sub panel installation runs $1,200 to $3,000, with straightforward same-wall or adjacent-room 60 to 100 amp installations at the low end. The number climbs with:
- Distance and routing: long feeder runs, finished walls to fish through, crawlspace or attic work
- Detached structures: trenching, conduit, ground rods, often $2,500 to $5,000-plus total
- Main panel condition: a full or obsolete main panel (Federal Pacific, Zinsco) may force upstream work first
- Amperage and materials: 125 amp copper feeder costs meaningfully more than 60 amp
Get two or three quotes that itemize the load calculation, feeder size and material, panel brand and amperage, permit handling, and patching responsibilities. A reputable quote will name these things without prompting.
Where the Homeowner Fits In
Your productive role is planning, not wiring: decide the panel location (code requires a clear working space 30 inches wide and 36 inches deep in front of it, so not behind the water heater), list every current and future load, ask how much spare breaker capacity the proposed panel leaves you, and confirm the permit is being pulled in your jurisdiction. Buying a panel with extra slots, a 30-space panel costs perhaps $40 more than a 12-space, is the cheapest future-proofing in the electrical world. Then let the licensed professional do the part where the math, the torque specs, and the bonding rules live.