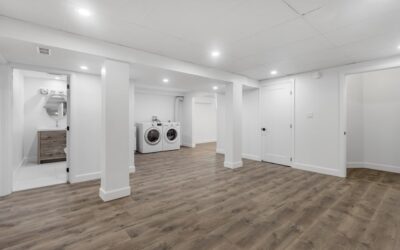
The basement slab is the worst place in any home to install flooring — high moisture, seasonal humidity swings, occasional flooding, and concrete that was poured by the cheapest bidder 40 years ago. Most products fail there within a decade. Epoxy basement flooring is one of the few systems that thrives in the conditions that destroy carpet, laminate, and even some LVPs. But the epoxy at Home Depot in a $90 kit is not the same product a professional installs for $7 per sq ft, and the difference shows up in three years. This guide explains the real systems and where they make sense.
Part of our Epoxy, Concrete & Garage Floors guide — explore the full guide →
Why Basements Punish Floor Materials
Three issues drive nearly every basement flooring failure. Hydrostatic pressure pushes water vapor up through the slab from the soil below — typical readings run 6 to 12 lbs per 1,000 sq ft per 24 hours, well above the 3-lb threshold most adhesives tolerate. Seasonal humidity in unconditioned basements swings from 35 percent in winter to 75 percent in summer, expanding and contracting wood and laminate. And occasional flooding from sump failures, pipe leaks, or window-well overflows wipes out anything not fully waterproof.
Epoxy handles all three. Cured epoxy is impermeable to liquid water, vapor-retardant when properly specified, and unaffected by humidity cycles. The catch is that it bonds to concrete only when the moisture transmission rate is below the system’s tolerance — usually around 5 lbs per 1,000 sq ft per 24 hours.
The System Categories
Three product tiers cover most residential basement projects.
- DIY water-based kits (Rust-Oleum EpoxyShield, Quikrete): 2-3 mils thick, $0.60–$1.20 per sq ft material
- Professional 100% solids epoxy: 8-12 mils, $4–$7 per sq ft installed
- Polyaspartic and hybrid systems: 15-30 mils, $7–$12 per sq ft installed
The DIY kits are oversold. They look great in week one and start peeling at high-moisture spots within 18 to 36 months in most US basements. Skip them unless your slab tested under 3 lbs MVER and the basement stays climate-controlled year-round.
Moisture Testing Is Non-Negotiable
Before specifying any epoxy system, test the slab. Two methods are standard. The calcium chloride test (ASTM F1869) measures moisture transmission in pounds per 1,000 sq ft per 24 hours over a 60 to 72 hour exposure. The relative humidity probe test (ASTM F2170) drills 40 percent of the slab depth and reads internal RH after 72 hours.
Pass criteria depends on the system. Standard 100% solids epoxy tolerates up to 5 lbs MVER or 80 percent internal RH. High-build polyaspartic with a vapor-blocking primer pushes those limits to 8 lbs and 90 percent RH. Anything above those numbers requires a moisture mitigation primer like Sika Sikafloor Sealtight 2000 or Koster VAP I 2000 before the topcoat goes down.
System Layers That Last
A professional basement epoxy stack typically runs four to six coats over 2 to 3 days.
- Surface prep: Diamond grind to CSP 3 profile, vacuum, repair cracks with flexible epoxy
- Primer: Moisture-tolerant epoxy primer (or moisture-mitigation primer if needed)
- Base coat: 100% solids pigmented epoxy at 8-12 mils
- Decorative layer: Optional vinyl chip flakes or quartz aggregate broadcast into wet base
- Topcoat: Polyaspartic or polyurethane at 4-8 mils for chemical and UV resistance
Skip any of these layers and lifespan drops by 30 to 50 percent. The primer step in particular is what most DIY kits omit, and it is the single biggest reason they fail.
Decorative Options
Three finish styles dominate basement installations. Solid color epoxy (gray, beige, terracotta) is the cleanest look and the easiest to spot-clean — best for home gyms, workshops, and laundry rooms. Vinyl-chip broadcast adds 1/8-inch flakes (Torginol, Decorative Concrete Supply) that hide minor concrete imperfections and add slip resistance — popular for finished basement living spaces. Metallic epoxy uses pearlescent pigments to create marble-like swirls and is a common choice for high-end finished basements where appearance matters.
Quartz broadcast is the most durable option but reads industrial — typically reserved for utility rooms or commercial-style finished basements.
Realistic Project Costs
- DIY 2-mil kit, 500 sq ft: $300–$600 in materials, plus 2 days labor
- Pro solid color, 1,000 sq ft: $4,000–$7,000 installed
- Pro vinyl-chip system, 1,000 sq ft: $5,500–$8,500 installed
- Metallic epoxy, 1,000 sq ft: $7,000–$12,000 installed
- Moisture mitigation primer (when needed): $2.50–$5 per sq ft additional
Add $1.50 to $4 per sq ft for crack repair, control-joint filling, and removal of existing paint or sealer.
Lifespan and Failure Modes
Properly specified and installed, professional epoxy basement flooring lasts 15 to 25 years. The most common failure modes are osmotic blistering (caused by skipping moisture mitigation), peeling at high-traffic edges (caused by inadequate prep), and yellowing under UV-heavy windows (caused by using non-aliphatic topcoats).
If the slab is over 15 years old and has any visible efflorescence or salt deposits, plan on the moisture mitigation primer regardless of MVER readings — long-term hydrostatic pressure can defeat the basic primer over time.
When Epoxy Is Not the Right Choice
Three basement scenarios suggest looking elsewhere. Carpeted comfort spaces — epoxy is hard, cold, and reflects sound. Choose LVP with a built-in pad instead. Active-leak basements — fix the water problem before any flooring. And budget-tight short-hold projects — DIY kits look fine for 2 to 3 years and cost less than any pro option, which can be the right call before a sale.
Frequently Asked Questions
Will epoxy seal cracks in my basement floor?
It will bridge hairlines (under 1/32 inch) but cannot bridge active or wider cracks. Route and fill those with flexible epoxy first.
Can I install epoxy over an existing painted basement floor?
Only if the paint passes a cross-hatch adhesion test. Most basement paint fails it — you will need to grind or strip first.
Is epoxy basement flooring slippery when wet?
Smooth solid epoxy is slippery. Vinyl-chip and quartz broadcast systems add slip resistance. Anti-slip aggregate can be added to the topcoat.
How long after installation can I move in furniture?
Foot traffic: 24 hours. Light furniture: 48 hours. Heavy items, vehicles, or full chemical resistance: 7 days minimum.
Prefer to explore on your own?
See how new flooring looks in your actual room in seconds — free, no signup.
Try the free Floor Studio →