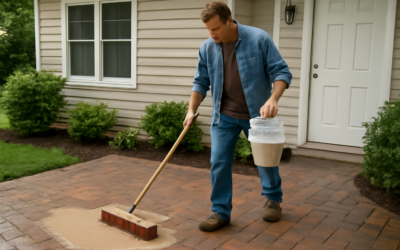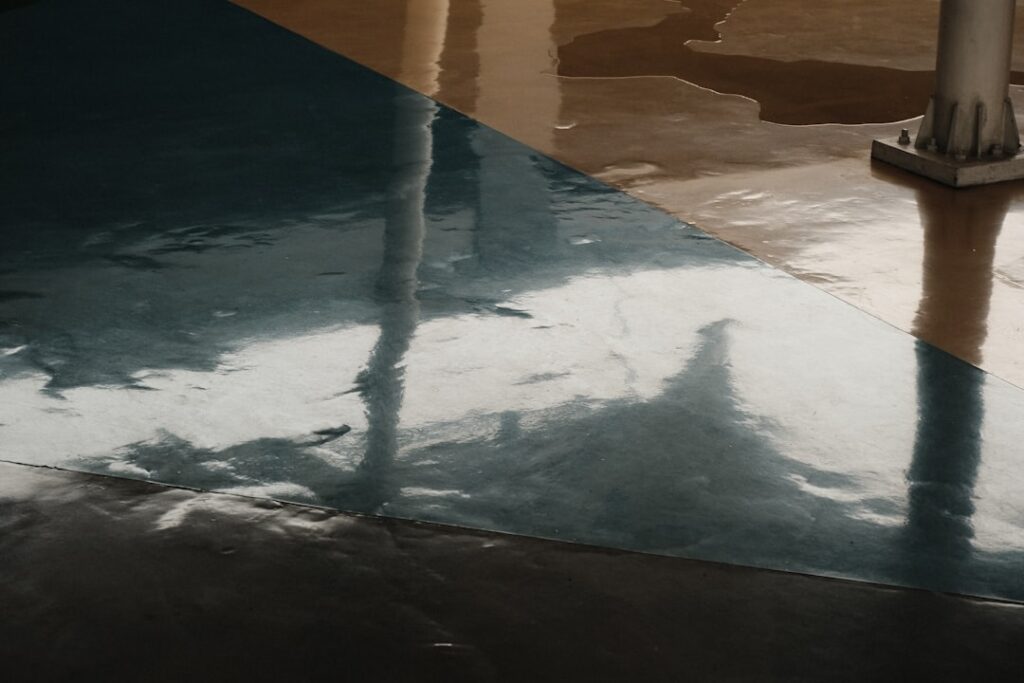
Walk across a freshly epoxied garage floor with wet boots and you’ll understand why traction matters — a smooth epoxy coating turns slick as an ice rink the moment water hits it. Epoxy sand floor paint solves that by suspending fine aggregate in the coating so your feet actually grip the surface. Whether you’re finishing a garage, a basement workshop, a pool deck, or a commercial ramp, adding grit is the single cheapest insurance against a broken wrist. This guide covers the grit options, mix ratios, and the exact application sequence I use on jobs.
Part of our Epoxy, Concrete & Garage Floors guide — explore the full guide →
What Anti-Slip Additive Actually Does
The “sand” in epoxy sand floor paint isn’t beach sand. It’s an engineered aggregate — usually aluminum oxide, polymer grit, or fine silica — that sits proud of the cured resin and breaks the water film under your shoes. Aluminum oxide is the toughest and my default for garages where tires spin and jack stands drag. Polymer grit feels softer underfoot and is the right call for barefoot areas like pool decks and basement bathrooms. Silica sand is the budget option at roughly $8 for a 50-lb bag, but it’s sharper and can feel rough on skin.
Grit is rated by mesh size. A 60-grit aluminum oxide gives aggressive traction for wet industrial zones. For a residential garage, 100- to 220-grit strikes the balance between grip and a surface you can still push a broom or floor jack across without catching. The finer the grit, the easier the floor is to keep clean.
Choosing the Right Aggregate
- Aluminum oxide — hardest, most durable, ideal for garages and shops. Around $15 to $25 per pound in coating-grade mesh.
- Polymer/plastic grit — softer, comfortable barefoot, UV-stable. Good for pool decks and patios. Roughly $20 per pound.
- Silica sand — cheapest, widely available, but sharp and can yellow under UV. Best hidden under a topcoat.
- Manufacturer anti-slip additive — brands like Rust-Oleum and Behr sell pre-measured shaker bags (about $10 to $15) sized for a single kit. Convenient for a one-car garage.
How Much Grit to Add
Overdo the aggregate and the floor turns into sandpaper that shreds bare feet and traps dirt. Add too little and you’ve wasted the effort. For a broadcast application, plan on roughly 1 to 2 pounds of aggregate per 100 square feet for a moderate anti-slip profile. If you’re mixing grit directly into the resin instead of broadcasting, follow the manufacturer’s ratio — usually a half-cup to one cup of additive per gallon of mixed epoxy. Mixing it in gives even coverage but a slightly less aggressive bite than broadcasting.
Surface Prep Comes First
Epoxy fails on adhesion far more often than on the additive itself. Concrete must be clean, dry, and profiled. Degrease the slab with a strong cleaner, then acid-etch with muriatic acid solution or, better, mechanically grind with a diamond cup wheel to open the pores. Do the water-drop test afterward: sprinkle water on the concrete, and if it beads instead of soaking in, the surface is still too tight and the epoxy won’t bond. Repair cracks with an epoxy patch and let everything dry for at least 24 hours. Slab moisture should read under about 3 to 4 pounds per 1,000 square feet in 24 hours by the calcium chloride test.
Step-by-Step Application
- Mix the epoxy. Combine Part A and Part B at the exact ratio on the label and stir for the full induction time — usually 2 to 3 minutes. Under-mixed epoxy stays tacky forever.
- Cut in the edges with a brush along walls and around drains.
- Roll the field with a 3/8-inch nap roller on an extension pole, working in 4-by-4-foot sections so you keep a wet edge.
- Broadcast the aggregate while the coat is still wet. Toss it up and out so it rains down evenly rather than dumping in piles. Aim for a light, uniform scatter.
- Let it cure per the label — typically 12 to 24 hours before recoat.
- Apply a clear topcoat over the broadcast grit to lock it in. This buries the sharp edges slightly and dramatically improves durability and cleanability.
Work in temperatures between 55°F and 85°F. Below 50°F most epoxies won’t cure properly, and above 90°F your pot life shrinks to minutes.
Cost Breakdown
A quality two-part epoxy kit covering 250 to 500 square feet runs $60 to $150 depending on brand — Rust-Oleum EpoxyShield sits at the budget end, while industrial-grade 100% solids systems from Rust Bullet or ArmorPoxy climb higher. Add $10 to $30 for the anti-slip aggregate and another $40 to $80 for a clear topcoat. Total materials for a standard two-car garage land around $150 to $300. Compare that to $1,500 to $4,000 for a professional polyaspartic install, and the DIY savings are obvious.
Maintenance and Common Mistakes
Textured floors hold grit, so sweep or dust-mop weekly and clean with a soft brush and mild cleaner — never a metal-bristle brush that can gouge the topcoat. The biggest mistakes I see: skipping the etch or grind step, broadcasting aggregate after the epoxy has skinned over (it won’t stick), and going too heavy on the grit. Start conservative. You can always add a second broadcast coat, but you can’t un-sandpaper a floor once it’s cured. Done right, an epoxy sand floor paint system delivers safe traction that lasts a decade or more.
Broadcast Grit vs. Mixing It In
There are two ways to get aggregate into the system, and the choice changes both the feel and the longevity. Broadcasting means you sprinkle grit onto a wet coat and then bury it under a clear topcoat, which gives the most aggressive, longest-lasting traction because the particles are locked mechanically into two layers of resin. Mixing the additive straight into the epoxy before you roll is faster and self-leveling, but the grit tends to sink slightly and you get a gentler bite that wears smoother over a few years of traffic.
For a garage that sees snow, road salt, and dripping vehicles, I broadcast every time. For a covered patio or a low-traffic basement where I mainly want to kill the slickness, mixing in is plenty and saves a whole recoat step. If you mix in, keep the epoxy moving in the bucket right up until you pour, because suspended aggregate settles to the bottom within minutes and you’ll end up with a gritty first section and a bald last one.
Alternatives to Epoxy Sand Systems
Anti-slip aggregate isn’t the only route to a safe floor, and a couple of alternatives are worth weighing before you commit. Polyaspartic coatings, often marketed as one-day garage floors, accept the same broadcast grit but cure in a few hours and shrug off UV yellowing better than epoxy — the tradeoff is a working time measured in minutes and a material cost roughly double. For a floor you don’t want to repaint at all, a bare-concrete anti-slip approach using a penetrating silicate densifier plus an etched profile gives modest traction with zero coating to peel.
- Polyaspartic with grit — fastest cure, best UV stability, higher cost and unforgiving pot life.
- Anti-slip floor tape or mats — cheap spot fix for a ramp or single step, but peels over time and traps grit at the edges.
- Rubberized deck coatings — grippy and soft underfoot for pool surrounds, though they hold dirt and need more frequent cleaning.
- Densified bare concrete — no coating to fail, but far less traction and no color or protection from oil stains.
Frequently Asked Questions
Can I add sand to a floor I already epoxied? Not directly — cured epoxy won’t grab loose grit. You’d scuff-sand the existing coat with 120-grit, wipe it clean, then roll a fresh clear coat and broadcast aggregate into that wet layer. It bonds to the roughed-up surface, not the old smooth one.
How long before I can drive on it? Foot traffic is usually fine after 24 hours at 70°F, but wait a full 72 hours before parking a vehicle and up to 7 days before dragging heavy equipment. Cold slabs cure slower, so add a day or two below 60°F.
Will the grit make the floor hard to clean? Finer mesh cleans easily with a dust mop and a squeegee; only aggressive 60-grit industrial profiles genuinely trap dirt. Burying the aggregate under a topcoat rounds the peaks and makes any texture noticeably easier to keep tidy.
Prefer to explore on your own?
See how new flooring looks in your actual room in seconds — free, no signup.
Try the free Floor Studio →