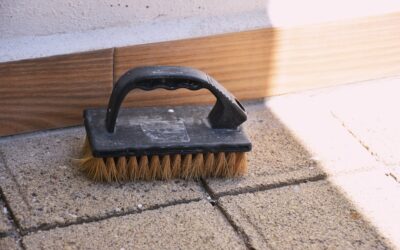
A mop pushes dirt around. A brush actually digs it out. If your kitchen grout still looks gray after a thorough mopping, the tool, not the cleaner, is usually the problem. A good floor scrub brush uses stiff bristles and direct pressure to lift the embedded grime that flat-headed mops glide right over. Choosing the right one depends entirely on what your floor is made of, because the brush that rescues a tile entryway can scratch a hardwood living room in seconds.
Why a Brush Beats a Mop for Deep Cleaning
Mops are designed for maintenance: wiping up spills and keeping surfaces presentable between deep cleans. They rely on the cleaning solution to do most of the chemical work and apply very little mechanical force. Stubborn soil, dried spills, and grout haze need agitation, and that is where bristles earn their keep.
The physics is simple. Concentrating your effort onto a small bristle head multiplies the pressure per square inch compared to a wide mop. That pressure breaks the bond between dirt and surface so the cleaner can rinse it away. For high-traffic tile, textured stone, and grout lines, no mop matches it.
Matching Bristle Stiffness to Your Floor
Bristle hardness is the single most important spec. Use the wrong stiffness and you either accomplish nothing or leave permanent marks. Here is a quick reference:
- Stiff nylon or polypropylene: Ceramic and porcelain tile, concrete, garage floors, and grout. These bristles resist water and chemicals and hold their shape.
- Medium bristles: Vinyl, linoleum, and sealed natural stone. Firm enough to clean but soft enough to avoid scratches.
- Soft bristles or microfiber: Sealed hardwood, laminate, and luxury vinyl plank. These lift grime without abrading the finish.
- Brass or stainless wire: Only for raw concrete, masonry, or rust removal. Never use metal on any finished floor.
When in doubt, start softer. You can always step up to a firmer brush, but you cannot undo a scratched finish.
Handle Styles and Ergonomics
The handle determines how much of the job your back will feel the next morning. There are three main formats.
Handheld scrub brush
A palm-sized brush, often with a grip pad, gives you maximum control for grout lines, corners, and small bathrooms. The downside is that you work on your hands and knees. A quality handheld brush costs $5 to $12.
Long-handle deck brush
A wide bristle head on a 48 to 60 inch pole lets you scrub standing up, which saves your knees on patios, garages, and large tile floors. Expect to pay $15 to $30 for a sturdy one with a threaded metal handle.
Power and drill-attachment brushes
Brush heads that chuck into a cordless drill spin at high speed and cut deep-cleaning time dramatically. A set of nylon drill brushes runs $12 to $25. Dedicated electric floor scrubbers start around $60 and climb past $200 for cordless models with water tanks.
Choosing the Right Brush by Room
Think in terms of the worst job each room throws at you. A tiled kitchen with greasy grout calls for a stiff-bristle handheld brush or a drill brush. A garage with oil stains needs a long-handle deck brush with stiff polypropylene bristles. A hardwood hallway only ever needs a soft brush or microfiber pad, used sparingly with a barely damp solution. Bathrooms benefit from a small grout brush with a pointed tip to reach into corners and around fixtures.
Many homeowners end up owning two: one stiff brush for tile and hard surfaces, and one soft brush for finished wood and vinyl. That covers nearly every scenario.
Technique That Saves Time
The brush does the work, but method makes it faster. Follow these steps for tile and grout:
- Sweep or vacuum first so you are not grinding loose grit into the floor.
- Apply your cleaner and let it dwell for 5 to 10 minutes. Dwell time loosens grime before you ever touch the brush.
- Scrub in small circular motions, working a few square feet at a time.
- Wipe up the loosened slurry with a clean cloth or wet vac before it dries back onto the surface.
- Rinse with clean water to remove cleaner residue, which otherwise attracts new dirt.
For grout specifically, a paste of baking soda and water followed by a stiff brush lifts staining without harsh chemicals. Avoid acidic cleaners on natural stone and on cement grout, since they etch and erode over time.
Pairing the Brush With the Right Cleaner
A brush and a cleaner work as a team, and matching them to the floor prevents both poor results and damage. For ceramic and porcelain tile, a neutral pH tile cleaner or a simple solution of warm water with a few drops of dish soap lifts most grime when paired with a stiff brush. On grease-heavy kitchen grout, a degreaser gives the bristles something to work with. For concrete and garage floors, a stronger alkaline cleaner cuts oil stains. Natural stone and sealed hardwood demand caution: skip anything acidic, including vinegar and lemon, which etch stone and strip wood finishes, and stick to cleaners labeled safe for the specific surface. Always test a new cleaner in an inconspicuous corner first, and never mix cleaning chemicals, since combinations like bleach and ammonia release dangerous fumes.
Care and Replacement
Rinse your brush thoroughly after every use and let it dry bristles-up so they keep their shape. Stored wet and face-down, bristles bend permanently and lose their bite. Inspect for splayed or worn bristles; once they flatten, the brush stops cleaning effectively and should be replaced. A well-treated nylon brush lasts a year or more of regular use.
Beyond cleaning, store brushes apart from one another so the bristles do not crush together and deform. A small wall hook or a slotted holder keeps each brush hanging freely. If you use one brush for harsh chemicals like degreasers and another for everyday cleaning, label them so you never cross-contaminate a wood-safe brush with residue meant for concrete.
The right floor scrub brush is an inexpensive tool that does more for a tired floor than any premium cleaner. Match the bristles to your surface, pick a handle that spares your back, and you will see results a mop could never deliver.
Prefer to explore on your own?
See how new flooring looks in your actual room in seconds — free, no signup.
Try the free Floor Studio →