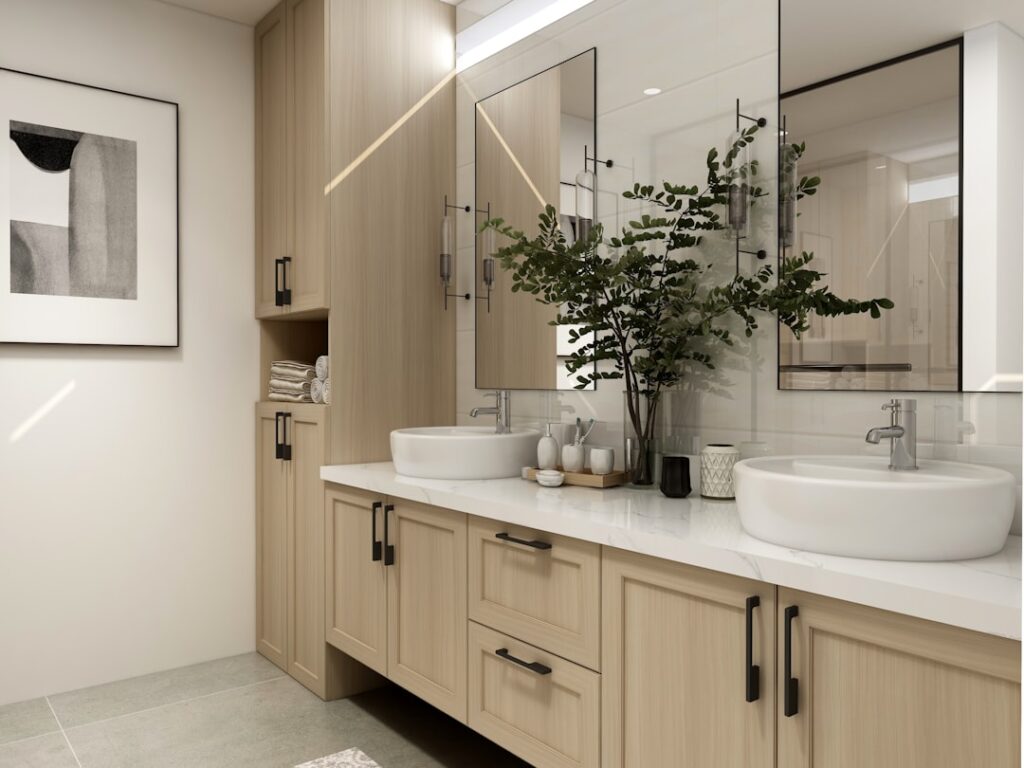
When homeowners tell me they want to freshen up a bathroom on a sensible budget, I almost always point them toward floor standing vanity units with basin included, because they solve two problems at once. You get storage and a finished sink in a single unit, and because the cabinet rests on the floor rather than hanging on the wall, installation is more forgiving and the structural demands are lower. After fitting these in everything from tight powder rooms to spacious primary baths, I have a clear sense of what to look for and where people overspend.
This guide covers the choice between floor-mounted and wall-hung, the sizes that actually fit real bathrooms, the basin styles that come integrated or dropped in, the materials that survive a steamy room, and the plumbing realities you need to plan around. By the end you should be able to walk into a showroom or scroll a website and shortlist the right unit in minutes.
Floor-Standing vs. Wall-Hung Vanities
The first fork in the road is whether the cabinet sits on the floor or floats on the wall. Floor-standing units carry their weight straight down through a plinth or feet, so they do not require the reinforced blocking inside the wall that a heavy wall-hung unit demands. That makes them the practical choice in older homes, rental upgrades, or any wall you are not certain can be opened up and braced. They also hide plumbing and offer more usable storage volume because the cabinet runs all the way to the floor.
Wall-hung vanities look lighter and make a small room feel bigger because you see floor beneath them, and they make mopping easier. But they need solid fixing, ideally into studs or a plywood backer, and they cap how much weight the basin and contents can bear. For most homeowners prioritizing storage, easy installation, and cost, the floor-standing unit with an included basin is the sensible default, which is why it remains the best-selling category.
Sizing: Widths, Depths, and Heights
Vanities are sold by width, and the common sizes tell you a lot about the room they suit. A 24-inch (roughly 600mm) unit is the workhorse for a full bathroom or a generous powder room. Compact 18- to 20-inch units squeeze into tight cloakrooms, while 30-, 36-, and 48-inch models serve larger baths, with 60-inch and up giving you a true double-basin layout. Measure your available wall run and subtract clearance so a door or towel bar does not collide with the cabinet.
Depth matters more than people expect. Standard vanities run 20 to 22 inches deep, but shallow-depth units at 15 to 18 inches rescue narrow rooms where a full cabinet would block the door swing or the path to the toilet. Height is trending upward: the old 30- to 32-inch “comfort” height felt low, and many new units sit at 34 to 36 inches, which is easier on your back at the sink. If you are tall, prioritize a taller unit or a countertop basin that adds height.
Basin Types That Come With the Unit
The “with basin” part of these units comes in several forms, and the style drives both the look and the practicality. Integrated basins are molded as one continuous piece with the countertop, usually in resin, ceramic, or solid surface, which means no seams to trap grime and the easiest cleaning of any option. Drop-in or inset basins sit in a cutout in the top with a visible rim, a traditional look that is simple to replace if it ever chips.
Vessel basins sit on top of the counter like a bowl, adding height and a design statement but requiring a taller faucet and a little more care when cleaning around the base. Under-mount basins fix beneath a solid stone or quartz top for a seamless wipe-down surface, typically found on higher-end units. For a busy family bathroom I usually steer people to an integrated or under-mount basin for easy cleaning; for a striking guest powder room, a vessel can be worth the trade-offs.
Materials and Moisture Resistance
A bathroom is the harshest room in the house for cabinetry, so material choice decides how long your unit survives. Most affordable vanities use MDF or particleboard with a laminate or foil wrap. Well-sealed MDF holds up fine, but any exposed raw edge near the basin will swell the first time water sits on it, so inspect the sealing and the toe-kick area before you buy. Plywood carcasses cost more but resist moisture far better and hold screws and hinges longer.
Solid wood and engineered “marine” plywood units are the premium tier, ideal if the vanity will see heavy use or high humidity. For the top, ceramic and resin integrated tops shrug off water entirely, while natural stone and quartz look luxurious but need sealing (stone) and add weight. Whatever the material, soft-close hinges and drawer runners are worth insisting on; they are cheap to include and a constant annoyance when absent.
Storage and Internal Layout
Two units of the same width can offer wildly different usefulness depending on how the inside is arranged. Cabinets with doors give you a big open cavity, cheap to build but awkward because the P-trap eats the middle and everything ends up stacked. Drawer units cost more and lose a little volume to the drawer boxes, but they are dramatically more usable day to day since you can see and reach everything.
The smartest layouts I recommend are hybrids: a top drawer notched around the plumbing plus a lower drawer or a cabinet below. If you are buying for a shared or family bathroom, prioritize drawers over doors even at a small premium, because organization is what makes a vanity feel bigger than its footprint. Check that at least one drawer is deep enough for a hair dryer or cleaning bottles standing upright.
Plumbing Considerations Before You Buy
The most common reason a vanity swap turns into a headache is plumbing that does not line up. Existing supply and drain lines come out of the wall or floor at a fixed height, and your new cabinet has to accommodate them. Floor-standing units with a full back panel need a cutout for the pipes; many come pre-scored, but you may be cutting the panel yourself. If your rough-in is unusually high or off-center, a drawer unit may not clear the trap, so measure the pipe locations before you order.
Also confirm the drain type. Integrated and vessel basins sometimes need a specific pop-up or a bottle trap for the shallow space beneath a vessel. If you are moving the vanity to a new spot, budget for a plumber to relocate supply and waste lines, which is where costs climb. For a straight like-for-like swap, most reasonably handy homeowners can shut off the water, disconnect the old unit, set the new one, and reconnect a faucet and P-trap in an afternoon.
Cost Ranges and How to Choose
Prices span a wide range, and knowing the tiers keeps you from overpaying. Budget units, 18 to 24 inches in laminated MDF with a ceramic integrated basin, run $150 to $400 and are perfectly serviceable for a guest bath or rental. Mid-range vanities with plywood construction, soft-close drawers, and a quality resin or ceramic top land in the $400 to $1,000 band and are where I point most owners doing their main bathroom.
Premium and double-basin units with solid wood, stone or quartz tops, and designer basins run $1,000 to $3,000 or more, plus the faucet and installation. Add $150 to $400 for a straightforward professional fit, more if plumbing moves. To choose well, start with the width your wall allows, pick the basin style that matches how the room will be used, insist on moisture-resistant construction and soft-close hardware, and confirm your plumbing rough-in lines up. Nail those four points and a floor-standing vanity with a basin gives you the most bathroom function for the money of any single fixture you can buy.
Finish, Faucet, and Coordinating the Details
The last decisions turn a functional unit into a finished room. Vanity finishes have moved well beyond plain white; matte navy, sage green, warm oak, and charcoal are all common now, and darker cabinets hide the scuffs and splashes of a family bathroom far better than gloss white. Match the finish to your floor and wall tone rather than the wall color alone, since the cabinet is a large horizontal mass that anchors the room. If the unit comes without a top, confirm the countertop material and edge profile before you commit.
Faucets are usually sold separately, and the basin dictates what fits. A vessel basin needs a tall vessel faucet; a standard integrated top takes a normal single-hole or widespread faucet depending on the pre-drilled holes. Count the holes in your basin before ordering hardware, because a three-hole top will look wrong with a single-hole faucet and vice versa. Coordinating the drawer pulls, faucet, and any towel bars in one metal finish, whether brushed nickel, matte black, or brass, is a small, cheap step that makes the whole vanity look designed rather than assembled.
Prefer to explore on your own?
See how new flooring looks in your actual room in seconds — free, no signup.
Try the free Floor Studio →