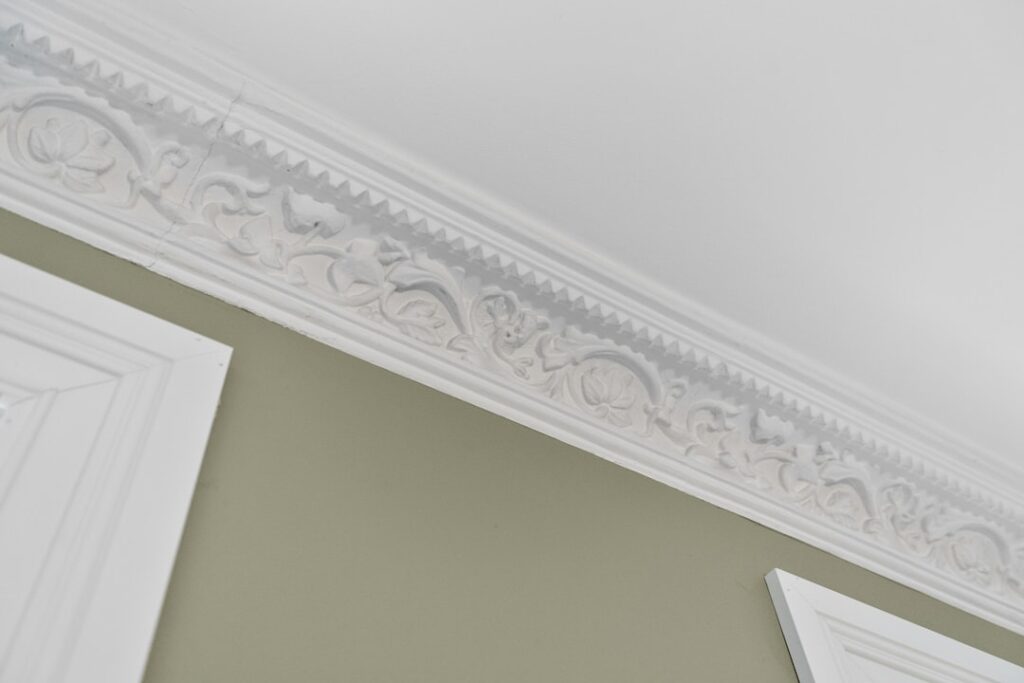
For homeowners who love the elegant look of crown molding but dread the compound miter cuts and heavy lifting that come with wood, foam crown molding is a genuine game changer. Made of dense polystyrene or polyurethane, foam crown is featherlight, cuts with a handsaw, and installs with adhesive instead of nails, making it one of the most DIY-friendly trim upgrades available. It goes up fast, costs less than wood in many cases, and once painted, most people cannot tell it from the real thing. This guide covers how it works, what it costs, and how to install it well.
What Foam Crown Molding Is
Foam crown molding is an architectural trim molded from expanded polystyrene (EPS) or high-density polyurethane. Polystyrene is the lightest and cheapest, often coated with a hard primer shell, while polyurethane is denser, more durable, and holds crisp detail better. Both come in long lengths, typically 8 to 12 feet, in a wide range of profiles from simple curves to ornate detailed designs. Because the material is so light, a single person can hold a full length overhead while the adhesive grabs, something that is difficult with heavy wood or MDF crown.
The Big Advantages
- Lightweight: Easy to handle and hold in place solo during installation.
- Glue-up installation: Adheres with construction adhesive or a special crown adhesive, minimizing or eliminating nails.
- Easy cutting: Cuts cleanly with a fine handsaw or miter saw, no splintering.
- Moisture-resistant: Polyurethane foam does not rot, warp, or absorb water, so it suits bathrooms and kitchens.
- Seamless joints: Gaps and seams fill easily with caulk or the adhesive itself for an invisible finish.
- Affordable detail: Ornate profiles that would be costly in wood are inexpensive in foam.
Foam vs. Wood and MDF Crown
Each material has trade-offs. Wood crown is the most traditional and durable but heavy, prone to gapping as it expands and contracts, and demands precise compound cuts. MDF is smooth and stable but heavy, dents easily, and swells if it gets wet. Foam is the lightest and easiest to install, resists moisture, and its glued joints do not open up with seasonal movement the way nailed wood can. Its main downside is that it is softer and can be dented by a hard knock, so it is less suited to high-traffic areas at a reachable height. For ceilings, where nobody touches it, foam’s durability is rarely an issue.
Cost of Foam Crown Molding
Foam crown is budget-friendly. Simple polystyrene profiles run $1 to $3 per linear foot, while denser polyurethane with fine detail runs $3 to $8 per foot. For an average 12-by-12 room with about 48 linear feet, materials cost $50 to $250 plus $15 to $30 for adhesive and caulk. Because installation is so approachable, most homeowners DIY it and save the labor entirely. Hiring a pro adds $4 to $10 per linear foot, but foam’s ease of installation makes it one of the best candidates for a first-time DIY trim project.
How to Install Foam Crown Molding
- Measure each wall and plan your cuts, noting inside and outside corners.
- Cut corners using a miter box or miter saw; many brands sell pre-made corner blocks that eliminate angled cuts entirely.
- Lightly sand and clean the wall and ceiling surfaces where the molding will bond.
- Apply the manufacturer’s recommended adhesive to both the wall and ceiling edges of the molding.
- Press the molding into the corner between wall and ceiling, holding it for the adhesive’s grab time, and use a few finish nails or painter’s tape to hold it while it sets if needed.
- Fill the seams and any gaps with the same adhesive or paintable caulk, smoothing with a wet finger.
- Once cured, prime if needed and paint.
The corner blocks are the secret weapon for beginners, turning the hardest part of crown molding into a simple butt joint against a decorative block.
Painting and Finishing
Most foam crown comes pre-primed and ready to paint. Use a latex or acrylic paint, and avoid oil-based paints or solvent-heavy products on bare polystyrene, since strong solvents can eat into the foam. A pre-primed polyurethane molding takes paint beautifully and, once finished in a satin or semi-gloss, is indistinguishable from painted wood from the floor. Caulking every seam and corner before painting is what gives foam crown its seamless, custom look, hiding the joints between lengths and at the corners.
Using Corner Blocks to Skip the Hard Cuts
The single feature that makes foam crown so beginner-friendly is the availability of decorative corner blocks, and they deserve a closer look because they change the whole project. Traditionally, the hardest part of any crown molding is the inside and outside corners, which require either precise compound miter cuts or careful coping. Corner blocks eliminate that entirely. You glue a decorative block into each corner of the room, then the straight lengths of crown simply butt against the flat face of the block with a plain square cut. There are no angles to calculate, no upside-down cutting, and no coping saw required. This means a first-timer can trim an entire room with nothing more than a way to make straight cuts and a tube of adhesive. Inside-corner blocks, outside-corner blocks, and even ceiling medallions and center pieces are available to match many profiles. For anyone intimidated by crown molding, corner blocks turn a job that stumps experienced carpenters into a straightforward glue-up that looks polished and professional.
Where Foam Crown Works Best
Foam crown is ideal in the many rooms where nobody touches the trim and where speed, budget, and moisture resistance matter. Living rooms, dining rooms, bedrooms, hallways, and home offices are perfect candidates, since the crown lives up at the ceiling out of harm’s way. Polyurethane foam crown is especially well suited to bathrooms, kitchens, and laundry rooms, because unlike wood and MDF it will not swell, rot, or grow mildew when exposed to humidity. It also excels in rental properties and quick refresh projects where the goal is an upscale look without the labor cost of finish carpentry. Where foam is less ideal is at a reachable height in a high-traffic area, such as a mudroom bench or a stairwell wall people brush against, since the softer material can dent from a sharp knock. For its intended home up at the ceiling, though, foam crown is durable, attractive, and a genuinely smart use of a renovation budget.
Common Mistakes to Avoid
- Using solvent-based paint on polystyrene: It can melt the foam; stick to latex or acrylic.
- Skipping surface prep: Adhesive bonds poorly to dusty or glossy surfaces.
- Not caulking seams: Unfilled joints between lengths show as thin lines once painted.
- Rushing the adhesive grab: Letting go too soon lets the molding sag; hold or tape until set.
- Installing at a reachable height in high-traffic spots: Foam dents; reserve it for ceilings and out-of-reach runs.
- Ignoring corner blocks: They make the job far easier for beginners; use them if cutting angles intimidates you.
Is Foam Crown Right for Your Project?
If you want the finished elegance of crown molding, a fast installation, a low price, and a project you can genuinely complete yourself over a weekend, foam crown molding is an excellent choice. Its light weight, glue-up install, moisture resistance, and available corner blocks remove nearly every obstacle that makes traditional crown intimidating. Reserve heavy wood crown for high-end, stain-grade projects and reachable spots that take abuse, and choose foam for painted ceilings where speed, budget, and ease matter most. Painted and caulked well, foam crown delivers the same graceful ceiling line at a fraction of the effort, and your guests will never know the difference.