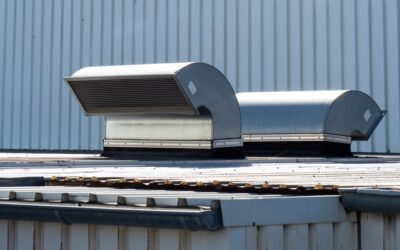
The biggest mistake with a gable vent on a vinyl-sided house is not the cut itself. It is cutting the siding tight to the vent, screwing it down hard, and trapping water behind it. Vinyl moves with temperature, and gable end vents for vinyl siding need a trim system that lets panels slide while still shedding rain away from the sheathing.
Here is the core answer. To add or replace a gable vent in vinyl siding, you unlock and remove the panels around the opening, cut the sheathing between framing members, install the vent with proper flashing against the house wrap, then trim it with J-channel or a purpose-made mounting block so the siding tucks in loosely around it. Done in that order, the vent looks factory-installed and stays dry for decades.
Gables are high, though. On most homes, the vent sits well above first-floor height, and that changes the safety math. Read the ladder section before you commit, and plan on hiring a siding contractor for any gable above the first story.
How Gable End Vents for Vinyl Siding Work
Gable vents let hot, moist attic air escape through the end walls of the roof. They come in rectangular, square, round, octagonal, and half-round shapes, usually in vinyl or aluminum, with a fixed louver and an insect screen behind it. Some are purely decorative, so check that the one you buy is a functioning vent with open louvers and a screen, not a solid plastic accent.
With vinyl siding, the vent has to integrate with a cladding that is designed to float. Panels hang on nails that sit in the center of slotted nail hems, leaving a small gap so each piece can expand and contract. Around any penetration, the siding ends inside a receiving channel rather than butting against the vent. That channel is what hides the cut edge and lets the panel move.
There are two main ways to create that channel:
- Vent with integral trim ring. Many vinyl vents are sold as a two-piece unit, with a frame that mounts to the wall and a built-in J-channel lip that receives siding on all sides.
- Mounting block plus separate vent. A gable vent mounting block for vinyl siding is a flat flanged plate with a receiving channel molded in. It mounts flat to the sheathing, the siding tucks into its edges, and the vent fastens to the block’s face. This works well when you want to use an aluminum or custom vent.
- Field-built J-channel. You can wrap a plain flanged vent with standard J-channel, mitering the corners. It is cheaper but fussier to make watertight at the top.
Ladder and Height Safety
Falls from ladders are among the most common serious home improvement injuries, and gable work combines height with two-handed tasks like cutting and fastening. Treat this section as part of the job, not a footnote.
- Above the first floor, hire a pro. If the vent sits higher than you can reach comfortably from a ladder at first-story height, or you would be working with arms overhead on the top rungs, call a siding contractor. They use pump jacks, scaffolding, or lifts with fall protection that a homeowner usually does not own.
- Use the right ladder. Choose an extension ladder long enough that you can work with your hips below the top three rungs, never standing on the top rungs. Check the duty rating covers your weight plus tools.
- Set it at the proper angle. Use the 4-to-1 rule: for every 4 feet of height, the base sits 1 foot out from the wall. Place feet on firm, level ground, and use a stabilizer or standoff arm so the ladder bears on the wall and not on the siding you plan to cut.
- Keep three points of contact when climbing, and carry tools in a belt or haul them up with a rope.
- Never work near power lines, in wind, or on wet ground. Keep a helper at the base.
Single-story homes with low gables, or detached garages and sheds, are the realistic DIY range for most people.
Tools and Materials
- Gable vent sized for your attic ventilation needs, with integral trim ring or a matching mounting block
- Siding unlocking tool (zip tool)
- Tin snips, utility knife, and a fine-tooth saw blade for vinyl
- Oscillating multi-tool or reciprocating saw for sheathing
- Drill/driver, level, tape measure, and a marker
- Corrosion-resistant roofing nails or pan-head screws
- Self-adhered flashing tape and house wrap tape
- J-channel if not using a mounting block
- Exterior sealant compatible with vinyl, used sparingly
- Safety glasses, gloves, and a dust mask
Step-by-Step: Cutting In a New or Replacement Vent
- Locate framing from the attic. Go into the attic and find the gable studs. Plan the opening between two studs so you do not have to cut framing. If the vent is wider than the stud spacing, adding a header and cutting a stud is framing work that deserves a carpenter’s eye. Drive a small nail out through the sheathing at each corner of the planned opening to mark it outside.
- Unlock the siding. On the ladder, hook the zip tool under the bottom lip of the panel above your work area and pull down and along to release the lock. Work slowly in cold weather, when vinyl gets brittle. Remove nails on the panels covering the opening and set them aside in order.
- Cut the sheathing. Using your corner nails as a guide, cut the opening with an oscillating tool. Keep the cut a bit smaller than the vent’s flange so the flange has solid backing.
- Prepare the house wrap. Cut the wrap in an I-pattern, fold the flaps into the opening, and staple them. At the top, cut a small flap you can lift so flashing can slide beneath it, following shingle-style lapping so water always runs over, not behind, each layer.
- Flash the opening. Apply self-adhered flashing tape along the bottom first, then the sides, then install the vent or mounting block, and finally tape the top flange with the house wrap flap folded down over it.
- Mount the vent or block. Set it level and fasten through the flange. With a mounting block, fasten the vent to its face afterward. Do not overdrive fasteners into vinyl flanges; leave a slight gap so the part can move.
- Trim and reinstall siding. Measure each panel against the vent and cut the notch so the siding sits inside the receiving channel with about 1/4 inch of clearance for expansion, more in cold weather installs. Lock each panel back into the one below, nail in the center of the slots, and leave nails slightly proud so the panel slides freely.
- Check the finish. Look for panels that are pulled tight or rippled, a sign they were nailed too hard. Seal only where the manufacturer calls for it; caulking vinyl to vinyl often traps water and restricts movement.
Replacing an Old Vent
Older gable end vents for vinyl siding often fade, crack, or lose their screens long before the siding wears out. Swapping a cracked or faded vent is easier than cutting a new one. Unlock the surrounding panels, remove the old vent’s fasteners, and inspect the sheathing edges for rot. Soft wood should be cut back and patched before the new unit goes in. If the new vent is a different size, you may need to enlarge the opening or add a mounting block to cover gaps. Replace old dried-out flashing rather than reusing it.
Troubleshooting
Water stains inside the attic below the vent
Wind-driven rain can blow through louvers, but stains on the sheathing below the vent usually point to failed top flashing. Check that the house wrap laps over the top flange and that the J-channel above has a drip edge or diverter.
Siding buckles around the vent
The panels are pinched. Either the cut notch is too tight or nails were driven home. Unlock the panel, widen the notch slightly, and refasten loosely.
Birds or wasps moving in
The insect screen is damaged or missing. Most vents allow the screen to be replaced from the attic side.
Attic still too hot or humid
Gable vents alone may not move enough air, and mixing them with ridge vents can short-circuit airflow. A roofer or insulation contractor can assess the whole ventilation layout.
General Cost Ranges
Vinyl gable vents themselves are relatively inexpensive, with basic rectangular units at the lower end and larger decorative shapes or aluminum units costing more. Mounting blocks and J-channel add a modest amount. The larger costs come from labor and access: a professional siding contractor will typically charge more for second-story gables because of scaffolding or lift setup, and adding framing for an oversized vent raises the price further. Expect the job to cost noticeably more if rotted sheathing turns up behind the old vent.
When to Call a Pro
Hire a siding contractor for any gable above the first floor, for vents that require cutting a stud, for homes where siding is old and brittle enough to crack when unlocked, and whenever rot is found around an existing vent. A pro is also the smart call if you are unsure about attic ventilation balance, since adding gable vents to a home with ridge and soffit venting can make performance worse rather than better.
For a low single-story gable or a garage, installing gable end vents for vinyl siding is a manageable weekend job if you respect the ladder rules, flash in the right order, and leave the vinyl room to move.
Frequently Asked Questions
Do I need a mounting block for a gable vent in vinyl siding?
Not always. Many vinyl vents have a built-in trim ring that receives the siding. A mounting block is useful when your vent lacks that ring or when you want a cleaner, more weather-resistant trim detail.
Can I install a gable vent without removing the siding?
Cutting through installed siding in place usually leaves exposed edges and poor flashing. Unlocking and removing the panels around the opening is the reliable way to get a watertight, clean result.
How much clearance should siding have around the vent?
Leave roughly 1/4 inch between the cut siding edge and the bottom of the receiving channel, and a bit more when installing in cold weather, so panels can expand in summer heat.
Should I caulk around a vinyl gable vent?
Use sealant sparingly and only where the vent maker recommends it. Flashing tape and correct lapping do the waterproofing; caulking vinyl panels to the vent can trap water and restrict movement.
Is it safe to install a gable vent from a ladder?
On a low single-story gable with a properly set and stabilized ladder, many homeowners do it safely. For anything above the first floor, hire a contractor who uses scaffolding or lifts with fall protection.