A solar attic fan needs no wiring, no breaker, and no electrician, which makes it one of the few roof projects a careful homeowner can finish in a day. That simplicity hides the real risk: a poorly flashed hole in your roof. Successful solar powered attic fan installation comes down to three things done right: placing the fan where it moves the most hot air, aiming the panel at the sun, and sealing the roof so water never follows the fan inside.
If you are comfortable on a single-story or low-pitch roof, a roof-mounted unit is a manageable DIY job. If climbing is not for you, a gable-mounted fan installs from inside the attic through an existing louvered vent and avoids cutting shingles entirely. Both options are covered in this guide, along with the ventilation math that keeps the fan from pulling conditioned air out of your house.
Planning Your Solar Powered Attic Fan Installation
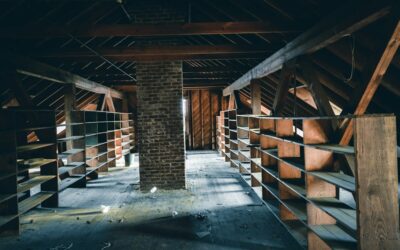
Start in the attic, not on the roof. Check how much intake ventilation you have, usually soffit vents along the eaves. An attic fan pulls air out, and that air must be replaced from somewhere. If intake is too small, the fan will draw air from the living space through ceiling gaps, light fixtures, and attic hatches, which wastes cooling and can pull in moisture. As a rule of thumb, you want at least as much net free intake area as exhaust area, and the fan maker lists the recommended intake for each model.
Next, look for existing exhaust. Ridge vents, turbines, and box vents can short-circuit a fan: it pulls air from the nearest opening instead of the soffits, leaving the rest of the attic hot. Many installers close off nearby box vents or pick a location well away from a ridge vent. Check the fan manufacturer’s guidance on combining with a ridge vent before you cut anything.
Finally, size the fan. Makers rate fans in cubic feet per minute, and a common target is enough airflow to exchange attic air about ten times per hour. Multiply attic floor area by the average height to get volume, then compare with the fan’s rating. Large attics may need two units spaced apart on the same slope.
Roof Mount or Gable Mount?
A roof-mounted fan with an integrated panel sits on the roof slope and pulls air up through a hole cut between rafters. It works best on a south- or west-facing slope with clear sun. A gable-mounted fan attaches to the back of an existing gable vent inside the attic, with its solar panel mounted separately on the roof or gable wall and connected by a low-voltage cable. Gable mounts avoid cutting shingles but move air across the attic rather than straight up, which suits rectangular attics with gables on each end.
Some roof-mount kits also offer a remote panel, useful when the ideal fan location sits on a shaded or north-facing slope. You place the fan where the heat is and the panel where the sun is, then connect them with the supplied cable.
Tools and Materials
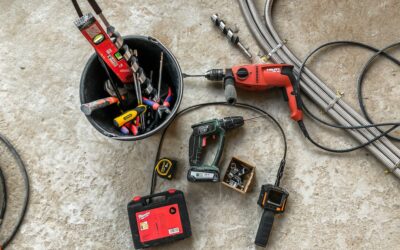
- Solar attic fan kit with flashing, panel, and hardware
- Extension ladder, roof harness and anchor, and soft-soled shoes
- Reciprocating saw or jigsaw, drill, and hole-saw bit if the kit calls for it
- Flat pry bar for lifting shingles, roofing nails, and a hammer
- Roofing sealant compatible with asphalt shingles
- Tape measure, chalk, and a long nail or drill bit to mark the hole from inside
- Safety glasses, gloves, and a dust mask for the attic
Step-by-Step Roof Mount Installation
1. Locate the Hole From the Attic
Pick a spot on the chosen slope about two feet down from the ridge, centered between two rafters, and clear of wiring, plumbing vents, and bracing. Measure the fan’s required opening, then drive a long nail or drill a small pilot hole up through the roof deck at the center so you can find it outside.
2. Set Up Safely on the Roof
Set the ladder on firm, level ground at a ratio of about one foot out for every four feet up, extending at least three feet past the roof edge. Secure it at the top. Install a roof anchor and wear a harness, even on moderate pitches. Work only on dry, calm days and avoid mid-afternoon heat, when shingles soften and scuff easily.
3. Cut the Opening
Mark a circle around the pilot nail using the kit’s template or diameter. Remove or trim shingles in the cut area. Cut through the deck with a reciprocating saw, keeping the blade shallow to avoid rafters. Clear the debris from the attic floor afterward so it does not compress insulation.
4. Flash the Fan Into the Shingles
This step keeps the roof watertight. Gently break the seal on the shingles upslope of the hole with a flat bar. Slide the top half of the fan’s flashing under those upper shingles, so water running down the roof flows over the flashing, not under it. The lower portion of the flashing sits on top of the downslope shingles. Like siding or a shingle course, everything overlaps downhill.
5. Fasten and Seal
Nail the flashing through the pre-punched holes or where the instructions direct. Cover each nail head under the upper shingles with roofing sealant, and run a bead under the shingle edges that lay over the flashing. Press the shingles back down. Avoid smearing sealant on exposed areas; a neat job relies on the overlap, with sealant as backup.
6. Aim the Panel
Integrated panels often tilt and rotate. In the Northern Hemisphere, face the panel roughly south and tilt it close to your latitude angle for year-round output, or slightly steeper to favor summer sun. Tighten the adjustments and check that no chimney, tree, or dormer shades it during peak afternoon hours, when attic heat is highest.
7. Test and Inspect
On a sunny day the fan should spin within moments. From the attic, confirm there is no daylight around the flashing, and check again after the first heavy rain for any drips or staining on the deck.
Gable Mount Installation
Working from inside the attic, measure the gable vent opening. Attach the fan to the inside of the vent using the kit’s mounting bracket or a simple frame of lumber screwed to the studs around the vent, making sure the fan blows outward. Mount the solar panel on the gable wall or on the roof with its bracket, sealing any fasteners through the roof with sealant. Run the low-voltage cable through a sealed hole to the fan and connect the plug. Screen any gaps so birds and insects cannot get in. If the opposite gable has a vent, that often becomes a supplemental intake.
For many homeowners, gable mounts are the friendliest path to a first solar powered attic fan installation, because the only roof work is the panel bracket, and many kits let you mount the panel on the gable wall from a ladder instead.
Roof and Ladder Safety
Falls from ladders and roofs cause serious injuries every year, and most happen during short, routine tasks. Use a harness and anchor, keep three points of contact on the ladder, and never carry heavy items up by hand; hoist them with a rope. For two-story homes, steep roofs, tile or slate roofing, or any roof you are not comfortable walking, hire a roofer or installer. Solar panels on these fans are low-voltage DC, but still avoid handling connectors in wet conditions.
Troubleshooting
- Fan does not spin: check the panel connection and look for shade; some units have a thermostat that only runs past a set temperature.
- Weak airflow: intake may be undersized, or a nearby vent is short-circuiting the fan.
- Leak after rain: the upper flashing likely sits on top of the shingles rather than under them; lift, reposition, and reseal.
- Noise or rattle: tighten mounting screws and check for debris on the blades.
- Attic still hot: the fan may be undersized for the attic volume, or insulation on the attic floor may be thin, letting heat radiate into rooms regardless of ventilation.
Cost Range
Solar attic fans typically range from a couple hundred dollars for basic units to several hundred for high-capacity models with remote panels. A DIY solar powered attic fan installation costs little beyond sealant and safety gear. Professional installation commonly adds a few hundred dollars per fan, more for steep roofs or added intake vents. Check whether your area offers a federal or local tax credit, since some solar fans have qualified in the past.
When to Call a Pro
Bring in a roofer if the roof is steep, two stories or more, near the end of its life, or covered in tile, slate, or metal, which need special flashing. A pro is also wise if your roof is under a manufacturer warranty that requires certified work. If the attic shows signs of mold, moisture, or inadequate insulation, have those assessed before adding ventilation, and do not let any attic fan depressurize a space containing a gas water heater or furnace without a qualified HVAC check.
Frequently Asked Questions
Can I install a solar attic fan myself?
Yes, on a single-story or low-pitch asphalt shingle roof if you use proper fall protection. Gable-mount models are even easier because most of the work happens inside the attic.
Where is the best place to put a solar attic fan?
Place it near the ridge on a south- or west-facing slope, centered between rafters, and away from other exhaust vents so it draws air from the soffits.
Do solar attic fans need electrical wiring?
No. The panel powers the fan directly with low-voltage DC, so no connection to your home’s electrical system is required.
Should I close my ridge vent if I add an attic fan?
Often yes, or the fan will pull from the ridge instead of the soffits. Follow the fan maker’s guidance, since some systems are designed to work alongside a ridge vent.
Do solar attic fans work on cloudy days?
They run slower in reduced sunlight and stop at night. Some models offer a battery or AC backup option for continued operation.