
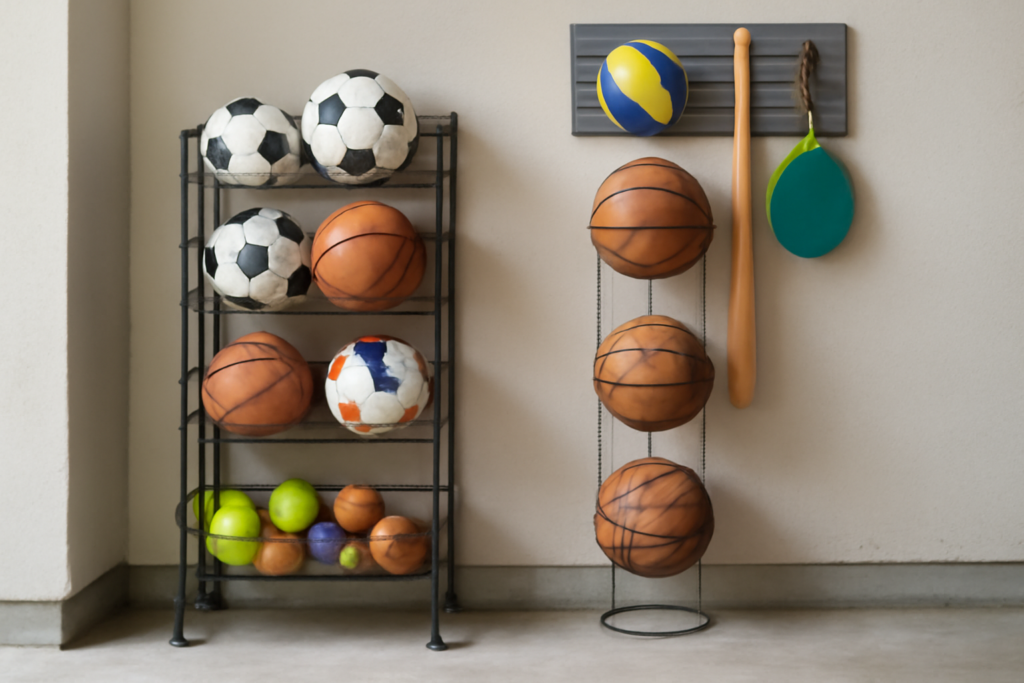
Nothing turns a two-car garage into an obstacle course faster than a family of athletes. A single basketball can roll under the car, trip you at the door, and vanish for a season. Smart garage ball storage solves the chaos by giving every ball a fixed home off the floor, which is exactly where round objects want to be least. The sports pile is often the first thing homeowners want gone. The good news is that corralling balls is one of the cheapest and quickest wins in the entire garage.
Before you buy anything, take five minutes to inventory what you actually own. Basketballs, soccer balls, and volleyballs are roughly 8 to 10 inches across. Footballs and rugby balls need horizontal cradles. Tennis balls, baseballs, and pickleballs are small enough to live in bins. When you know your mix, you can match the storage to the shape instead of buying a one-size rack that half your gear won’t fit.
Why Vertical Storage Beats a Corner Pile
The corner pile is the default, and it fails for a simple reason: round things don’t stack. Gravity constantly redistributes the pile, so balls migrate into walkways and behind bikes. Going vertical uses the one resource almost every garage has in surplus, which is wall and ceiling height above the four-foot mark. A wall-mounted system keeps balls visible, drains any rainwater or sweat, and lets kids grab their own gear without dismantling a mountain.
There is also an air-pressure benefit most people overlook. Balls left in a hot pile against a concrete floor lose pressure faster because heat and slow leaks compound. Hanging them in open air, where temperatures stay more even, keeps them game-ready longer. In a garage that swings from 40°F in winter to 95°F in summer, that difference is real over a season.
Wall-Mounted Racks and Hammocks
The workhorse of ball storage is the wire wall rack. Models like the Rubbermaid FastTrack sports organizer or a simple two-tier steel ball rack hold six to nine balls and mount to studs with a few lag screws. Expect to pay $30 to $70 for a sturdy steel unit. Look for a lip or basket depth of at least 5 inches so balls don’t roll off when a door slams.
For a budget approach, an elastic ball hammock is hard to beat. These stretchy net corners screw into two adjacent walls and hold a surprising 10 to 15 balls for under $20. They flex to fit whatever you cram in, from basketballs to a stray helmet. The trade-off is that they sag over time and look messier than a rack, so they suit kids’ zones where function beats form.
- Steel wire rack: $30-$70, holds 6-9 balls, cleanest look, needs stud mounting
- Elastic corner hammock: $12-$20, holds 10-15 balls, flexible, sags over time
- Slatwall ball baskets: $15-$25 each, modular, best if you already run slatwall
- Overhead cargo net: $25-$40, uses ceiling space, slower to access
Bins, Carts, and Rolling Options
Small balls and mixed gear belong in bins, not racks. A rolling sports cart with two or three open mesh bins keeps baseballs, tennis balls, and cleats mobile so you can wheel everything to the car on game day. The Milton or Suncast rolling organizers run $60 to $120 and double as a bench. If you coach or haul a team’s worth of equipment, the mobility pays for itself the first weekend.
For a stationary solution, stackable ventilated totes work well. Choose bins with mesh or drilled sides so damp balls dry instead of growing mildew. Label the front of each bin by sport, and you eliminate the daily dig. A three-bin tower costs around $40 and fits neatly on a shelf or in a corner where a rack won’t reach.
DIY Garage Ball Storage Projects
If you own a drill and a Saturday morning, you can build a better rack than most store-bought units for around $25 in lumber. The classic design uses two horizontal 2×4 rails mounted 12 inches apart on the wall, with lengths of PVC pipe or wooden dowels angled slightly upward between them. Balls rest in the gaps and can’t roll forward. Angle the shelf back about 10 degrees and nothing escapes.
Another proven build is the bungee-cord bin. Screw a plywood box or repurpose an old dresser drawer to the wall, then run two horizontal bungee cords across the open face a few inches apart. Push balls in past the cords and they stay put, but a kid can pull them out with one hand. It handles odd shapes like footballs that racks struggle with.
For the ceiling, a simple cargo net stretched between four eye bolts turns dead air above the garage door into deep storage for off-season gear. Just keep it clear of the door’s travel path and never load it over anything you park under, since nets do occasionally shed a ball.
Planning Your Layout
Placement matters as much as the hardware. Mount everyday balls at kid height near the door to the yard, so gear goes out and comes back without crossing the whole garage. Park seasonal items like footballs in fall and pool balls in summer up high or in the far corner. The goal is that the stuff you touch weekly is the easiest to reach, and everything else stays out of the daily flow.
Leave at least 24 inches of clearance between any wall rack and a parked car’s mirrors and doors. A nice rack can get sheared off if it sticks into the swing zone of a minivan’s sliding door. Measure with the vehicle actually parked before you drill.
Keeping It Organized Long-Term
Any system survives only if putting gear away is easier than dropping it. That is why open racks and hammocks outperform lidded boxes for daily-use balls: a lid is one step too many for a nine-year-old. Reserve closed bins for small items and off-season gear that you access a handful of times a year.
Twice a year, pull everything down and do a quick triage. Toss the flat balls that won’t hold air, re-inflate the low ones to their stamped PSI, and wipe down anything gritty before it scratches your car. A ten-minute reset in spring and fall keeps the whole zone from sliding back into a pile.
Storing Inflatables and Off-Season Gear
Beach balls, pool floats, and other inflatables create a special storage headache because they are bulky when full and awkward even when deflated. The smart move is to deflate large inflatables at the end of the season, fold them flat, and stash them in a labeled bin rather than fighting to hang them. A single 27-gallon tote swallows an entire summer’s worth of pool toys and slides onto a high shelf until Memorial Day.
For gear that lives outdoors, remember that garages swing through wide temperature extremes. Rubber and vinyl degrade faster when they bake against a sun-warmed wall or freeze solid in winter, so keep pricier items like leather basketballs and quality soccer balls away from exterior walls that transfer the most heat and cold. An interior wall or a spot near the house-facing side of the garage stays more stable and adds years to your gear.
Combining Ball Storage With a Full Sports Zone
The most effective setups treat balls as one part of a dedicated sports corner rather than an isolated rack. Group the ball rack with hooks for bats, hockey sticks, and rackets, a bin for gloves and pads, and a shelf for helmets. When everything for a given sport lives in one zone, a kid can grab a complete kit in seconds and, more importantly, put it all back in the same trip.
A pegboard or slatwall panel behind the sports corner ties it together and lets you reconfigure as your kids age out of one sport and into another. Adjustable hooks and baskets mean the same wall that held tee-ball gear at age six can carry a lacrosse setup at age twelve without new hardware. Building in that flexibility from the start keeps the zone useful for the long haul instead of forcing a redo every couple of years.
Good garage ball storage is not about buying the fanciest rack. It is about matching the shape of your gear to the right holder, mounting it where your family naturally reaches, and keeping the barrier to putting things away as low as possible. Do that, and the rolling-basketball obstacle course disappears for good, giving you back both floor space and a little sanity every time you pull into the garage.


