If your belt-drive opener has started slipping, squealing, or letting the door jerk on its way up, the rubber belt has likely stretched or frayed past its useful life. A garage door opener belt replacement is a manageable DIY project that restores smooth, quiet operation and costs a fraction of a new opener. Belt-drive openers are prized for running quietly, but the reinforced rubber belt does wear over years of daily cycling. The good news is that replacing it takes a couple of hours and basic tools, and it can add many more years of life to an otherwise-good opener.
Part of our Garage Doors guide — explore the full guide →
- Signs Your Belt Needs Replacing
- Belt Drive vs. Chain Drive
- Tools and Parts You'll Need
- Safety First
- Step-by-Step Belt Replacement
- Reconnect and Test
- Fine-Tuning the Tension
- What It Costs
- How Long Belts Last and Why They Wear
- Belt Care and Maintenance
- When to Replace the Whole Opener Instead
- The Bottom Line
Signs Your Belt Needs Replacing
A worn belt announces itself well before it snaps. Watch for these symptoms:
- Slipping or jerking: The door moves unevenly or the belt seems to skip on the drive gear.
- New noise: A belt drive is normally quiet, so squealing, slapping, or grinding signals wear or misalignment.
- Visible fraying or cracking: Inspect the belt for exposed cords, cracks, or thinning spots.
- Excessive sag: A belt that droops noticeably has stretched beyond proper tension.
- Door won’t fully open or close: A slipping belt can stop the door short of its travel limits.
If you catch these early, you can replace the belt on your schedule rather than being stranded with a door stuck open or closed.
Belt Drive vs. Chain Drive
Before ordering parts, confirm you actually have a belt drive. Look at the rail running from the opener to the door. A belt drive uses a wide, flat reinforced rubber belt, while a chain drive uses a metal bicycle-style chain. This matters because they use different replacement parts and the chain version is adjusted rather than replaced as often. This guide covers belt drives specifically, though the removal and reinstallation steps are broadly similar.
Tools and Parts You’ll Need
- A replacement belt matching your opener’s brand and rail length (order by model number)
- A stepladder
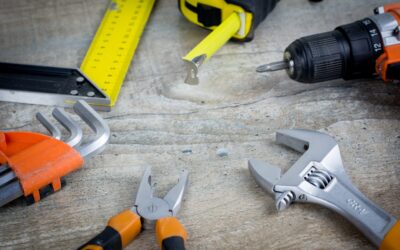
- Wrenches and sockets, commonly 1/2 inch and 9/16 inch
- Pliers and a screwdriver
- Work gloves and safety glasses
- The opener’s manual, if available, for the exact belt routing
Buying the correct belt is critical. Belts are sized to the rail length (7-foot doors versus 8-foot or taller) and vary by manufacturer, so match your opener’s model number exactly. A universal belt of the wrong length or profile won’t seat properly on the drive gear.
Safety First
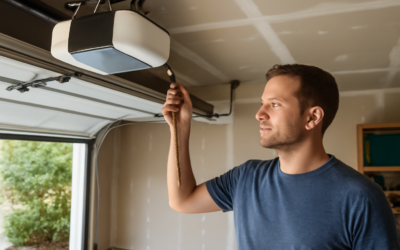
Before touching anything, take these precautions. Unplug the opener from the ceiling outlet so it can’t cycle while your hands are in the mechanism. Then release the door from the opener using the emergency release cord (the red handle), and either work with the door closed or securely propped and clamped so it can’t fall. A garage door weighs well over a hundred pounds, and the springs are under enormous tension; never disturb the springs themselves, only the opener belt.
Step-by-Step Belt Replacement
- Close the door and unplug the opener. Confirm it has no power.
- Disconnect the trolley. Pull the emergency release cord to detach the door from the trolley that rides the rail.
- Release the belt tension. At the door end of the rail, loosen the tension nut on the idler pulley bracket to slacken the belt.
- Detach the belt from the trolley. Note exactly how the belt connects to the trolley, then disconnect it. Taking a photo first makes reassembly foolproof.
- Remove the old belt. Slip it off the drive sprocket at the motor end and the idler pulley at the door end, and pull it free of the rail.
- Route the new belt. Feed the new belt along the rail the same way, around the idler pulley and onto the motor’s drive sprocket, keeping it untwisted.
- Reconnect to the trolley. Attach both belt ends to the trolley exactly as the old one was, matching your photo.
- Set the tension. Tighten the idler pulley tension nut until the belt is snug but not overtight. Most manuals specify tightening until the belt is taut with slight give; overtensioning stresses the motor and bearings.
Reconnect and Test
With the new belt installed and tensioned, reconnect the trolley to the door by running the opener until the trolley reaches the release mechanism and re-latches, or by pulling the release cord toward the door. Plug the opener back in. Now test carefully: run the door through a full open and close cycle and watch the belt. It should track straight on the sprocket, move smoothly, and stay quiet. If the door doesn’t reach full open or close, adjust the travel limit screws on the opener. If the belt still slips, increase the tension slightly.
Fine-Tuning the Tension
Belt tension is the setting people most often get wrong. Too loose and the belt slips and slaps; too tight and it wears prematurely and strains the motor. A properly tensioned belt has just a little flex when you press it midway along the rail, without sagging or twanging tight. Recheck it after a week of use, since a new belt seats slightly and may need a minor adjustment.
What It Costs
A replacement belt runs roughly $30 to $70 depending on brand and length. Doing it yourself, your only other cost is a couple of hours. Hiring a garage door technician to replace a belt typically costs $100 to $250 including the part, so the DIY route saves a meaningful amount. Compare that to a full opener replacement at $300 to $600 installed, and a belt swap is clearly the economical fix for an otherwise-working unit.
How Long Belts Last and Why They Wear
A quality reinforced rubber belt typically lasts 10 to 15 years under normal residential use, which is often the life of the opener itself. The belt wears from a combination of factors: the constant flexing around the drive sprocket and idler pulley, exposure to temperature swings in an unconditioned garage, and the cumulative stress of thousands of open-close cycles. A household that cycles the door a dozen times a day naturally wears the belt faster than one that uses it twice.
You can extend belt life with a couple of habits. Keep the door itself well maintained, because a door that binds, sticks, or is out of balance forces the belt to work far harder than it should. Lubricate the door’s rollers, hinges, and springs on schedule so the opener isn’t fighting friction. And keep the belt at proper tension, since both a loose slipping belt and an overtight one wear prematurely. A smooth-running door is the best thing you can do for belt longevity.
Belt Care and Maintenance
Unlike a chain drive, a belt drive needs no lubrication on the belt itself; oiling it can actually attract grit and degrade the rubber, so keep lubricant off the belt. What the belt does need is periodic inspection. A couple of times a year, look it over for fraying, cracking, or thinning, and check the tension by pressing on it midway along the rail. While you’re at it, inspect the idler pulley and drive sprocket for wear, since a chewed-up sprocket will quickly damage a new belt.
If you find the belt worn but the sprocket or pulley also damaged, replace those components too. Installing a fresh belt onto a worn drive sprocket just wears the new belt out fast, so address the whole drive system together when parts show age.
When to Replace the Whole Opener Instead
Sometimes a belt replacement isn’t the smart call. If your opener is already 15 or more years old, lacks modern safety features like photo-eye sensors, or has other failing components such as a worn motor or stripped drive gear, the money is better spent on a new unit. Modern openers add real benefits: quieter operation, battery backup that works during power outages, smartphone control, and improved security through rolling codes. Weigh the roughly $30 to $70 belt against a $300 to $600 new opener, and factor in the age and condition of everything else before deciding.
The Bottom Line
Replacing a garage door opener belt is one of the more approachable garage repairs, and it directly cures the slipping, noise, and jerky motion that make an aging opener frustrating. Order the correct belt by model number, unplug the opener and release the door for safety, route and tension the new belt carefully, and test through a full cycle. In a couple of hours you’ll have restored the quiet, smooth operation that made you choose a belt drive in the first place, all for the price of the belt.