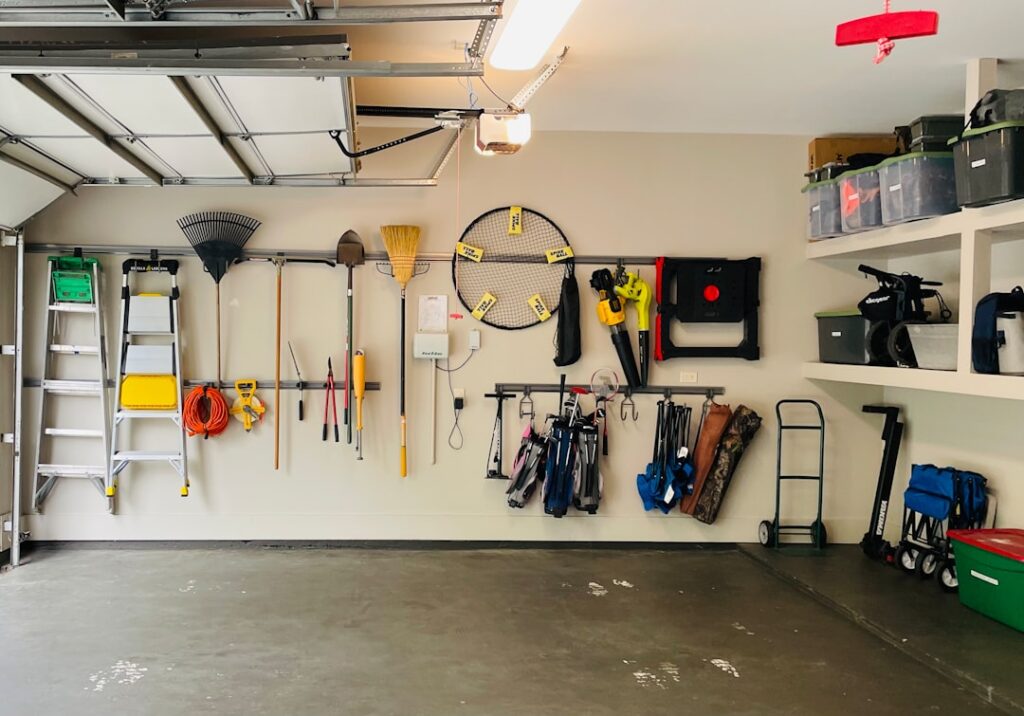
Nothing clears a cluttered garage faster or cheaper than getting long, awkward gear up off the floor and onto the wall. Garage storage hooks are the highest-return organizing purchase you can make, turning blank wall and ceiling space into hanging spots for bikes, ladders, rakes, hoses, and extension cords. A $40 assortment of hooks can reclaim more floor than a $300 cabinet.
The catch is that a hook is only as good as what it’s screwed into. Anchor it wrong and your bike ends up on the hood of your car. This guide covers the hook types worth owning, real weight limits, and exactly how to mount them so they hold.
The Main Types of Storage Hooks
Hooks aren’t one product. Matching the shape to the item is what makes the wall work.
- J-hooks: The all-purpose single hook. Great for extension cords, hoses, buckets, and hand tools. Sold in multipacks for a few dollars each.
- U-hooks and utility hooks: The wide U cradles awkward loads like folding chairs, ladders, and hedge trimmers.
- Bike hooks: Vinyl-coated hooks that hang a bike vertically by the wheel or horizontally by the frame. A single vertical hook holds a full bike.
- Ladder and tool hooks: Heavier gauge, often sold in pairs, rated to carry an extension ladder or a wheelbarrow flat against the wall.
- Track-system hooks: Hooks that clip into a wall rail (Gladiator GearTrack, Rubbermaid FastTrack) so you can slide and rearrange without redrilling.
Most homeowners do best with a mixed assortment pack of J and U hooks plus a couple of dedicated bike hooks. Buy the coated versions; the vinyl or rubber sleeve protects tool handles and keeps hooks from rusting.
Weight Ratings and Why They Lie a Little
Every hook prints a weight rating, but that number assumes a perfect mount into solid wood. A screw-in hook that says “50 lb” driven into drywall alone might hold 10 pounds before it rips free. The rating is a ceiling, not a promise.
Here’s what typical hooks genuinely handle when mounted correctly into a stud. A standard steel J-hook holds 25 to 50 pounds. A heavy utility or ladder hook holds 50 to 75 pounds. Bike hooks are usually rated 35 to 50 pounds, plenty for any bicycle. Track-system hooks vary by clip but commonly run 25 to 75 pounds each.
Give yourself a safety margin of at least double. If a wheelbarrow weighs 30 pounds, use hooks rated for 60-plus and spread the load across two of them. Loads sway when you bump them, and a swaying load pulls harder than a static one.
Anchoring Into Studs vs. Drywall
This is the section that saves your stuff. The rule is simple: anything over about 15 pounds must be screwed into a stud or into solid wood, not into bare drywall.
Find your studs with a magnetic or electronic stud finder. In most garages they sit 16 inches on center, sometimes 24. Mark the center, drill a pilot hole slightly narrower than the hook’s screw shank, and drive the hook in until the threaded portion is fully buried. A hook screwed into a 2×4 stud will bend before it pulls out.
When you can’t hit a stud
If your target spot has no stud behind it, you have two good options. Mount a strip of 3/4-inch plywood across several studs first, then screw hooks anywhere into the plywood. Or use a rated toggle bolt (like a Snaptoggle) that clamps behind the drywall, good for 30 to 50 pounds when installed right. Plastic drywall anchors are fine for a broom but never for a bike.
Ceiling Hooks for Bikes and Big Gear
Ceilings are wasted space in most garages. Ceiling hooks and pulley hoists get bikes, kayaks, and ladders overhead, freeing the entire wall and floor beneath them.
Screw ceiling hooks only into the joists, never into the drywall or the gap between joists. Joists usually run 16 or 24 inches on center; a stud finder works overhead too. For a single bike hung by both wheels, two heavy vinyl-coated hooks into a joist cost about $8 and work great. For a heavy kayak or a road bike you lift often, a pulley hoist system ($25 to $50) lets you crank the load up with a rope instead of pressing it overhead.
Mind your clearance. Measure how low the hung item hangs and confirm your car, garage door track, and opener all clear it before you commit the holes.
Smart Layout and Spacing
A wall of hooks only helps if you can actually get things on and off them. Plan the layout before you drill.
Hang the heaviest, least-used items highest and the daily-grab items at chest height. Leave enough space between hooks that a load on one doesn’t collide with its neighbor; for bikes, that means 18 to 24 inches between vertical hooks so handlebars and pedals clear. Group by category, garden tools together, cords and hoses together, so you’re not hunting.
Keep a clear zone around the garage door opener and its track. And run your hooks in a straight, level line. Snap a chalk line first. A tidy row of hooks reads as organized even when it’s fully loaded, while a scattered set looks like clutter no matter what.
Installing Hooks the Right Way
The install itself takes minutes once you’ve planned the layout. Screw-in hooks with a threaded shank are the strongest and simplest for solid wood. Drill a pilot hole about two-thirds the diameter of the screw threads so the hook bites without splitting the stud, then thread it in by hand until only the hook and its collar show. If it gets tight near the end, slip a screwdriver shaft through the hook for leverage.
For bolt-on hooks with a mounting plate, use two screws minimum and hit a stud with at least one of them. Level the plate before you drive the second screw so the hook doesn’t sit cockeyed. On block or concrete walls, common in older garages, switch to a masonry bit and plastic or sleeve anchors rated for the load, and let the anchor seat fully before hanging weight.
Test every hook before you trust it. Hang the item, then push and tug on it a few times to simulate the bumps of real use. A hook that shifts or a screw that backs out even slightly means you missed the stud or under-drilled the pilot. Fix it now, not when your bike is hanging over the car.
What It Costs to Outfit a Garage
The beauty of hooks is how little they cost for how much they do. A 20-piece assortment of coated J and U hooks runs $15 to $30. A pack of four heavy-duty utility hooks is $12 to $20. Individual bike hooks are $2 to $5 each; a bike pulley hoist is $25 to $50. A basic wall-track kit with a rail and a starter set of hooks starts around $60 to $100.
For most two-car garages, $50 to $80 in assorted hooks plus a couple of ceiling bike hooks clears everything long and awkward off the floor. That’s a fraction of what cabinets or a slatwall system cost, and it’s the first thing I install in any garage.
Common Mistakes to Avoid
A handful of errors account for nearly every hook failure I’ve seen. Steer clear of these and your wall will hold.
- Trusting drywall anchors with heavy loads. The plastic expansion anchors in the hook’s blister pack are for brooms and cords, not bikes. Anything real goes into a stud or a plywood backer.
- Over-drilling the pilot hole. A pilot too close to the screw diameter strips the wood and the hook works loose. Keep it around two-thirds the thread diameter.
- Bare metal on tool handles. Uncoated hooks scratch handles and can rust onto them. Spend the extra dollar for vinyl-coated versions.
- Ignoring clearance. Hooks that put a load into the path of the car door, garage door, or opener track cause dents and jams. Map the swing zones first.
Fix these up front and you won’t be re-drilling holes six months later.
Get the anchoring right, respect the weight limits, and a wall of well-placed garage storage hooks will hold your gear for the life of the house.