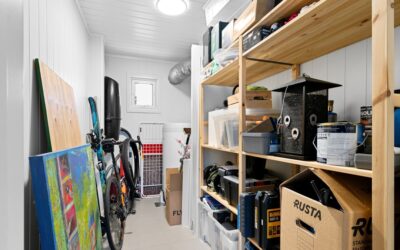
If your garage has become an obstacle course of scooters, sports balls, and sun-faded ride-ons, you need a real garage toy storage system, not another pile in the corner. The goal is simple: get everything off the floor, make it easy for kids to grab and return items themselves, and keep the space flexible so the car still fits. Done right, a weekend and a few hundred dollars reclaims the whole bay.
- Sort Before You Store
- Wall Systems Do the Heavy Lifting
- Bins and Baskets for the Small Stuff
- Taming the Ball Avalanche
- Storing Bikes, Scooters, and Ride-Ons
- Overhead Storage for Seasonal Toys
- Zoning the Garage
- Flooring and Protection
- Making It Kid-Friendly
- Keeping the System Working
- A Realistic Budget
Sort Before You Store
Every good system starts with a purge. Pull everything out and sort into four piles: keep and use often, keep but seasonal, donate, and trash. Kids outgrow toys fast — that toddler ride-on and the deflated kiddie pool are probably done. Be honest, because the storage you buy should match what actually stays, not the whole graveyard.
Group the keepers by type: wheeled toys, balls and sports gear, sand and water toys, and small loose items. Each group wants a different solution, so this sorting step directly shapes what you buy.
Wall Systems Do the Heavy Lifting
Floor space is precious; wall space is usually wide open. A track-and-hook system like Gladiator GearTrack, Rubbermaid FastTrack, or a slatwall panel turns bare drywall into a working grid. Rails cost about $15 to $30 per 4-foot section, and hooks run $5 to $15 each. Because the hooks slide and reposition, the system grows with your kids — a scooter hook today, a bike hook next year.
- Bike hooks: hang bikes by the front wheel or use a horizontal hook to store them level against the wall.
- Utility hooks: hold helmets, jump ropes, hula hoops, and folding scooters.
- Basket attachments: corral loose balls and pool toys without a separate bin.
Mount rails into studs at 16-inch centers with lag screws so a loaded hook doesn’t rip out of drywall.
Bins and Baskets for the Small Stuff
Loose toys need containment, and clear or labeled bins let kids find things without dumping everything. Use large open totes for bulky items and stackable lidded bins for anything that has to survive dust and temperature swings. A 27-gallon heavy-duty tote runs $12 to $18 and stacks three high without bowing.
For a kid-accessible zone, mount a low cube shelf or a plastic drawer cart within their reach. When the return bin is at their height, cleanup actually happens. Reserve upper shelves and overhead space for seasonal gear you control — the water balloons and beach toys that only come out three months a year.
Taming the Ball Avalanche
Nothing scatters like sports balls. A vertical ball corral — a wood or wire cage about 12 by 18 by 48 inches — stacks basketballs, soccer balls, and footballs in a footprint the size of a trash can. You can buy one for $40 to $80 or build one from 2x2s and bungee cords for under $25 in an afternoon.
For smaller gear — baseballs, gloves, tennis balls — a wall-mounted wire basket or a repurposed hanging shoe organizer keeps them visible and off the floor. Give bats, rackets, and hockey sticks their own long hooks so they stop sliding across the garage.
Storing Bikes, Scooters, and Ride-Ons
Wheeled toys are the bulkiest offenders and deserve their own strategy. Kids’ bikes hang beautifully from a horizontal wall hook or a vertical front-wheel hook, clearing the floor completely. Scooters slide into a slotted rack or hang from a utility hook by the handlebar. For battery-powered ride-ons and Power Wheels, park them on a rubber mat against the wall and mount the charger on a nearby hook so the cord doesn’t snake across the floor.
- Bike hooks: one per bike, mounted into studs at a height each kid can reach.
- Scooter racks: corral three or four scooters in a footprint the size of a doormat.
- Ride-on parking: a taped floor square plus a wall-mounted charger keeps it charged and contained.
Mount bike hooks at a height that grows with your kids — start low so a five-year-old can hang their own bike, then raise the hooks as they get taller. Teaching kids to hang their own bike is the single habit that keeps the garage floor clear.
Overhead Storage for Seasonal Toys
Pool floats, sleds, and the giant inflatable everyone forgets until July belong overhead. A ceiling rack bolted into joists holds 250 to 600 pounds and costs $130 to $300 for a 4-by-8-foot unit. Store lightweight, bulky, rarely-used items up top and keep daily toys down low. Just don’t stash anything a child needs to reach — overhead is parent territory.
Large lidded totes work well up there because they protect contents from dust and the temperature swings that crack cheap plastic over a couple of summers.
Zoning the Garage
Assign toys a defined zone rather than letting them creep across the whole space. Pick the wall nearest the door kids use so they can grab a scooter and go without walking past the car or tools. A painted or taped boundary on the floor — a simple 6-by-6-foot square — teaches younger kids where toys live and where the car parks.
Keep sharp tools, chemicals, and lawn equipment in a separate, ideally locked zone far from the toy area. A garage that mixes weed killer with sidewalk chalk is a hazard; separating the zones is free and matters more than any bin.
Flooring and Protection
Ride-on toys and bikes leave black scuffs and tire marks on bare concrete, and a cold, damp slab rusts metal frames. Interlocking foam or PVC floor tiles ($2 to $4 per square foot) create a soft, wipeable play surface in the toy zone. If you’d rather seal the whole floor, an epoxy or polyaspartic coating ($2.50 to $5 per square foot DIY) shrugs off scuffs and hoses clean.
Add a rubber mat under the wheeled-toy parking spot to catch mud and grass, and cleanup drops from a chore to a quick sweep.
Making It Kid-Friendly
A storage system only works long-term if kids can use it without you. Design for their height and their attention span. Put daily toys in open bins at floor level so there’s no lid to fight and no shelf to reach. Reserve the upper shelves and hooks for items you hand out and put away yourself. The rule of thumb: if you want a child to return something, the spot has to be reachable in one motion.
Color-coding helps younger kids. Assign a bin color to each category — red for balls, blue for sand toys, green for art supplies — and cleanup becomes a matching game rather than a chore. A small step stool stored in the zone lets older kids reach a slightly higher shelf safely, extending the usable storage without you lifting a finger.
Keeping the System Working
The best garage toy storage plan fails if nobody maintains it, so build in easy habits. Label every bin with words and a picture for pre-readers. Do a five-minute reset each week and a bigger sort each season — as kids grow, hook heights rise and toddler bins get donated. Store a small broom and dustpan in the zone so sand and grass get swept, not tracked into the house.
- Label bins with words and pictures for young kids.
- Reset weekly, deep-sort each season.
- Rotate outgrown items to donation right away.
A Realistic Budget
You don’t need a showroom garage. A solid starter setup — one 8-foot rail with hooks, a ball corral, four totes, and a low kid-height shelf — runs about $250 to $400 and handles most families. Add an overhead rack and floor tiles and you’re around $600 to $900 for a system that lasts through several childhood stages. Spend on the wall system and bins first; those two do 80 percent of the work and keep the garage usable for everyone.