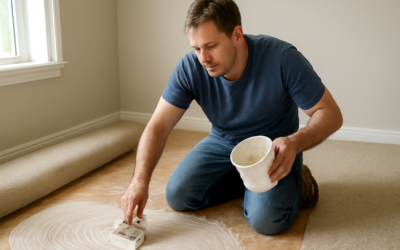
Carpet tiles changed the residential basement and home office market in a way that broadloom never did. They install fast, replace individually when stained, and ship flat instead of needing a 30-foot box truck. The question of whether to glue down carpet tiles versus relying on the peel-and-stick or pressure-sensitive backing comes up in almost every project. The short answer is that full glue-down beats every other method for high-traffic floors that need to last a decade. The longer answer involves adhesive selection, subfloor prep, and installation sequencing that determines whether the floor holds tight or starts curling at the seams within a year.
Part of our Tile & Grout guide — explore the full guide →
Why Glue Down Beats Peel and Stick
Most consumer-grade carpet tiles ship with a pressure-sensitive backing or are intended to install with double-stick tabs at the corners. Those methods work for low-traffic areas like home offices and craft rooms. Full glue-down with a pressure-sensitive adhesive is a different category of installation.
- Full glue-down lifespan: 10 to 15 years in residential traffic, 7 to 10 years in commercial.
- Peel-and-stick lifespan: 3 to 5 years in residential, 2 to 3 years in commercial.
- Movement and shifting: Glue-down stays put. Peel-and-stick shifts under chair casters and heavy traffic.
- Replacement: Both allow individual tile replacement, though glue-down tiles require a heat gun to soften the bond.
For basements, family rooms, mudrooms, and any area where chairs roll or kids run, the full glue-down method earns back its extra labor cost within the first 3 years of service.
Carpet Tile Types You Will Encounter
The retail market splits carpet tiles into three categories, and the glue-down approach works for all three with the same fundamental method. The differences come in tile thickness, pile height, and warranty coverage.
- Commercial loop pile: Low cut at 1/4 to 3/8 inch, durable, brands like Interface, Milliken, and Shaw Contract.
- Residential cut pile: Soft hand at 3/8 to 1/2 inch pile, brands like FLOR and Mohawk Air.o.
- Patterned premium: Mixed loop and cut, often modular, brands like FLOR Suited and Interface Net Effect.
Pricing runs $1.50 to $4 per square foot for commercial loop, $4 to $9 per square foot for residential cut, and $7 to $15 per square foot for premium patterns. A typical 500-square-foot basement runs $750 to $4,500 in material plus another $200 in adhesive and prep.
Subfloor Preparation
The single largest cause of failed glue-down installations is poor subfloor prep. Carpet tile adhesive bonds to the subfloor surface, not to whatever is beneath it. Loose paint, dust, oil, residual mastic, or moisture all break the bond.
For concrete subfloors, test moisture with a calcium chloride test kit before adhesive selection. Results above 3 pounds per 1,000 square feet per 24 hours mean you need a moisture-tolerant adhesive like Henry 263 or a Schluter Ditra membrane below the tiles. Sweep, vacuum, and damp-mop the slab. Patch any cracks or holes with a portland cement-based patch like Ardex Feather Finish.
For plywood or OSB subfloors, fasten any loose sheets with 1-1/4 inch ring-shank nails or screws every 6 inches at edges and 8 inches in the field. Skim-coat seams with floor patch and let cure for 24 hours. Sand any high spots flush with a belt sander.
Choosing the Right Adhesive
Three adhesive types work for residential carpet tile installations. The choice depends on whether you want full bond or releasable bond.
Pressure-sensitive carpet tile adhesive (like Roberts 6700 or Henry 356) is the standard for residential glue-down. It dries to a tacky film that grips the tile back without permanently bonding it. Tiles can be lifted and replaced for the life of the floor. Coverage runs 150 to 200 square feet per gallon at the recommended trowel notch.
Full-spread acrylic adhesive (like Roberts 7350) creates a permanent bond. Tiles bonded this way are not designed for individual replacement. Use this only where you are certain the floor will not change.
Releasable wet-set adhesive (like Taylor 2025 Releasable) is the highest-end choice and combines the best of both worlds. The bond holds tiles in place under heavy use and remains releasable for swapping individual tiles. The cost runs about 30 percent more than standard PSA, but the installation forgiveness is significant.
Layout Strategy
Plan the layout before opening a single bucket of adhesive. Carpet tiles are usually 18 by 18 inches or 24 by 24 inches, and the seam pattern affects how the finished floor reads visually.
The three common installation patterns each create a different look. Quarter-turn (also called ashlar) installs each tile rotated 90 degrees from its neighbor, hiding small visual differences between tiles and reading as a single unified floor. Monolithic installs every tile in the same direction, which makes pile direction obvious and works well for solid colors. Brick pattern offsets each row by 50 percent, similar to subway tile, and is dramatic with patterned tiles.
Start the layout from the center of the room. Find the center of two opposing walls and snap a chalk line between each pair. The intersection is your starting point. Dry-lay a row of tiles in each direction to the walls to verify that the cut tiles at the perimeter are at least 6 inches wide. If a cut tile would be less than 6 inches, shift the starting line by half a tile to balance the cuts.
Adhesive Application
Carpet tile adhesive cures in two stages. The first is the open time when it remains workable, typically 30 to 60 minutes. The second is the working time when it has dried to tacky but still bonds, usually 4 to 6 hours after spreading.
- Pour a 1-gallon ribbon along the chalk line.
- Spread with a 1/16-inch V-notch trowel held at 45 degrees.
- Wait 30 to 60 minutes until the adhesive turns from milky white to clear and feels tacky but not wet.
- Lay tiles starting at the center intersection, working outward in a pyramid pattern.
- Press each tile firmly with a 75-pound carpet roller or by walking on it heel-toe.
Do not skip the wait time. Tiles set into wet adhesive bond too aggressively and cannot be lifted later. Tiles set into properly tacked adhesive bond securely while remaining releasable for repairs.
Cutting Tiles at the Perimeter
Wall cuts are the most visible part of the finished floor. Sloppy cuts undo the work of a careful field installation. Use a sharp utility knife with a fresh hooked blade, a straightedge, and a cutting board to protect the floor below.
To template a cut, place a full tile directly on top of the last installed full tile in the row. Set a second tile against the wall, slightly overhanging the first. Mark the overlapped edge with a pencil, then transfer the mark to the underlying tile. The cut tile drops into place with the correct dimension. This template method is faster and more accurate than measuring with a tape.
Common Installation Mistakes
Five errors account for almost every failed glue-down carpet tile floor.
- Installing on a damp slab without moisture testing first.
- Setting tiles into wet adhesive instead of waiting for proper tack.
- Mixing tile pile directions when the manufacturer specified quarter-turn or monolithic.
- Skipping the 75-pound roller, leaving high spots that pop loose.
- Walking on the floor before the 24-hour cure window completes.
The first two cause delamination within 6 months. The third creates obvious visual seams that no amount of vacuuming fixes. The last two cause individual tiles to lift over time. All five are fully preventable with patience and adherence to the adhesive instructions.
Maintenance After Installation
A glue-down carpet tile floor takes 72 hours to reach full bond strength. Avoid moving heavy furniture across the surface during that window. Vacuum lightly after 24 hours to remove installation debris.
For long-term care, vacuum twice a week with a beater-bar vacuum set to the proper height for the pile. Spot clean spills immediately with cold water and a mild dish detergent. Schedule professional hot-water extraction or low-moisture encapsulation cleaning every 12 to 18 months. With proper maintenance, a glue-down installation looks new for 8 to 10 years and serviceable for 12 to 15.