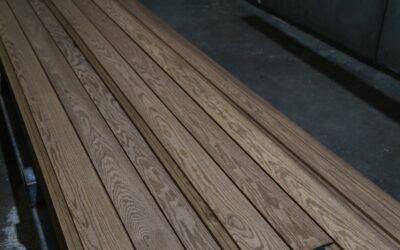
Hardwood floor sanding is the process of removing the old finish, scratches, stains, and surface damage from your wood floors to prepare them for a fresh coat of stain and protective finish. It is the most transformative home improvement project you can do: a worn, dull, scratched hardwood floor can look brand new after proper sanding and refinishing. But it is also a project where technique matters enormously. Poor sanding creates visible scratches, uneven surfaces, and results that look worse than the original floor.
This guide covers when sanding is needed, the equipment involved, the correct grit progression, the full step-by-step process, DIY vs. professional considerations, and what the project will cost.
- When Does Your Hardwood Floor Need Sanding?
- Hardwood Floor Sanding Equipment
- Sandpaper Grit Progression
- Step-by-Step Hardwood Floor Sanding Process
- DIY vs. Professional Hardwood Floor Sanding
- Hardwood Floor Sanding Cost
- Tips for Better Sanding Results
- After Sanding: Staining and Finishing
- Final Thoughts
When Does Your Hardwood Floor Need Sanding?
Not every worn hardwood floor needs full sanding. Here is how to determine if sanding is the right approach:
Signs You Need Full Sanding
- Deep scratches that penetrate the stain: If scratches show bare wood through the stain color, surface treatments will not fix them. Sanding is needed.
- Widespread wear patterns: Traffic paths in hallways, kitchens, and living rooms where the finish is completely worn through.
- Gray or black wood: When unprotected wood is exposed to moisture and UV, it turns gray or black. This discoloration goes below the surface and requires sanding to remove.
- Previous refinish failures: Bubbling, peeling, or flaking finish from a bad previous refinish job needs to be completely removed by sanding.
- Water stains or pet stains: Dark stains from water or pet urine often penetrate into the wood and require sanding to remove (deep stains may need board replacement).
- Uneven surfaces: Cupped or crowned boards from moisture issues may need sanding after the moisture problem is resolved.
- Changing stain color: If you want to go from dark to light or change the stain color entirely, you need to sand down to bare wood.
When You Can Skip Full Sanding
- Light surface scratches only: A screen-and-recoat (buff the existing finish with a floor buffer and apply a new topcoat) is sufficient for light wear with no deep scratches.
- Floor is in good shape but dull: Buffing and recoating refreshes the finish without the dust, cost, and effort of full sanding.
- Engineered hardwood: Most engineered wood flooring has a thin veneer layer (1 to 4 mm) that can only be sanded once or twice. Check your specific product’s specifications before sanding.
Hardwood Floor Sanding Equipment
Drum Sander
The drum sander is the primary tool for hardwood floor sanding. It uses a rotating drum wrapped with sandpaper to aggressively remove old finish and surface wood. Drum sanders are powerful and efficient but unforgiving. Stopping in one spot or tilting the machine creates visible gouges and dips. They require experience and a steady hand.


Drum sanders are available for rent at Home Depot, Lowe’s, and equipment rental centers for approximately $60 to $80 per day.
Orbital (Random Orbit) Floor Sander
An orbital floor sander uses a large pad that moves in a random orbital pattern, similar to a handheld random orbit sander but much larger. It is significantly more forgiving than a drum sander because the random pattern prevents the machine from creating directional scratches or gouges. The trade-off is speed: orbital sanders remove material more slowly than drum sanders.
For DIYers, an orbital sander is the safer choice. Many professionals now use orbitals for final sanding passes even when they use a drum for initial cuts. Rental cost is similar to drum sanders, around $50 to $75 per day.
Edger
Neither drum nor orbital sanders can reach within 3 to 4 inches of walls, cabinets, and other obstacles. An edger is a handheld disc sander designed specifically for these perimeter areas. Edgers require careful technique because they sand in a circular pattern that can leave swirl marks if used improperly. Move the edger in sweeping arcs, never hold it in one spot.
Rental cost: $30 to $50 per day.
Detail Sander and Scrapers
Corners, closets, stair nosings, and tight spaces that even the edger cannot reach require hand sanding or a detail sander (oscillating multi-tool with a sanding attachment). A sharp paint scraper can also remove old finish from tight corners.
Floor Buffer (For Screen and Recoat)
A floor buffer with a sanding screen attachment is used for the screen-and-recoat process and for final surface preparation before applying finish. It scuffs the surface without removing significant material. Rental cost: $30 to $50 per day.
Sandpaper Grit Progression
The grit progression is the sequence of increasingly fine sandpaper grits used during sanding. Each pass removes the scratch pattern from the previous grit, leaving a progressively smoother surface. Skipping grits or starting too fine results in poor finish adhesion and visible scratch patterns.
Standard Grit Progression
- 36-grit (coarse): First pass. Removes old finish, deep scratches, and surface imperfections. This is the most aggressive cut and removes the most material. Not always necessary if the existing finish is thin or the floor is in relatively good shape. Skip to 60-grit if the floor only needs light sanding.
- 60-grit (medium): Second pass. Removes the 36-grit scratch pattern and begins smoothing the wood. This is where the floor starts looking clean and uniform.
- 80-grit (medium-fine): Third pass. Refines the surface further and removes the 60-grit scratches. This is a sufficient stopping point for some finishes (like oil-based polyurethane on oak).
- 100-grit (fine): Fourth pass (optional). Creates an even smoother surface for water-based finishes, lighter stain colors, and species like maple that show scratches more readily.
- 120-grit (very fine): Fifth pass (optional). Used for the finest surface preparation, typically on maple, birch, or when applying a natural or very light stain. Some professionals stop at 100 because going too fine can cause stain absorption issues.
Grit Progression for the Edger
The edger follows the same progression as the main sander, but many professionals use one grit finer on the edger to compensate for its more aggressive circular sanding pattern. For example, if the drum sander finishes at 80-grit, the edger might finish at 100-grit.
Important Grit Rules
- Never skip more than one grit level. Going from 36 to 100, for example, leaves deep 36-grit scratches that the 100-grit paper cannot remove.
- Sand with the grain of the wood. Cross-grain sanding creates scratches that show through stain and finish.
- Each grit should remove the scratch pattern from the previous grit completely before moving on.
Step-by-Step Hardwood Floor Sanding Process
Preparation
- Remove all furniture and rugs. The room must be completely empty.
- Remove shoe molding and base shoe. Leave baseboards in place but remove the small trim at the floor level. Number pieces for reinstallation.
- Check for and set protruding nails. Walk the entire floor and use a nail set to sink any nails that are above the surface. Protruding nails tear sandpaper and gouge the floor.
- Repair damaged boards. Replace cracked, split, or severely damaged boards before sanding.
- Fill large gaps and holes. Use wood filler in large gaps and nail holes. Note that many professionals fill after the first sanding pass, mixing sawdust with wood filler for a better color match.
- Seal the room. Close doors and seal HVAC vents and doorways with plastic sheeting and painter’s tape. Sanding creates enormous amounts of fine dust, even with dustless equipment.
- Safety gear: Wear a dust mask (N95 minimum, P100 is better), safety glasses, and hearing protection.
Sanding the Main Floor
- Load the drum or orbital sander with 36-grit paper (or 60-grit for lighter jobs).
- Start along one wall, sanding with the grain of the wood. With a drum sander, tilt the drum off the floor before turning the machine on, then lower it slowly into the floor while walking forward. Never start or stop with the drum on the floor.
- Walk at a steady, consistent pace. Too slow removes too much material. Too fast does not remove enough.
- Overlap each pass by 2 to 3 inches to avoid ridges.
- Sand the entire floor in one direction, then vacuum the dust.
- Repeat with 60-grit, then 80-grit, then 100-grit (following your planned progression).
- Vacuum thoroughly between each grit change.
Sanding the Edges
- Load the edger with the same grit you used on the main floor (starting from the coarsest).
- Sand the 3 to 4-inch strip along walls that the main sander missed.
- Move the edger in sweeping arcs, keeping it in constant motion to prevent swirl marks.
- Progress through all grits to match the main floor.
- Blend the edger area into the main floor area by feathering the sanding overlap.
Detail Sanding
- Hand sand corners, closets, and under radiators that the edger could not reach.
- Use the same final grit as the main floor.
- A paint scraper works for getting old finish out of tight corners.
Final Preparation
- Vacuum the entire floor thoroughly with a shop vacuum.
- Do a final pass with a buffer and fine sanding screen (120 or 150-grit) to blend any remaining differences between the main floor, edges, and detail areas.
- Vacuum again.
- Tack the floor with a slightly damp microfiber mop to pick up remaining fine dust.
- The floor is now ready for staining and finishing.
DIY vs. Professional Hardwood Floor Sanding
DIY Sanding
Pros:
- Significant cost savings (50 to 70% less than professional)
- Work on your own schedule
- Satisfying to complete yourself
Cons:
- Steep learning curve, especially with drum sanders
- Risk of creating gouges, waves, and uneven surfaces
- Time-consuming (a room that takes a pro 1 day may take a DIYer 3 to 4 days)
- Equipment rental costs add up if the project takes longer than expected
- Massive dust generation (even with dust containment systems)
DIY recommendation: If you choose to DIY, use an orbital floor sander instead of a drum sander. It is much more forgiving and still produces professional-quality results. Practice on a closet floor or a less visible area before tackling the main rooms.
Professional Sanding
Pros:
- Expertise and experience produce a superior, even result
- Professional dustless sanding systems contain 95 to 99% of dust
- Faster completion (most rooms done in 1 day for sanding, plus 1 to 2 days for finish)
- Equipment is commercial-grade with better results
- Warranty on workmanship
Cons:
- Higher cost
- Scheduling and availability can mean waiting weeks
- You need to find a reputable contractor
Hardwood Floor Sanding Cost
Professional Sanding and Refinishing Costs
- Sanding and refinishing (clear coat, no stain): $3 to $5 per square foot
- Sanding, staining, and refinishing: $4 to $7 per square foot
- Screen and recoat (no sanding): $1.50 to $3 per square foot
- Additional costs: Furniture moving ($50 to $200), shoe molding removal/reinstall ($1 to $2 per linear foot), stair refinishing ($25 to $75 per step)
DIY Sanding Costs
- Drum sander rental: $60 to $80 per day
- Orbital sander rental: $50 to $75 per day
- Edger rental: $30 to $50 per day
- Sandpaper (all grits): $50 to $100 per room
- Stain: $30 to $60 per gallon (covers 400 to 600 sq ft)
- Polyurethane finish: $40 to $80 per gallon (covers 400 to 600 sq ft per coat)
- Supplies (tack cloth, painter’s tape, applicators, etc.): $30 to $60
Example Budget: 500-Square-Foot Room
- Professional (sand, stain, 3 coats poly): $2,000 to $3,500
- DIY (same scope, 3-day rental): $400 to $700
Tips for Better Sanding Results
- Inspect between grits: After each sanding pass, get down on the floor and look across the surface at a low angle. Light raking across the surface reveals scratches, swirl marks, and missed areas.
- Change sandpaper frequently: Worn sandpaper creates heat and burnishes the wood instead of cutting it. This can cause stain absorption problems.
- Mind the edges: The transition between the main sander area and the edger area is where most visible imperfections occur. Spend extra time blending these areas.
- Control dust: Even with dust containment, sand dust gets everywhere. Remove valuables from adjacent rooms and seal doorways with plastic.
- Check moisture content: If the floor has had water damage, check moisture content with a meter before sanding. Sanding and finishing a floor with elevated moisture leads to finish failure.
- Plan your stain test: After sanding to final grit, test your stain color in a closet or inconspicuous area before committing to the entire floor.
After Sanding: Staining and Finishing
Once sanding is complete, the floor needs stain (optional) and a protective finish. The most common finishes are:
- Oil-based polyurethane: Classic amber tone, very durable, longest curing time (24 hours between coats, 3 to 7 days before furniture). Apply 3 coats.
- Water-based polyurethane: Crystal clear (no yellowing), fast drying (2 to 4 hours between coats), lower VOC. Apply 3 to 4 coats.
- Hardwax oil: Penetrating finish with a natural, matte look. Easy to repair. Popular in modern and Scandinavian design. Apply 2 to 3 coats.
The finishing stage is just as important as sanding. A perfectly sanded floor with a poorly applied finish still looks bad. Take your time, maintain a wet edge, and follow the finish manufacturer’s instructions precisely.
Final Thoughts
Hardwood floor sanding is one of the most rewarding home improvement projects when done correctly. The key is patience: proper grit progression, steady technique, thorough dust removal, and attention to detail at edges and transitions. Whether you tackle it yourself with an orbital sander or hire a professional, a freshly sanded and refinished hardwood floor adds beauty and value to your home that lasts for decades.
Prefer to explore on your own?
See how new flooring looks in your actual room in seconds — free, no signup.
Try the free Floor Studio →