
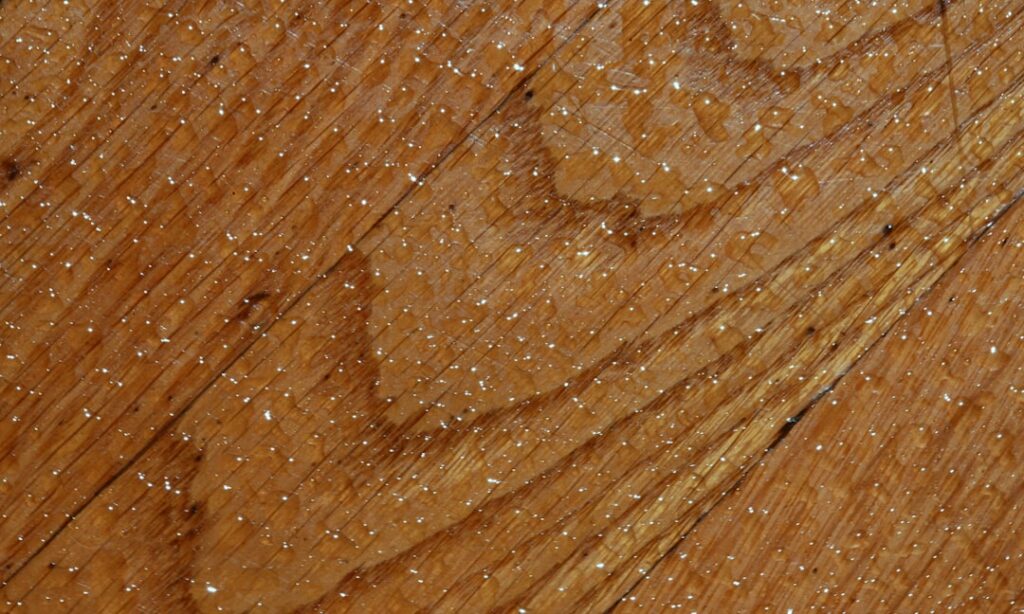
Choosing the right hardwood floor stain transforms raw or refinished wood into the exact look you want — from pale Scandinavian white oak to deep espresso walnut. The stain you select affects not just the color but also the grain visibility, the warmth of the room, and how well the floor ages over time. With dozens of stain types, hundreds of colors, and real consequences for getting it wrong, this decision deserves careful thought.
This guide walks you through every major stain type, the most popular stain colors in 2026, how to choose the right stain for your wood species, the complete application process, and the tips that professionals use to get flawless results.
- Types of Hardwood Floor Stain
- Most Popular Stain Colors
- Best Stains by Wood Species
- How to Choose the Right Stain
- Application Process Step by Step
- Common Staining Mistakes to Avoid
- Topcoat Options After Staining
- Trending Stain Looks in 2026
- Cost of Staining Hardwood Floors
- DIY vs Professional Staining
- Frequently Asked Questions
Types of Hardwood Floor Stain
Not all hardwood floor stain products work the same way. Understanding the differences helps you choose the right product for your project.


Oil-Based Stain
Oil-based stains are the traditional choice and still the most widely used by professionals. They use a linseed oil or tung oil carrier that penetrates deep into the wood grain, producing rich, warm color with excellent grain definition.
Advantages:
- Deep penetration produces rich, vibrant color
- Long open time (15–30 minutes) gives you plenty of time to work and wipe
- Excellent grain enhancement — the oil brings out the natural wood figure
- Wide availability of colors from every major brand
- Forgiving application — easier to get an even result
Disadvantages:
- Strong fumes requiring good ventilation (high VOCs)
- Slow dry time (8–24 hours between coats)
- Adds amber/yellow undertone to the wood — deepens over time
- Cannot be topcoated with water-based polyurethane without risking adhesion issues (unless properly cured)
Best brands: Minwax, DuraSeal, Varathane, Bona DriFast
Water-Based Stain
Water-based stains use water as the carrier instead of oil. They have grown significantly in popularity due to lower VOCs, faster dry times, and a clear/neutral color tone that does not yellow over time.
Advantages:
- Low VOCs — less odor and safer indoor air quality
- Fast dry time (2–4 hours between coats)
- Does not amber or yellow — maintains the wood’s true color
- Compatible with water-based polyurethane topcoats for a consistently clear finish
- Easy cleanup with soap and water
Disadvantages:
- Short open time (3–5 minutes) makes working on large areas challenging
- Can raise the wood grain, requiring extra sanding
- Colors may appear less rich and warm compared to oil-based
- More difficult to apply evenly — lap marks and blotchiness are common for beginners
Best brands: Bona NordicSeal, Rubio Monocoat (technically an oil but water-cleanup), DuraSeal Quick Coat
Gel Stain
Gel stains have a thick, pudding-like consistency that sits on the wood surface rather than penetrating deeply. This makes them ideal for woods that stain unevenly (like pine and birch) because the gel provides more consistent coverage.
Advantages:
- Excellent for blotch-prone woods — provides more uniform color
- Does not drip or run — easy to control on vertical surfaces
- Can be applied over existing finishes for color refreshing without full sanding
- Thick consistency prevents over-penetration in soft wood areas
Disadvantages:
- Obscures wood grain more than penetrating stains
- Thicker film can create buildup in corners and between boards
- Longer dry times than water-based stains
- Limited color range compared to oil-based and water-based options
Best brands: General Finishes, Minwax Gel Stain, Old Masters
Reactive (Fumed/Chemical) Stain
Reactive stains use chemical reactions with the tannins naturally present in wood to create color. The most common reactive staining method is ammonia fuming, which turns tannin-rich woods (especially white oak) a deep, rich brown without any surface coating.
Advantages:
- Produces unique, deep color that no pigmented stain can replicate
- Color goes through the entire wood fiber, not just the surface
- No film buildup — the wood texture remains completely natural
- Creates natural-looking color variation that follows the wood’s grain and character
Disadvantages:
- Results are unpredictable and vary by wood species, tannin content, and exposure time
- Ammonia fuming is hazardous — requires professional handling with respiratory protection
- Only works on tannin-rich woods (oak, walnut, chestnut). Has little effect on maple, birch, or pine
- Cannot be easily controlled for precise color matching
Rubio Monocoat (Oil Plus 2C)
While technically a hardwax oil finish rather than a traditional stain, Rubio Monocoat deserves mention because it combines staining and finishing in a single coat. It is applied to raw wood and provides both color and protection in one step. The product bonds with the wood fibers in a single molecular layer, which is where the “Monocoat” name comes from.
Advantages:
- Color and protection in one coat — saves time and labor
- 60+ color options from natural to dark charcoal
- Zero VOCs
- Easy to spot-repair without refinishing the entire floor
- Natural matte appearance that is highly on-trend
Disadvantages:
- Requires specific application technique
- Less protection than a polyurethane topcoat — needs periodic maintenance coats
- Expensive per square foot compared to traditional stain + polyurethane
Most Popular Stain Colors
Here are the most requested hardwood floor stain colors in 2026, based on industry trends and professional refinisher feedback:
Natural / Unstained
Applying a clear finish with no stain lets the wood’s natural color shine through. This look is huge right now, especially on white oak. Water-based polyurethane keeps the color as close to raw wood as possible, while oil-based polyurethane adds a warm amber tone.
Light Gray / Weathered
Gray-toned stains (like Bona NordicSeal or DuraSeal Country White mixed with gray) create a Scandinavian, coastal, or modern farmhouse look. These work best on white oak and ash. Gray stains on red oak can clash with the wood’s pink undertones.
Warm Honey / Golden Oak
A classic golden tone that works well on both red and white oak. Colors like Minwax Golden Oak and DuraSeal Golden Brown produce this timeless look. It adds warmth without going too dark.
Medium Brown / Provincial
Medium brown is the most universally appealing stain color. DuraSeal Provincial and Minwax Provincial are the go-to choices. They darken the wood enough to add richness without hiding the grain or making the room feel dark. This is the safest choice for resale value.
Dark Walnut
Dark Walnut (by both Minwax and DuraSeal) is one of the most popular dark stain choices. It creates a sophisticated, warm dark brown that works in both traditional and contemporary homes. Two coats produce a very deep tone.
Espresso / Ebony
The darkest stain options, like DuraSeal Ebony and Minwax True Black, produce near-black floors. These are dramatic and luxurious but show every scratch, dust particle, and pet hair. High maintenance but stunning in the right setting.
Jacobean
A rich, warm dark brown with reddish undertones. Jacobean is slightly warmer than Dark Walnut and pairs beautifully with traditional interiors. One of the top five most requested stain colors by refinishing professionals.
Special Walnut
A lighter brown than Dark Walnut, Special Walnut adds just enough color to enrich the wood without dramatically changing it. It is an excellent “goldilocks” choice for homeowners who want some color but do not want the floor to look heavily stained.
Best Stains by Wood Species
The wood species dramatically affects how a hardwood floor stain looks. The same stain color can look completely different on different woods.
White Oak
White oak is the most versatile wood for staining. It accepts stain evenly and produces consistent results across a wide color range — from natural to ebony. White oak is the preferred canvas for gray and cool-toned stains because it has minimal pink or red undertones. For more about hardwood species and options, see our hardwood flooring guide.
Red Oak
Red oak has strong pink and red undertones that affect stain color. Dark stains (Dark Walnut, Jacobean, Ebony) mask the red tones effectively. Medium stains show the red grain prominently. Gray stains can clash with red oak’s warm undertones. If you want a cool or neutral tone on red oak, consider a custom mix with a gray or green tint to neutralize the pink.
Maple
Maple is notoriously difficult to stain. Its tight, closed grain resists penetration and produces blotchy, uneven results with most penetrating stains. Use a wood conditioner (pre-stain) before applying stain, choose gel stain, or consider water-based stains applied very lightly. Many professionals recommend leaving maple natural or using a very light stain.
Pine
Like maple, pine stains unevenly due to its soft grain pattern. Gel stain or a pre-stain conditioner is essential. Pine also yellows significantly over time, especially under oil-based products.
Hickory
Hickory’s dramatic grain variation (wide range from light sapwood to dark heartwood) creates a rustic, high-contrast look with any stain. Medium to dark stains help unify the color variation. Very light stains accentuate the natural contrast.
Walnut
Walnut is naturally dark and richly colored. Most walnut floors look best with a natural (unstained) finish that lets the wood’s inherent color speak for itself. If staining walnut, lighter stains are rarely used — a clear or very light stain with an oil-based topcoat enhances the natural warmth.
How to Choose the Right Stain
Follow these steps to select the right hardwood floor stain:
- Identify your wood species. This determines which stain types and colors are compatible.
- Decide on undertone. Warm (gold, amber, red) or cool (gray, ash, true brown)? This narrows your color choices significantly.
- Consider the room’s light. Dark stains absorb light and make rooms feel smaller. Light stains reflect light and open up spaces. North-facing rooms benefit from warmer stain tones.
- Think about maintenance. Very dark and very light stains show dirt, scratches, and wear more than medium tones. If low maintenance matters, medium brown is the safest choice.
- Always test on your actual floor. Stain colors look different on samples, in photos, and on your floor. Sand a hidden area (inside a closet, under an appliance) and apply test swatches of your top 2–3 choices. View them in daylight and artificial light before committing.
- Consider the topcoat. Oil-based polyurethane adds amber warmth to any stain. Water-based polyurethane maintains the stain’s true color. This significantly affects the final appearance.
Application Process Step by Step
Here is the complete process for applying hardwood floor stain:
Step 1: Sand the Floor
The floor must be sanded to bare wood before staining. A typical sanding sequence uses a drum sander with 36-grit, 60-grit, 80-grit, and 100-grit papers in succession. Edge areas are sanded with an edger. The final pass should be 100 or 120-grit for oil-based stain, or 80–100 grit for water-based stain (finer sanding can close the grain and reduce stain absorption).
Step 2: Vacuum and Tack
Vacuum all sanding dust thoroughly, then wipe the entire floor with a tack cloth to remove fine particles. Any dust left on the surface will be trapped under the stain and visible in the finish.
Step 3: Water Pop (Optional but Recommended)
Water popping involves dampening the sanded floor with clean water and letting it dry completely before staining. This opens the wood grain and allows the stain to penetrate more deeply and evenly. Water popping is especially important when using water-based stains or when a more vibrant color is desired. It adds 4–8 hours to the timeline but dramatically improves stain absorption and color consistency.
Step 4: Apply Stain
Working in manageable sections (3–4 feet wide, following the board length), apply stain with a brush, applicator pad, or lamb’s wool applicator. Work the stain into the grain, then wipe off excess with clean rags, always wiping in the direction of the grain. The key is consistent wipe-off timing — if you leave stain on longer in some areas than others, the color will be uneven.
Step 5: Dry and Assess
Allow the stain to dry completely (follow the manufacturer’s timing — typically 8–24 hours for oil-based, 2–4 hours for water-based). Inspect the color. If you want a deeper color, apply a second coat of stain.
Step 6: Apply Topcoat
Once the stain is fully cured, apply your chosen polyurethane or hardwax oil topcoat. Two to three coats of polyurethane are standard, with light sanding (220-grit screen) between coats for adhesion.
Common Staining Mistakes to Avoid
- Skipping the test swatch: The single most common mistake. Always test on your actual floor before committing.
- Uneven sanding: Drum sander marks, swirl marks from the edger, and inconsistent grit progression create uneven stain absorption. The stain highlights every sanding flaw.
- Not stirring the stain thoroughly: Pigment settles to the bottom of the can. Stir thoroughly before and during application. Shake cans before opening.
- Inconsistent wipe-off timing: This creates light and dark patches. Work in consistent sections and wipe at the same time interval across the entire floor.
- Working too large an area: On large floors, stain can dry before you wipe it, creating dark patches. Work in 3–4 foot wide strips.
- Staining over sanding dust: Even a thin film of dust prevents stain penetration and creates a hazy, uneven look.
- Choosing based on online photos: Screen colors are unreliable. Stain samples on your specific wood in your specific lighting are the only reliable guide.
Topcoat Options After Staining
The topcoat protects the stained wood and determines the final sheen and color tone.
- Oil-based polyurethane: Adds amber warmth, deepens the stain color, extremely durable. Dries slowly (8–24 hours between coats). Strong fumes.
- Water-based polyurethane: Crystal clear — does not alter the stain color. Fast drying (2–4 hours between coats). Low odor. Slightly less durable than oil-based for wear resistance.
- Hardwax oil (Rubio, Osmo): Matte, natural look with a soft hand-feel. Lower protection than polyurethane but easy to spot-repair. Requires periodic maintenance coats.
- Conversion varnish (Swedish finish): Extremely hard and durable. Professional application only. High VOCs. Used in commercial and high-traffic residential applications.
For more about engineered hardwood and finish options, see our engineered wood flooring guide.
Trending Stain Looks in 2026
- Natural white oak with water-based finish: The most requested look in 2026. Clean, light, and modern.
- Cool-toned medium brown: Moving away from warm amber tones toward neutral and cool browns.
- Matte finish: Ultra-matte and satin sheens have replaced semi-gloss as the preferred finish.
- Color mixing: Custom stain blends (e.g., 50% Provincial + 50% Classic Gray) for unique, personalized tones.
- Fumed white oak: Ammonia-fumed white oak creates a deep, rich brown with incredible depth and natural variation.
Cost of Staining Hardwood Floors
Staining is typically part of a full sand-and-refinish project. Here is what the staining component costs:
- Stain product cost (DIY): $0.15 – $0.40 per sq ft
- Professional staining (labor + material): $1.00 – $2.00 per sq ft as part of a refinish project
- Full refinish with stain (sand + stain + 3 coats polyurethane): $4.00 – $8.00 per sq ft professionally
- Rubio Monocoat application: $3.00 – $6.00 per sq ft (product is expensive, labor is less)
For a 500 sq ft room, professional sanding and staining costs $2,000 – $4,000 total including all materials and labor.
DIY vs Professional Staining
When to DIY
- Small rooms (under 200 sq ft) like a bedroom or den
- You have experience with sanding equipment or are willing to learn
- The wood species stains easily (oak) and you choose a forgiving oil-based stain
- You can accept imperfect results or are willing to redo sections
When to Hire a Pro
- Large or open-concept spaces where lap marks and inconsistencies are visible
- Custom stain colors or difficult colors (gray, white, very dark)
- Blotch-prone wood species (maple, birch, pine)
- High-end homes where the result must be flawless
- Reactive staining (ammonia fuming) — always professional
Frequently Asked Questions
What is the most popular hardwood floor stain color?
In 2026, natural (unstained) white oak with a water-based finish is the most requested look. For stained floors, DuraSeal Provincial and Minwax Special Walnut remain the most popular medium brown options, while Dark Walnut and Jacobean lead the dark stain category.
Can you change the color of hardwood floors?
Yes, but it requires sanding the floor down to bare wood and applying a new stain. You cannot effectively stain over an existing finished floor — the old finish must be completely removed first. Going from dark to light requires more sanding than light to dark.
How long does hardwood floor stain last?
The stain itself is permanent once applied — it soaks into the wood fiber. What wears over time is the protective topcoat (polyurethane). When the topcoat wears through in traffic areas (typically after 7–15 years), the stained wood underneath can be scuffed and worn. At that point, the floor needs refinishing.
Does staining hardwood floors change the grain pattern?
Staining enhances and accentuates the grain pattern rather than hiding it (unless using a gel stain or paint). Darker stains create more contrast between the grain lines and surrounding wood, making the grain more visible. Very light stains and natural finishes show the grain most subtly.
Can you stain engineered hardwood floors?
Yes, if the engineered hardwood has a veneer thick enough to sand (typically 2mm or thicker). The sanding removes the factory finish, allowing new stain to penetrate. Engineered hardwood with veneers under 2mm generally cannot be safely sanded and restained.
Is it better to use oil-based or water-based stain?
Oil-based stain is easier to apply evenly and produces richer color with better grain enhancement. Water-based stain is better for achieving cool or true-to-color tones without amber yellowing, and it is healthier to work with. For warm, traditional looks, oil-based is preferred. For modern, natural, or gray tones, water-based is the better choice.
Prefer to explore on your own?
See how new flooring looks in your actual room in seconds — free, no signup.
Try the free Floor Studio →

