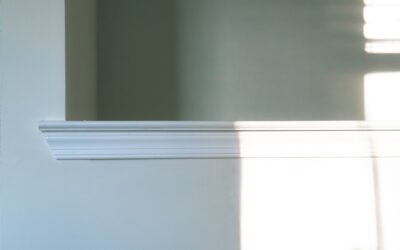
The finishing details are what make a room feel truly complete, and few elements do more than well-chosen trim. Hardwood trim frames doors and windows, caps floors with baseboards, and adds architectural character that elevates an entire space. Whether you want a stained, natural-wood look or crisp painted profiles, understanding your options helps you make smart choices. This complete guide walks through the types of hardwood trim, popular wood species, real cost ranges, installation basics, and finishing tips to help you get a polished result.
- What Is Hardwood Trim?
- Common Types of Hardwood Trim
- Popular Hardwood Species for Trim
- Stained vs. Painted Hardwood Trim
- How Much Does Hardwood Trim Cost?
- Installation Basics
- Finishing and Maintenance Tips
- Hardwood Trim vs. MDF and Composite Trim
- Matching Trim to Your Home’s Style
- Tools and Tips for a Clean Installation
- Final Thoughts on Hardwood Trim
What Is Hardwood Trim?
Hardwood trim refers to the milled wood moldings made from hardwood species that finish and frame the transitions in a room. It includes baseboards, casings, crown molding, chair rails, and the transition pieces that accompany hardwood flooring. Unlike softwood or composite trim, hardwood trim is prized for its density, rich grain, and ability to take a beautiful stained finish. It is more durable and resistant to dents than softer materials, making it a favorite for high-quality homes and areas that see wear.
Common Types of Hardwood Trim
Trim comes in many profiles, each serving a purpose:
- Baseboard: Runs along the bottom of walls where they meet the floor, protecting the wall and hiding the flooring edge.
- Door and window casing: Frames openings, covering the gap between the wall and the jamb for a finished look.
- Crown molding: Installed where walls meet the ceiling, adding elegance and a sense of height.
- Chair rail: A horizontal molding around the middle of a wall, both decorative and protective.
- Quarter round and shoe molding: Small profiles that cover the gap between baseboard and floor for a clean transition.
- Flooring transitions: Thresholds, T-moldings, and reducers that join hardwood floors to other surfaces.
Popular Hardwood Species for Trim
The species you choose affects color, grain, hardness, and cost:
- Oak: Strong, affordable, and with pronounced grain that takes stain beautifully. A classic choice.
- Maple: Smooth, fine grain with a light color, ideal for a clean modern look, though it can be trickier to stain evenly.
- Cherry: Rich reddish tones that deepen with age, offering a warm, upscale appearance.
- Walnut: Deep, luxurious brown color prized for high-end interiors.
- Poplar: Technically a hardwood, inexpensive and smooth, best when the trim will be painted.
Match the trim species to your flooring and furniture, or choose paint-grade poplar if you plan to paint the trim a solid color.
Stained vs. Painted Hardwood Trim
One of the biggest decisions is whether to stain or paint. Stained hardwood trim showcases the natural grain and pairs beautifully with hardwood floors and traditional decor, bringing warmth and richness to a room. It does require a species with attractive grain and careful finishing. Painted trim, on the other hand, offers a crisp, clean look that suits modern and transitional styles, hides less attractive grain, and lets you use more affordable paint-grade wood. Painted white or off-white trim brightens rooms and provides timeless contrast against colored walls.
How Much Does Hardwood Trim Cost?
Costs vary by species, profile, and whether you install it yourself:
- Paint-grade poplar and pine trim: roughly $1 to $3 per linear foot
- Oak and maple trim: roughly $2 to $6 per linear foot
- Premium cherry and walnut trim: roughly $5 to $12 or more per linear foot
- Professional installation: often $2 to $6 per linear foot depending on complexity
Crown molding and intricate profiles cost more to buy and install than simple baseboards. For an average room, trim materials might run a couple hundred dollars, while whole-home trim packages add up quickly, especially in premium species.
Installation Basics
Installing hardwood trim is a rewarding project for a patient DIYer with the right tools. The essentials include a miter saw for clean angle cuts, a nail gun or hammer and finish nails, a coping saw for inside corners, wood glue, and a level. General steps look like this:
- Measure each wall carefully and cut pieces slightly long to fine-tune the fit.
- Cut outside corners with matching miter angles for a tight seam.
- Cope inside corners rather than mitering them for a gap-free joint that resists seasonal movement.
- Nail the trim into wall studs and framing, keeping it level.
- Fill nail holes and gaps with wood filler or caulk, then sand smooth.
- Stain or paint as desired, ideally finishing the trim before or right after installation.
Because hardwood is dense, pre-drilling near ends prevents splitting when nailing.
Finishing and Maintenance Tips
For stained trim, sand smooth, apply a wood conditioner on blotch-prone species like maple, then stain and seal with polyurethane for durability. For painted trim, prime first for a smooth, even finish. Once installed, hardwood trim is easy to maintain: dust regularly and wipe with a slightly damp cloth. Touch up scuffs on painted trim as needed, and refresh the protective topcoat on stained trim in high-wear areas over the years. Quality hardwood trim can last the life of the home with minimal care.
Hardwood Trim vs. MDF and Composite Trim
When shopping for trim, you will find hardwood competing with MDF and other composite products, and it is worth understanding the trade-offs. MDF trim is smooth, inexpensive, and comes pre-primed, making it a popular choice for painted applications. However, it dents more easily, swells if it gets wet, and cannot be stained to show natural grain. Hardwood trim costs more and requires a bit more skill to install, but it is far more durable, resists moisture better, and can be stained to reveal beautiful grain.
The decision often comes down to your finish and location. For painted trim in a dry, low-impact area, MDF can be perfectly adequate and budget-friendly. For stained trim, high-traffic zones, doorways that take abuse, or any area exposed to occasional moisture, hardwood is the more durable, longer-lasting investment. Many homeowners even mix the two, using hardwood where it shows and takes wear, and MDF in less demanding spots.
Matching Trim to Your Home’s Style
The profile you choose should reflect your home’s architecture. Consider these pairings:
- Traditional and colonial homes: Detailed, layered profiles with crown molding and substantial baseboards.
- Craftsman and bungalow styles: Flat, wide, squared-off trim with clean lines and minimal ornamentation.
- Modern and contemporary spaces: Slim, simple profiles or even minimalist reveals for an understated look.
- Farmhouse interiors: Chunky, painted trim and shiplap accents for warmth and character.
Keeping trim proportions consistent with your ceiling height and room scale ensures the finished result feels balanced and intentional rather than an afterthought.
Tools and Tips for a Clean Installation
Achieving tight, gap-free joints is what makes hardwood trim look professionally installed, and having the right tools makes all the difference. A power miter saw delivers the clean, accurate angle cuts that hand saws struggle with, while a coping saw lets you fit inside corners perfectly. A brad or finish nailer speeds the work and leaves small holes, and a good tape measure, sharp pencil, and reliable level keep everything straight and true.
Beyond tools, a few habits produce noticeably better results:
- Cut each piece slightly long and shave it down for a precise fit rather than cutting short.
- Cope inside corners instead of mitering them so joints stay tight as the wood moves with the seasons.
- Pre-drill near the ends of dense hardwood to prevent splitting when you nail.
- Fill nail holes and hairline gaps with matching filler or caulk, then sand smooth before finishing.
- Acclimate the trim in the room for a few days so it adjusts to the humidity before installation.
Taking these steps rewards you with crisp, seamless trim that elevates the whole room.
Final Thoughts on Hardwood Trim
Hardwood trim is one of those details that quietly signals quality and craftsmanship throughout a home. By choosing the right species, deciding between a stained or painted finish, and installing it with careful cuts and coped corners, you frame your rooms with lasting beauty and value. Whether you favor the rich grain of oak and walnut or the clean lines of painted profiles, well-executed hardwood trim ties a space together and stands up to years of everyday life. Plan your profiles, take your time on the cuts, and enjoy the polished result.
Prefer to explore on your own?
See how new flooring looks in your actual room in seconds — free, no signup.
Try the free Floor Studio →