Getting your Honeywell WiFi thermostat setup right the first time means smooth app control, reliable scheduling, and years of energy savings without frustrating connection drops. Honeywell (now sold under the Resideo brand for its Home line) makes some of the most popular smart thermostats in America, including the T-series and the Honeywell Home app-connected models. This guide walks through the entire setup process from wiring to WiFi pairing to scheduling, plus the troubleshooting steps that solve the most common problems.
- Before You Begin: What to Check
- Step 1: Turn Off Power and Document Wiring
- Step 2: Handle the C-Wire
- Step 3: Mount and Wire the New Thermostat
- Step 4: Power Up and Configure the System
- Step 5: Connect to WiFi and the App
- Step 6: Set Your Schedule and Preferences
- Troubleshooting Common Setup Problems
- Tips for a Reliable Setup
- Understanding Your Wire Terminals
- Frequently Asked Questions
- Wrapping Up
Before You Begin: What to Check
A little preparation prevents most setup headaches. Before touching anything, confirm:
- Your model and app. Most current Honeywell smart thermostats use the Honeywell Home app (or Resideo). Older Lyric or Total Connect Comfort models may use a different app, so match the app to your device.
- Your WiFi network. Thermostats connect to 2.4 GHz WiFi, not 5 GHz. Know your network name and password, and make sure the signal reaches the thermostat location.
- The C-wire question. Many Honeywell WiFi models require a common (C) wire for steady power. Check your existing wiring before installing.
Step 1: Turn Off Power and Document Wiring
Safety and record-keeping come first. Shut off power to your heating and cooling system at the breaker or the system’s service switch. Then remove your old thermostat’s faceplate and take a clear photo of the existing wiring before disconnecting anything. Note which colored wire connects to which lettered terminal (R, Rc, Rh, W, Y, G, C, and so on). Honeywell includes labeling stickers, use them, because wire colors are not always standard and the labels are your safety net.
Step 2: Handle the C-Wire
The C-wire supplies continuous 24-volt power so the thermostat can run WiFi without draining the system. Look at your wiring:
- If you have a C-wire already connected, great, wire it to the C terminal and you are set.
- If you have an unused wire bundled in the wall, you may be able to connect it as a C-wire at both the thermostat and the furnace control board.
- If you have no C-wire, many Honeywell kits include a C-wire adapter that installs at the HVAC unit to provide the needed power. Some models can also run without one on certain systems.
Getting steady power right is the key to avoiding the number-one complaint, a thermostat that keeps dropping off WiFi.
Step 3: Mount and Wire the New Thermostat
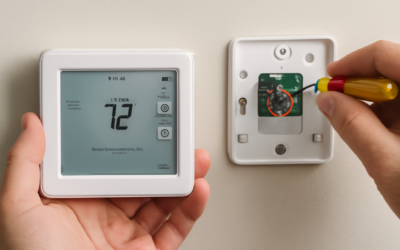
- Disconnect old wires. Release each wire from the old base, keeping them from slipping into the wall (bend them or clip a pencil across the hole).
- Remove the old base. Unscrew it and pull the wires through the new Honeywell base plate.
- Mount the new base. Level it and screw it to the wall using the included anchors.
- Connect the wires. Insert each labeled wire into the matching terminal. Honeywell’s push-in terminals make this easy, gently push the tab, insert the wire, release.
- Attach the faceplate. Snap the thermostat onto the base until it seats fully.
Step 4: Power Up and Configure the System
Turn the breaker back on. The thermostat should light up and begin its initial startup. Follow the on-screen prompts to set language, date, and time, and to choose your heating and cooling system type (conventional gas/electric, heat pump, and stages). If you are unsure of your system type, the setup menu usually detects the connected wires and suggests the right configuration. Confirm the display shows the correct current temperature, which tells you the wiring is reading properly.
Step 5: Connect to WiFi and the App
This is where the smart features come alive:
- Download the Honeywell Home app from the App Store or Google Play and create or sign in to your account.
- Add a device in the app and select your thermostat model.
- Put the thermostat in WiFi setup mode. On the thermostat, choose the WiFi menu; it broadcasts a temporary network or shows a pairing code.
- Join the thermostat’s network when prompted, or scan the code, then select your home 2.4 GHz network and enter the password.
- Confirm the connection. The thermostat shows a WiFi icon and the app confirms the device is online.
If the app cannot find the thermostat, make sure your phone is on the 2.4 GHz band during setup and that Bluetooth and location permissions are enabled for the app.
Step 6: Set Your Schedule and Preferences
With the thermostat online, configure it to actually save energy:
- Create a schedule with different temperatures for wake, away, home, and sleep periods, either on the device or in the app.
- Enable geofencing (on models that support it) so the thermostat adjusts based on your phone’s location.
- Set up smart alerts for extreme temperatures, humidity, or air-filter reminders.
- Link voice assistants. Connect Alexa or Google Assistant in the app for voice control.
Troubleshooting Common Setup Problems
Most setup issues come down to a few culprits:
- Thermostat will not connect to WiFi. Confirm you are using the 2.4 GHz band, not 5 GHz. Move closer to the router or add an extender if the signal is weak at the thermostat.
- Keeps dropping offline. Almost always a power issue, install or verify the C-wire or C-wire adapter for steady power.
- Blank screen after wiring. Check that the faceplate is fully seated and the breaker is on; a loose R-wire is a common cause.
- Heating or cooling runs wrong. Recheck wiring against your photo; a swapped Y and G or misconnected Rc/Rh causes odd behavior.
- App will not find the device. Enable Bluetooth and location for the app and make sure the thermostat is in pairing mode.
Tips for a Reliable Setup
To keep everything running smoothly long term, name the thermostat clearly in the app if you have more than one, keep the Honeywell Home app updated, and periodically check that your router firmware is current. If you ever change your WiFi password or router, you will need to reconnect the thermostat through the app’s WiFi settings. Registering the device also unlocks warranty support and, in many areas, utility rebate eligibility for Energy Star thermostats.
Understanding Your Wire Terminals
Knowing what each terminal does removes most of the mystery from wiring. The R, Rc, and Rh terminals carry 24-volt power; a single R wire powers both heating and cooling, while separate Rc (cooling) and Rh (heating) wires appear on some systems. The W terminal controls heating, and W2 handles a second heating stage. The Y terminal controls cooling, with Y2 for a second cooling stage. The G terminal runs the fan. The C terminal is the common wire that provides continuous power for the WiFi radio and display.
Heat-pump systems use additional terminals like O/B for the reversing valve and AUX or E for auxiliary and emergency heat. Match your labeled wires to these terminals exactly as the app instructs, and your system will heat and cool correctly.
Frequently Asked Questions
Why won’t my Honeywell thermostat connect to WiFi? The most common cause is trying to connect to a 5 GHz network. Honeywell thermostats use 2.4 GHz only. Also confirm the signal is strong at the thermostat and that Bluetooth and location are enabled for the app.
Do I really need a C-wire? Many Honeywell WiFi models require one for steady power. If you lack a C-wire, use the included C-wire adapter at the furnace or an add-a-wire accessory. Skipping it often causes the thermostat to drop offline repeatedly.
What app do I use? Most current models use the Honeywell Home app. Older Lyric or Total Connect Comfort devices may use a different app, so match the app to your specific model.
How do I reconnect after changing my router? Open the Honeywell Home app, go to the thermostat’s WiFi settings, and reconnect it to the new network name and password. The thermostat does not update automatically when your WiFi changes.
Wrapping Up
A successful Honeywell WiFi thermostat setup comes down to three things: getting steady power via a C-wire, wiring the terminals correctly from your labeled photo, and connecting to a strong 2.4 GHz WiFi network through the Honeywell Home app. Take a photo before you disconnect anything, handle the C-wire properly, and pair the app carefully, and you will have full remote control, smart scheduling, and geofencing in about half an hour. Once it is online, dial in a schedule that matches your routine and start enjoying lower energy bills and a more comfortable home.