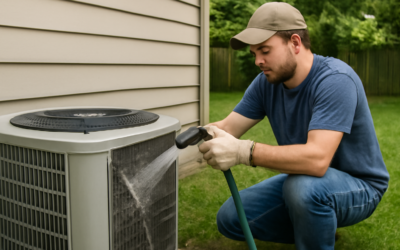
A neglected window air conditioner can pull 25 to 40 percent more electricity than a clean one and blow musty, allergen-laden air into your living space. Most people learn how to clean AC window unit components only when the smell becomes unbearable or the cooling performance collapses, by which point the dirt has packed into the coils and the drain pan looks like a science experiment. Done correctly, a thorough cleaning takes 90 minutes, costs nothing in supplies, and recovers most of the lost efficiency. Done wrong, you bend fins, short out electronics, or leave wet coils that breed mold within weeks.
Part of our Windows & Doors guide — explore the full guide →
Tools and Supplies You Need
Most of what you need is already in the house. Buy the specialty items if you do not have them, because substitutes do not work as well:
- Phillips and flathead screwdrivers
- Soft bristle brush (toothbrush works)
- Garden sprayer or pump sprayer with clean water
- Coil cleaner (Nu-Calgon Evap Pow’r-C or Nu-Brite, $12 to $20)
- Fin comb for straightening bent fins ($8 to $15)
- Shop vacuum with brush attachment
- Microfiber cloths and bucket
- Mild dish soap or all-purpose cleaner
Skip household bleach. The fumes corrode the aluminum fins and damage rubber components inside the unit. Coil cleaners are formulated to be safe on aluminum and copper while still cutting through oils and biofilm.
Safety and Power Disconnection
Unplug the unit fully. If it is hardwired, turn off the breaker and verify zero voltage with a non-contact tester. Window AC units carry capacitors that can hold a charge even when unplugged, especially in larger units (12,000 BTU and up). Wait at least 5 minutes after disconnecting before opening the case.
Work outside or in a garage on a tarp. Cleaning produces a lot of brown water and dislodged debris that you do not want indoors. If the unit is too heavy to remove from the window safely (most are 50 to 100 lbs), do as much cleaning in place as possible and skip the deep coil work until you can get help removing it.
Cleaning the Filter
The reusable foam or fabric filter sits behind the front grille on most units. Pop the grille off (usually held by clips or screws). The filter slides out without tools.
- Vacuum the filter to remove loose dust
- Wash with warm water and a drop of dish soap
- Rinse thoroughly until water runs clear
- Press between towels to remove water
- Air dry completely (4 to 6 hours minimum) before reinstalling
Damaged or torn filters need replacement. Generic foam filter material from Amazon ($8 to $15 per square foot) cuts to fit any unit. Do not run the AC without a filter even briefly. Dust gets into the evaporator coil and creates the deep cleaning problem you are trying to prevent.
Removing the Front Grille and Front Cover
With the filter out, look for additional screws holding the front cover. Most units have 2 to 6 Phillips screws. Remove and set aside in a labeled bag. Some units have hidden screws under stickers or behind decorative panels.
Once the cover comes off, you see the evaporator coil (the cold side, indoor face), the blower fan, and the drain pan. The condenser coil and condenser fan are on the back side, accessible only when the unit is removed from the window.
Cleaning the Evaporator Coil
The evaporator coil is the bank of thin aluminum fins on the indoor side. Years of dust and biological growth pack between the fins, blocking airflow and reducing heat exchange. Clean carefully because the fins bend with light pressure.
Vacuum first with a brush attachment, working from top to bottom, with the brush parallel to the fins (not crosswise, which bends them). Then apply coil cleaner per the product directions. Most foaming coil cleaners spray on, foam up while loosening grime, then rinse off. Use the garden sprayer with clean water for rinsing if the coil is removable, or carefully with a damp microfiber cloth for in-place cleaning.
Straightening Bent Fins
A fin comb has multiple sets of teeth at standard fin spacings (8 to 14 fins per inch). Match the comb spacing to your unit’s fins, then drag gently along the bent areas in the direction of airflow. The comb teeth slip into the channels and straighten as they pass.
Severely flattened sections may not fully recover, but every degree of straightening improves airflow. Flat fins behave like wall: zero air passes through them. Properly spaced fins let the air do its job, dropping coil contact temperature and improving cooling.
Cleaning the Drain Pan and Drainage
The drain pan sits below the evaporator coil and catches condensate. Window units typically use the slinger ring on the condenser fan to throw drain water onto the hot condenser coil for evaporative cooling. The pan and the drain channel both grow biofilm and algae.
- Vacuum standing water and debris from the pan
- Spray with coil cleaner or mild bleach solution (1:10 if you must)
- Scrub with a brush to break up biofilm
- Flush with clean water until rinse runs clear
- Verify drain hole at the rear of the pan is clear
A clogged drain pan overflows into your room, your wall cavity, or both. Most water leaks from window units trace to clogged drainage, not coil problems.
Cleaning the Blower Wheel
The blower wheel (squirrel cage fan) on the indoor side accumulates greasy dust that vacuums alone cannot remove. Access varies by unit. Some have removable wheels, some require partial disassembly.
If you can access the wheel, scrub each blade with a stiff brush and degreasing cleaner. The grime usually comes off in chunks. Rinse with a damp cloth, dry thoroughly. Reassemble carefully, ensuring the wheel spins freely without contact.
An unbalanced blower wheel after cleaning vibrates audibly. If you hear a new vibration, check that all clips and balance weights returned to their original positions.
Cleaning the Condenser Coil
The condenser coil on the back of the unit collects everything the outdoor air carries: cottonwood fluff, pollen, insects, dust, and bird leavings. This is usually the dirtiest component but also the easiest to clean if you can pull the unit from the window.
Outside, on a tarp, hose down the condenser coil with moderate pressure (not high pressure, which bends fins). Apply coil cleaner generously and let it foam. Rinse thoroughly from the inside out if possible, pushing debris back the way it entered. Repeat until rinse water runs clear.
Reassembly and Testing
Let everything dry completely (4 to 24 hours depending on humidity) before reassembly and power-up. Wet electrical components arc and can damage the unit permanently. Verify drainage is still flowing, replace the filter, reattach the front cover, and reinstall in the window with proper sealing around the gaps.
Power up and run the unit for 30 minutes. The first run after cleaning may produce a faint odor as residual cleaner evaporates. Air output should be noticeably colder and stronger if the cleaning succeeded. Plan to repeat this full cleaning every spring before peak cooling season, and rinse the filter monthly during heavy use.