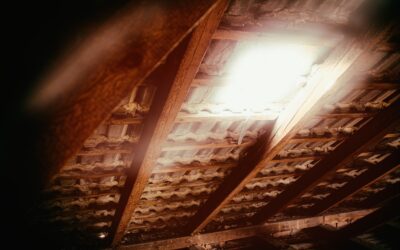
An attic can hit 150°F on a summer afternoon, baking your living space below and driving up cooling costs, and a properly installed attic fan can drop that temperature dramatically. Learning how to install an attic fan is a manageable project for a confident DIYer, but it involves working at height, cutting into your roof or gable, and connecting to household electrical wiring, so it demands real respect for safety. This guide walks through sizing, fan types, the installation steps, and the critical ventilation balance that makes the difference between a fan that helps and one that creates problems. Where electrical work or roof cutting exceeds your comfort, hire a licensed professional.
Understand the Two Main Types
Before buying anything, know what kind of attic fan you need, since installation differs significantly between them.
- Roof-mount attic fans — Installed through the roof deck, pulling hot air straight out the top. Effective but require cutting and flashing a roof penetration.
- Gable-mount attic fans — Installed at an existing gable vent on the attic’s end wall, easier to mount because they avoid cutting the roof.
- Solar-powered fans — Either roof or gable mounted, running on a small solar panel with no electrical wiring required, the simplest electrical option.
- Whole-house fans — A different product mounted in the ceiling to pull cool evening air through the whole home; not the same as an attic exhaust fan.
For most homeowners, a gable-mount or solar fan is the easier install because it avoids cutting and sealing a roof opening. This guide focuses on the general process common to powered attic fans.
Size the Fan and Balance Ventilation
Sizing is the most overlooked step, and getting it wrong undermines the whole project. An attic fan is rated in cubic feet per minute (CFM). A common guideline is roughly 0.7 CFM per square foot of attic floor area, adding more for dark roofs or steep pitches. An undersized fan barely helps; an oversized fan can cause problems.
The critical concept is intake-to-exhaust balance. A powered fan exhausts air, and that air must be replaced through intake vents, usually soffit vents along the eaves. Without enough intake venting, the fan will pull air from inside your house through ceiling gaps, wasting your air conditioning and potentially backdrafting combustion appliances, which is a genuine safety hazard. Always confirm you have adequate, unblocked intake ventilation before installing a powered fan. Many building codes specify a minimum net free vent area, so check local requirements.
Gather Tools and Materials
Having everything on hand before you climb up makes the job go smoothly and safely.
- The fan unit with its thermostat and any humidistat control.
- Cutting tools such as a reciprocating saw or jigsaw, plus a drill.
- Mounting hardware, roofing nails or screws, and roofing sealant or flashing for roof installs.
- Electrical supplies if hardwiring, including cable, connectors, and a junction box.
- Safety gear: a sturdy ladder, fall-protection harness for roof work, work gloves, eye protection, and a dust mask for the attic.
Read the manufacturer’s instructions fully, since exact mounting and clearance details vary by model and override generic advice.
The Installation Steps
With the fan sized and intake confirmed, the general process follows these stages. The exact location of the cut depends on whether you chose a roof or gable unit.
- Mark the opening — From inside the attic, locate a spot between framing members and mark the cut using the template provided with the fan.
- Make the cut — For a gable fan, cut into the gable wall at the vent; for a roof fan, cut through the roof deck and shingles from above. Cut precisely to the template.
- Mount the fan — Secure the unit to the framing per the instructions. On a roof, slide the upper flange under the shingles and seal all penetrations with roofing sealant and proper flashing to prevent leaks.
- Wire the controls — Connect the fan to its thermostat and humidistat, then to the power source.
- Test and verify — Set the thermostat (commonly around 100°F to 110°F), restore power, and confirm the fan runs and exhausts properly.
Take your time sealing a roof opening; a poorly flashed penetration is a future leak. This is one reason many homeowners prefer the gable or solar route.
The Electrical Connection
The wiring is the part that demands the most caution. A hardwired attic fan connects to a household circuit, often through a junction box, and is controlled by a thermostat. Working with 120-volt wiring carries real risk of shock and fire if done incorrectly.
Always shut off power at the breaker before touching any wiring and verify the circuit is dead with a non-contact voltage tester. Make connections in an approved junction box with proper connectors, and ensure the work meets the National Electrical Code and your local code, which may require a permit and inspection. If you are not fully confident in electrical work, hire a licensed electrician for the wiring; it is the smartest money you can spend on this project. Solar-powered fans sidestep this entirely, which is part of their appeal for DIYers.
Safety, Code, and When to Call a Pro
This project combines three hazards: working at height, cutting structural roof or wall material, and electrical wiring. Falls from roofs and ladders are a leading cause of serious home-improvement injuries, so use proper fall protection, never work on a wet or steep roof alone, and pick a calm, dry day. Wear a mask in the attic, where insulation fibers and extreme heat are real concerns; work in the cooler morning hours.
Know your limits. If the job requires cutting your roof, extensive electrical work, or you are uneasy at height, hire a qualified roofer or electrician, or both. A correctly sized and installed attic fan, with balanced intake ventilation and a safe, code-compliant electrical connection, can meaningfully cool your attic and ease the load on your air conditioner. Done wrong, it can cause leaks, draw conditioned air, or create a fire risk, so when in doubt on how to install an attic fan, bring in a licensed professional.