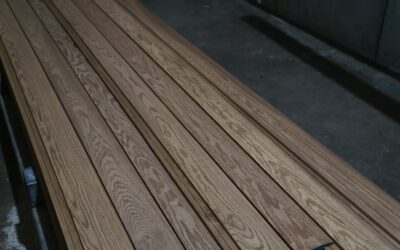
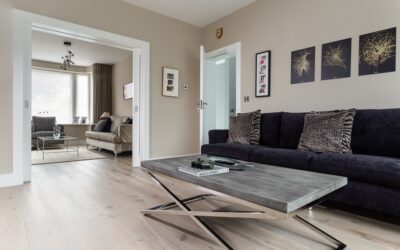
A plywood subfloor is the friendliest surface a hardwood installer can ask for, which is exactly why so many jobs go wrong on it. Learning how to install hardwood flooring on plywood is less about muscle and more about discipline: acclimating the wood, confirming the subfloor is dry and flat, and following a proper fastener schedule. Nail it and your floor stays tight and quiet for decades. Rush it and you’ll chase squeaks and gaps forever.
This guide walks through the process for both solid and engineered planks over a plywood base.
Confirm Your Subfloor Is Ready
Before a single board goes down, the plywood has to earn it. The subfloor should be at least 3/4-inch tongue-and-groove plywood or 5/8-inch minimum, fastened securely to joists spaced no more than 16 inches on center. Walk the whole floor and listen. Any squeak or flex means a loose sheet that needs to be screwed down into the joist before you cover it.
Flatness matters just as much. Lay a straightedge across the floor and check for high or low spots; the standard tolerance is 3/16 inch over 10 feet. Sand down humps and fill dips with a cementitious patch. A flat base is what keeps end joints from lifting later.
Test for Moisture First
Moisture is the number one killer of wood floors. Use a pin-type moisture meter to check both the plywood and the hardwood, and record the readings. The plywood subfloor should generally read below 12 percent, and the difference between the subfloor and the flooring should be no more than 4 percentage points for wide planks or 2 points for boards over 3 inches wide.
If the readings are too far apart, you have to let the wood acclimate. Stack the flooring in the room where it will live, ideally cross-stacked with spacers for airflow, and give it three to seven days at normal living temperature and humidity. Skipping this step is the most common reason floors cup or gap seasonally.
Lay Down Underlayment
Over plywood, you’ll roll out a layer of 15-pound asphalt felt or rosin paper before nailing. This isn’t a vapor barrier in the plastic-sheet sense; it’s a slip sheet that reduces squeaks between wood and wood and helps block minor moisture. Overlap the seams by a few inches and staple it flat.
If you’re installing engineered planks as a floating floor instead of nailing, swap the felt for a foam underlayment rated for wood. Do not stack a plastic vapor barrier over a plywood subfloor in a nail-down job, though; trapped moisture between the layers causes more problems than it solves.
Plan Direction and Layout
Run your boards perpendicular to the floor joists whenever possible. Crossing the joists gives the floor maximum structural support and prevents sagging between them. In a long, narrow room, running the planks lengthwise also makes the space feel larger and more intentional.
Snap a chalk line for your first row and dry-lay a few rows to check your color mix and factor in the room’s out-of-square. You want to avoid finishing with a sliver-width board against the far wall, so measure the room’s width and adjust your starting board width if needed.
Nail and Staple Schedule
This is the heart of how to install hardwood flooring on plywood. Face-nail the first row near the wall where a baseboard will hide the holes, then blind-nail through the tongue for the rest of the field using a pneumatic flooring nailer or stapler.
- Fastener spacing: Drive a cleat or staple every 6 to 8 inches along each board.
- End spacing: Place a fastener within 1 to 2 inches of each board end to lock down the ends.
- Fastener length: Use 1-1/2 to 2-inch cleats or staples for 3/4-inch solid flooring so they bite the plywood without hitting anything below.
Stagger the end joints at least 6 inches from row to row for strength and a natural look, and keep tapping each board tight with a mallet and tapping block before you fasten.
Leave Proper Expansion Gaps
Wood moves with the seasons, so it needs room to breathe. Maintain a 1/2- to 3/4-inch expansion gap around the entire perimeter, at door thresholds, and anywhere the floor meets a fixed vertical surface like a hearth or cabinet base. Use spacers against the wall as you work.
The baseboard and shoe molding cover this gap once you’re done. Never caulk the flooring tight to the wall or trap it under heavy furniture in a way that fights its natural expansion, or you’ll get buckling in humid months.
Tools and Materials You’ll Need
Having the right gear on hand turns a frustrating job into a smooth one. Before you start, gather the essentials so you’re not stopping mid-row to run to the store.
- Pneumatic flooring nailer or stapler: The single biggest time-saver; a manual nailer works but wears you out fast.
- Air compressor: Sized to keep up with the nailer.
- Miter saw and table saw: The miter saw handles end cuts, the table saw rips the final row to width.
- Moisture meter: Non-negotiable for checking both wood and subfloor.
- Tapping block, pull bar, and mallet: For seating boards tight without damaging the tongue.
- Chalk line, spacers, and pry bar: For layout and closing gaps.
Renting the nailer and compressor for a weekend costs far less than buying and is plenty for a single room.
Common Mistakes to Avoid
Most floor failures trace back to a handful of preventable errors. Skipping acclimation tops the list, since wood that hasn’t adjusted to the room’s humidity will gap or cup within a season. Forgetting the expansion gap is a close second; a floor pinned tight to the walls has nowhere to go and buckles in humid weather.
Other frequent slip-ups include nailing into a subfloor that still squeaks instead of screwing it down first, failing to stagger end joints so seams line up in an unsightly pattern, and driving fasteners at the wrong angle so they blow through the face of the plank. Take the extra hour to prep and lay out properly, and knowing how to install hardwood flooring on plywood becomes a repeatable, reliable skill rather than a gamble.
Finishing the Job
The last row usually needs to be ripped narrower to fit, and you’ll pull it snug with a pry bar against the wall before face-nailing. Install transition strips at doorways, reattach the baseboards, and add quarter-round shoe molding to hide the expansion gap cleanly. Give unfinished flooring a day to settle before sanding and coating, and your hardwood over plywood is ready for decades of service.
Prefer to explore on your own?
See how new flooring looks in your actual room in seconds — free, no signup.
Try the free Floor Studio →