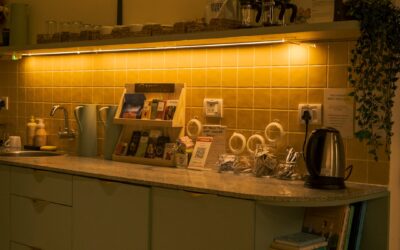
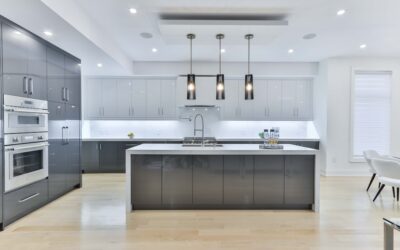
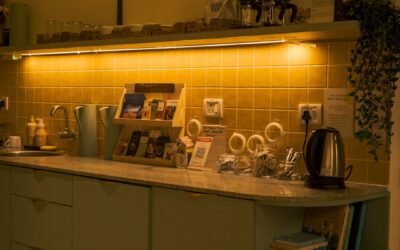
Task lighting under your upper cabinets does more for a kitchen than almost any other lighting upgrade, and wiring it to a real wall switch instead of a fumbling plug-in cord makes it feel professionally done. Learning how to install under cabinet lighting to a switch is well within reach for a confident DIYer, though it does involve running low-voltage or line-voltage wiring and tapping into an existing circuit. This guide breaks the job into clear steps, covers the safest ways to source power, and explains where a permit and an electrician are worth the money.
Part of our Kitchen Remodeling guide — explore the full guide →
- Understanding Your Wiring Options First
- Tools and Materials You Will Need
- Step 1: Cut the Power and Find a Source
- Step 2: Mount the Switch Box
- Step 3: Run the Cable
- Step 4: Wire the Switch
- Step 5: Connect the Fixtures or Transformer
- Step 6: Test, Secure, and Finish
- When to Call an Electrician and Pull a Permit
- Choosing Between Puck Lights, Bars, and Strips
- Hardwired vs Plug-In Considerations
- Positioning Fixtures for the Best Light
Understanding Your Wiring Options First
Before touching a wire, decide how your lights get power, because that dictates everything downstream. Most modern under-cabinet systems are LED and come in two flavors: line-voltage fixtures that run on 120 volts directly, and low-voltage LED strips that use a transformer to step power down to 12 or 24 volts. Line-voltage pucks and bars wire like any 120-volt fixture, while low-voltage strips need a driver mounted somewhere out of sight.
For a switch-controlled install, you will route 120-volt power to a switch, then on to either the fixtures directly or to a hidden transformer that feeds the strips. Knowing which system you bought keeps you from mismatching components later.
Tools and Materials You Will Need
- Non-contact voltage tester and a multimeter
- 14/2 or 12/2 NM-B cable to match the circuit gauge
- Single-pole switch or dimmer rated for LED loads
- Old-work switch box and wire connectors
- Fish tape, drywall saw, and a stud finder
- Wire strippers, screwdrivers, and a drill
- Your under-cabinet fixtures and, for low-voltage, the transformer
Pick a dimmer specifically labeled for LED or dimmable LED loads. A standard incandescent dimmer will make LED strips flicker and buzz, which is the number one complaint after a rushed install.
Step 1: Cut the Power and Find a Source
Shut off the breaker feeding the circuit you plan to tap, then verify with your voltage tester at the source. The most common power sources are an existing receptacle above the counter, a nearby switch box with a hot and neutral present, or an attic junction. Confirm the circuit has capacity, since kitchen LED under-cabinet runs draw very little, often under 40 watts total for an entire kitchen, so almost any general lighting circuit handles them.
Do not tap a small-appliance counter circuit if code in your area reserves those exclusively for outlets. When in doubt, run the lights from a general lighting circuit instead.
Step 2: Mount the Switch Box
Choose a switch location beside the existing wall switches or at the entry to the kitchen so it feels natural to reach. Trace the old-work box, cut the drywall opening with a drywall saw, and set the box aside until the wiring is fished. Keep the box height consistent with your other switches, typically 46 to 48 inches to center, so the finished wall looks intentional.
Step 3: Run the Cable
Fish 14/2 cable from your power source to the switch box, then a second run from the switch up to the first fixture location under the cabinets. Drill through the wall top plate and route the cable into the cabinet soffit or through the back of the upper cabinet, keeping it hidden behind a valance or light rail. Leave 8 to 10 inches of extra cable at each box for comfortable connections.
Where the cable emerges near the fixtures, protect it with a grommet or clamp so the cabinet edge cannot chafe the jacket over time.
Step 4: Wire the Switch
At the switch box you should have two cables: the incoming power and the outgoing feed to the lights. Connect the two neutrals together with a wire connector and pigtail if needed, splice the ground wires and bond them to the switch’s green screw, then connect the incoming hot and the outgoing hot to the two switch terminals. For a dimmer, follow the leads: line to the hot source and load to the fixture feed.
This is the heart of learning how to install under cabinet lighting to a switch, because the switch interrupts only the hot conductor while the neutral passes straight through to the lights.
Step 5: Connect the Fixtures or Transformer
For line-voltage bars, daisy-chain each fixture using the supplied connectors or short jumper cables, matching black to black, white to white, and ground to ground. For low-voltage strips, wire the 120-volt feed into the transformer’s line-in terminals, then run the low-voltage output to the LED strips, watching polarity on the DC leads.
Mount the transformer inside a cabinet, on top of the uppers, or in an accessible chase, never sealed permanently behind drywall, because drivers occasionally fail and need replacement. Keep the total strip length within the transformer’s rated wattage, adding a 20 percent buffer so it never runs at full capacity.
Step 6: Test, Secure, and Finish
Restore the breaker and flip the switch. All fixtures should light evenly, and a dimmer should ramp smoothly without flicker across its range. If one section stays dark, kill the power and recheck that connection. Once everything works, tuck the wiring, screw the fixtures to the underside of the cabinets tight against the front light rail so the diodes hide from view, and reinstall the switch plate.
Aim the fixtures toward the backsplash, not straight down, to spread light across the counter and reduce glare bouncing off a glossy stone surface.
When to Call an Electrician and Pull a Permit
Most jurisdictions require a permit any time you add or extend a branch circuit, and the inspection is cheap insurance. If your power source has no neutral, if the panel is full, or if you are uncomfortable working in a live box even with the breaker off, hire a licensed electrician. Expect a pro to charge $250 to $600 to add switched under-cabinet lighting to a single kitchen depending on wall access and fixture count.
Done carefully, switched under-cabinet lighting takes a weekend, costs a fraction of a kitchen remodel, and instantly makes the whole room feel finished the moment you flip that switch.
Choosing Between Puck Lights, Bars, and Strips
Before you run a single wire, decide which fixture style suits your cabinets, because it changes how the light falls on the counter. Each of the three common formats has a distinct look and best use.
- LED light bars are linear fixtures a foot or more long that mount along the underside of the cabinet, throwing an even wash across the whole counter. They are the most popular choice for continuous, professional-looking task light.
- Puck lights are small round fixtures that create pools of light directly beneath them. They suit accent lighting and glass-front cabinets but can leave scalloped dark gaps between pucks on a work counter.
- LED tape or strip lights are flexible ribbons of diodes that hide behind a light rail and give a seamless, dot-free glow. They are the slimmest option and excellent under cabinets with a valance to conceal them.
For everyday kitchen task lighting, continuous bars or well-concealed strips give the most even, glare-free result. Reserve puck lights for accenting a display cabinet rather than lighting a prep surface.
Hardwired vs Plug-In Considerations
The whole point of wiring to a switch is a clean, hardwired install, but it helps to understand the alternative you are moving beyond. Plug-in under-cabinet lights simply connect to an existing outlet with a visible cord, which is fast and requires no electrical work, but the dangling cord looks unfinished and ties up a counter receptacle. Hardwiring routes the power inside the wall and cabinets so nothing shows, and tying it to a wall switch means no reaching under the cabinet to find a tiny button.
Hardwiring is the more involved job because it means running cable and connecting to a circuit, but it is what makes the installation look professionally done. If you rent or want a temporary solution, plug-in strips with an in-line switch are a reasonable stopgap. For a permanent kitchen upgrade in a home you own, the switched hardwired approach is worth the extra effort every time.
Positioning Fixtures for the Best Light
Where you mount the fixtures under the cabinet matters as much as the fixtures themselves. Position them toward the front edge of the cabinet underside, close to the light rail or face frame, rather than pushed to the back against the wall. Mounting toward the front aims the light out across the counter and toward the backsplash, spreading illumination over the work surface instead of trapping it against the wall.
Fixtures mounted too far back light only the backsplash and leave the front of the counter in shadow, while fixtures right at the front edge and hidden behind the light rail keep the diodes out of your line of sight so you see light, not glare. On glossy stone or tile backsplashes, angling the light slightly and using a diffused fixture reduces harsh hot spots reflecting back at you. A little planning here is the difference between lighting that looks custom and lighting that looks like an afterthought stuck under the cabinet.