Removing an old ceiling fan looks intimidating because of the wiring and the weight over your head, but it is genuinely one of the more approachable electrical projects a homeowner can tackle. Learning how to take down a ceiling fan the right way comes down to two things: killing the power completely before you touch a wire, and supporting the fan’s weight so it does not drop while you disconnect it. A typical fan weighs 15 to 50 pounds, so this is a two-person job if you can manage it. Follow the steps below in order and you can have the fan down in about 30 to 45 minutes, ready to replace, repair, or swap for a light fixture.
- Tools and Safety Gear You'll Need
- Step 1: Cut the Power at the Breaker
- Step 2: Remove the Blades (Optional but Recommended)
- Step 3: Remove the Light Kit and Shades
- Step 4: Lower the Canopy and Disconnect the Wiring
- Step 5: Remove the Fan from the Mounting Bracket
- Step 6: Remove or Reuse the Mounting Bracket and Box
- Safety Tips and Common Mistakes
- Understanding the Fan's Mounting System
- What to Do With the Old Fan and Box
Tools and Safety Gear You’ll Need
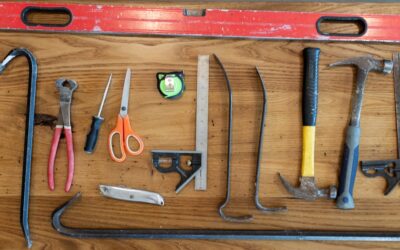
Gather everything before you climb the ladder so you are not making trips mid-job. You will want:
- A sturdy stepladder tall enough to reach the fan comfortably
- A non-contact voltage tester (the single most important safety tool here)
- Phillips and flathead screwdrivers
- A nut driver or small adjustable wrench
- Wire cutters or strippers (usually just needed if wiring is damaged)
- A helper to hold the fan body
- Safety glasses and a container for screws and small parts
A helper matters more than any tool. Holding a 30-pound fan overhead with one hand while unscrewing wire nuts with the other is how people get hurt or drop the unit.
Step 1: Cut the Power at the Breaker
This is the step you never skip and never rush. Turning off the wall switch is not enough, the wiring in the box can still be live. Go to your electrical panel and switch off the breaker that controls that room’s fan or light circuit. If your breakers are not labeled, turn on the fan and light, then flip breakers until both go dead.
Back at the fan, hold a non-contact voltage tester near the wires and the switch to confirm there is no power. Test the wires directly once the canopy is open, too. Treat every wire as live until the tester proves otherwise. This single habit is what makes the whole job safe.
Step 2: Remove the Blades (Optional but Recommended)
You can take a fan down with the blades attached, but removing them first makes the fan lighter, easier to handle, and less likely to get bent or to whack you or the walls. Each blade is typically held by two or three screws where the blade arm meets the motor housing. Unscrew each blade and set them aside in a stack. On some fans the blade arms detach from the motor as a unit instead, either way, taking the blades off first is worth the few extra minutes.
Step 3: Remove the Light Kit and Shades
If your fan has a light fixture, deal with it next. Unscrew and remove any glass shades or globes and set them somewhere safe, they break easily. Remove the bulbs. Then unscrew the light kit from the bottom of the fan’s switch housing; it will hang by a short set of wires. Disconnect those wires (they are usually joined with wire nuts or a plug connector) and set the light kit aside. Now you are down to just the motor and canopy.
Step 4: Lower the Canopy and Disconnect the Wiring
The canopy is the decorative cover pressed up against the ceiling that hides the electrical box and wiring. Loosen its mounting screws or the collar that holds it, and slide it down the downrod to expose the wires and the mounting bracket.
This is where your helper takes the weight. Have them support the fan motor while you work. Inside you will see the connections, typically:
- Black to black: the hot (line) wire
- White to white: the neutral
- Green or bare copper: the ground
- Sometimes a blue wire for a separately switched light
Test again with your voltage tester to be certain the wires are dead. Then unscrew each wire nut and separate the fan’s wires from the house wires. Note or photograph how everything was connected if you plan to install a replacement.
Step 5: Remove the Fan from the Mounting Bracket
With the wires disconnected, the fan now hangs only from its mounting bracket, the metal plate screwed to the electrical box in the ceiling. Most fans use a ball-and-socket hanger: the downrod ends in a ball that sits in a slot on the bracket. Have your helper lift and rotate the fan slightly to free the ball from the bracket slot, then carefully lower the whole fan down together. Some flush-mount fans are instead held by two screws through the motor housing into the bracket, remove those and lower the unit.
Set the fan down gently. The heaviest, most awkward part of the job is now over.
Step 6: Remove or Reuse the Mounting Bracket and Box
What you do next depends on your plans. If you are replacing the fan, you can often leave the mounting bracket and electrical box in place, provided the box is a fan-rated box (metal, marked “acceptable for fan support,” and screwed to a joist or brace). If you are removing the fan for good and installing a regular light or just capping the box, unscrew the mounting bracket.
Whenever you leave wiring exposed, cap each wire with a wire nut and, if the box will stay empty, install a blank cover plate over it. Never leave bare, uncapped wires in an open box, even with the breaker off.
Safety Tips and Common Mistakes
A few reminders separate a smooth job from a trip to the ER. Always confirm the power is off with a tester, not just the switch. Use a proper ladder on a stable surface, never a chair. Do not work alone if the fan is heavy, gravity is not your friend overhead. And do not force the ball out of the bracket; lift and rotate gently so you do not lose your grip.
If you open the box and find aluminum wiring, scorched insulation, or a box that is not fan-rated and wobbles, stop and call an electrician. Otherwise, now that you know how to take down a ceiling fan safely, the whole job is well within reach: cut the power, work top to bottom, support the weight, and confirm the wires are dead before you touch them. Do those four things and you will have that fan down and out in under an hour.
Understanding the Fan’s Mounting System
Knowing how your fan hangs makes the removal go faster, because not all fans mount the same way. The most common residential setup is the ball-and-socket, or ball hanger: the downrod ends in a metal ball that drops into a slotted bracket, letting the fan pivot and self-level. To release it, you lift and rotate the ball out of the slot. If your fan uses this system, that final step is quick once the wiring is disconnected.
Low-profile or flush-mount “hugger” fans skip the downrod and bolt directly to the mounting bracket with two or more screws through the motor housing, so you remove those screws to free the fan. Older or heavier fans may use a J-hook or a half-ball with a different bracket. Before you start, glance up at how the canopy meets the ceiling and, once the canopy is down, identify which system you have. That tells you exactly what to do at the moment the fan is ready to come off the bracket, so you are not fumbling with a heavy motor overhead trying to figure it out.
What to Do With the Old Fan and Box
Once the fan is down, think about the next step so you leave things safe and clean. If you are replacing it with a new fan, keep the existing fan-rated box and, if it is compatible, the mounting bracket, most new fans include their own bracket, so you will usually swap it. Photograph the old wiring connections before you disconnect, since the color-coding on the new fan will match.
If you are not replacing the fan, you must safely close the box. Cap each house wire, black, white, and ground, individually with a wire nut, tuck them neatly into the box, and screw a blank cover plate over the opening. Never leave an open box with exposed wires, even with the breaker off; it is both a code violation and a fire and shock hazard. As for the old fan, many are still functional and can be donated, sold, or reused in another room; if it is truly dead, most metal recyclers will take the motor. Taking a few minutes to close up the box properly and deal with the old unit responsibly is the final piece of doing the job right, and now that you know how to take down a ceiling fan from breaker to bracket, you can handle the whole task confidently and safely.