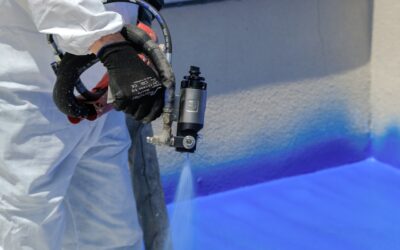
The biggest mistake painters make with latex is assuming the paint comes ready to spray, roll, or brush exactly as supplied from the can. It rarely does. Learning how to thin latex paint properly is the difference between a glass-smooth finish and a textured, streaky mess that needs sanding and repainting within a week. This guide walks through thinning ratios for every application method, the right water types and additives to use, viscosity testing with simple tools, and the mistakes that ruin a can of good paint in minutes.
Part of our Paint & Walls guide — explore the full guide →
- Why Latex Paint Often Needs Thinning
- The Right Thinner for Latex
- Thinning Ratios by Application Method
- Testing Viscosity Without a Viscometer
- Step-by-Step Thinning Process
- Using Floetrol and Similar Extenders
- Common Mistakes to Avoid
- Sprayer-Specific Tips
- Temperature and Humidity Adjustments
- Storage and Reuse of Thinned Paint
Why Latex Paint Often Needs Thinning
Paint manufacturers ship latex at a viscosity designed for brush and roller application in average conditions: 70 degrees F, 50 percent humidity, and a cooperative user. Real-world conditions shift that balance constantly. Hot dry days evaporate water faster, thickening paint in the tray. Sprayers demand lower viscosity than brushes. Older cans separate and need remixing plus dilution to return to working consistency.
Skip thinning when the paint needs it and you get brush marks, roller stipple, clogged sprayer tips, and poor coverage requiring extra coats. Over-thin the paint and you lose hiding power, sag on vertical surfaces, and wash out color density. The target is just enough thinning to match the application tool.
The Right Thinner for Latex
Latex paint is water-based. The only correct thinner is clean water, with one occasional exception.
- Clean tap water: acceptable in most areas but minerals and chlorine can affect drying time
- Distilled water: the professional choice, no minerals, consistent dilution, $1 to $2 per gallon
- Paint conditioners like Floetrol or XIM Latex Extender: extend open time and improve leveling without just diluting the film
Never thin latex with mineral spirits, paint thinner, lacquer thinner, or acetone. These solvents break down the acrylic or vinyl binders in the paint, ruining adhesion and film integrity. The paint might look normal in the can but fails within hours of drying.
Thinning Ratios by Application Method
Each application method has a target viscosity window. Starting ratios for most latex paints:
- Brushing: usually no thinning, or up to 1/2 cup water per gallon if conditions are hot
- Rolling: 1/2 to 1 cup water per gallon to break surface tension and improve roller loading
- HVLP spraying: 10 to 25 percent water by volume, typically 12 to 32 ounces per gallon
- Airless spraying: 0 to 10 percent water depending on tip size, often no thinning needed with 0.017 and larger tips
- Air-assisted spraying: 5 to 15 percent water for ceiling and wall paint
Always start with the lowest ratio and adjust upward. Adding water is easy. Removing it is not.
Testing Viscosity Without a Viscometer
Professional shops use Zahn cups or Ford cups calibrated in seconds. Homeowners get reliable results with the funnel drip test.
- Fill a standard kitchen funnel with the thinned paint to the brim
- Place it over an empty cup and time how long it takes to empty completely
- Target drip times: 20 to 30 seconds for HVLP spray latex, 15 to 20 seconds for airless spray, 40 to 60 seconds for brushing viscosity
Another quick check: dip a stir stick into the paint and lift it straight out. Properly thinned latex for rolling sheets off the stick in a continuous smooth drip. Too thick and it clumps. Too thin and it runs off like water.
Step-by-Step Thinning Process
A repeatable process that works for any ratio:
- Stir the paint thoroughly for 2 to 3 minutes with a paint stirrer or drill-mounted mixer, reaching the bottom of the can and blending any pigment sludge
- Pour the desired amount of paint into a clean 5 gallon bucket or measured pot
- Measure the thinning water using a graduated measuring cup
- Add water in 1/4 of the total target amount at a time, stirring between each addition
- Test viscosity with the funnel drip or stir stick
- Continue adding water in small increments until the paint reaches the target for your method
- Strain through a paint filter or fine mesh sock before loading into the sprayer or roller tray
Straining catches any chunks or dried bits that would clog sprayers and leave blemishes on brushed surfaces.
Using Floetrol and Similar Extenders
Flood Floetrol is the most common latex paint extender on the US market. It is not a thinner in the viscosity sense, though it does slightly reduce viscosity. Its primary function is to extend open time (wet edge time) so brush marks and roller laps level out before the paint skins over.
Typical usage: add 8 to 16 ounces of Floetrol per gallon of latex paint, in addition to or instead of plain water. A cabinet door painted with a quality brush and Floetrol-amended Benjamin Moore Advance or Sherwin-Williams Emerald Urethane Trim Enamel can look almost spray-finished after proper leveling time.
In hot or dry conditions (above 85 degrees F or below 30 percent RH), Floetrol is nearly mandatory for any cabinet, door, or trim work with latex-based topcoats.
Common Mistakes to Avoid
Several habits destroy otherwise good paint:
- Pouring thinner directly into the original paint can, contaminating the rest of the gallon
- Using dirty water from a bucket that held tools or cleaners
- Adding thinner before mixing separated paint, resulting in wrong viscosity once everything blends
- Measuring water by eye rather than with a graduated cup
- Over-thinning because the first spray coat looked thin, then not letting proper flash time pass
Document every thinning ratio you use that produces good results. A simple note like “Behr Marquee eggshell 8 oz distilled water per gallon for HVLP” saves hours of trial and error the next time you use that product.
Sprayer-Specific Tips
Different sprayer types respond to thinning in unique ways:
HVLP (High Volume Low Pressure): needs the most thinning, often 20 to 25 percent water. Tip sizes 1.3 to 1.8 mm handle thinned latex well. Check gravity or pressure cup manuals for specific recommendations.
Airless sprayers: modern units with 0.017 or larger tips spray most latex straight from the can. Thin only if the machine struggles to prime or produces tails in the spray pattern.
Handheld battery sprayers like the Wagner FLEXiO and Graco Ultra: thin to roughly 15 to 20 percent water. These units tolerate thicker paint than HVLP but less than airless.
Temperature and Humidity Adjustments
Ambient conditions change ideal thinning ratios significantly. Hot dry days require more thinner because water evaporates from the paint mid-flight between sprayer and surface, effectively thickening the droplet that lands. Cold humid days need less thinner because the paint stays fluid longer.
- Below 55 degrees F or above 90 degrees F: not recommended for latex application
- 60 to 75 degrees F, 40 to 60 percent RH: use standard ratios
- Above 85 degrees F or below 30 percent RH: add 10 to 15 percent more water and consider Floetrol
- Below 65 degrees F, high humidity: use 10 percent less water than standard
Storage and Reuse of Thinned Paint
Thinned latex paint keeps for 2 to 4 weeks in a sealed container stored at 50 to 75 degrees F. After that, the binders start to separate and the paint may not recover full film strength even after stirring. Mark the container with the date, paint name, and thinning ratio.
Never return thinned paint to the original can. Always keep thinned paint in a secondary container. The original can keeps the manufacturer’s calibrated viscosity for any future touchup work. This single habit prevents the common regret of needing to match a 10 year old wall color and finding a can that was accidentally over-thinned in 2022.